Can I run a design thinking classroom on Tuesdays from 1-3pm?
You can run a flexible studio space in your classroom for a certain part of the day. “Choice time” is a common example of a modified space of possibility in a traditional classroom. If you extend the duration of “choice time” and give your students some simple materials and real-world challenges to choose from, you are on your way to running a problem-based learning design studio.
I am not a designer. Where do I find curriculum?
The first place to seek the curriculum is in your classroom’s daily activities. You can start by talking about what designers do in the world. Ask the students if they know about careers that use design. Talk about and define engineering, architecture, interior design, product design. Then ask them to start thinking like designers. Look around you. What would you like to change or improve about the classroom? Is there a new tool your classroom could use? If they could re-design the classroom, how would they configure it? What kind of furniture is best for learning? What does it look like? If we wanted to design a rainwater storage system for our school, what would it look like? What about school buses or cars of the future? These are questions that your students will have lots of ideas about. Brainstorming ideas on the board can help students develop concepts on their own.
How much time do I need?
A good studio experience is about 5-15 minutes of presentation and discussion and then about a 45-60 minutes of hands-on work time, plus 10-15 minutes of peer critique. During studio time the teacher circulates, assists students, and helps keep them engaged.
I am not an artist. What materials do I need and how do I help the kids?
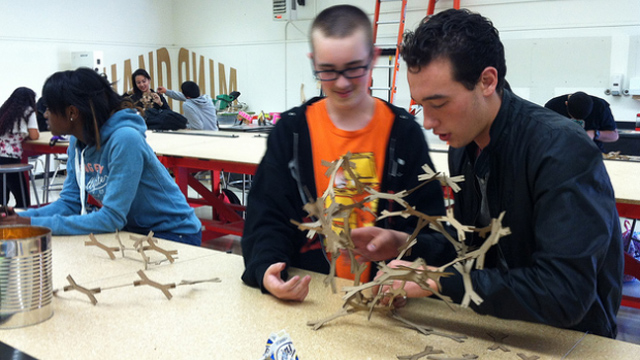
Most professional designers work with simple materials in the design process, and kids should too. Arrange the room so kids can work on flat surfaces in flexible groups. I recommend tag board, tape, and scissors for 3D building and large sheets of construction paper, pencils, and markers as 2D design studio tools. It's best to keep these tools off to the side so students can gather them as they need and keep their studio surfaces uncluttered.
You can best assist the students by answering their questions with questions. If a student asks, “What should I do?” you can answer with, “ If you wanted to improve the design of (insert a common object), what would you change?” This is higher-level inquiry, because you do not have the right answer. The answer lies in the student’s perceptions of the world and his design ideas. This is student-centered learning. You may have to ask questions to understand a student model or drawing, and then the student can explain their work to you.
DIG INTO DESIGN THINKING
[catlist categorypage="yes" numberposts="5" thumbnail="yes" excludeposts="this" class="" title_tag="h3" title_class="post-title" thumbnail_class="thumbnail"]
Wow, it gets loud in here and some students are distracted. How do I keep order?
As in gym, the studio works best with a clear set of rules laid out before students begin. It can be useful to show students pictures of adults working in studios, and to show them how these kinds of workplaces look. You can describe how these adults work in their studios: They walk over to a colleague to ask a question, they ask their peers for help instead of waiting for their boss, and they use quiet voices while they are working so their colleagues can focus. Set specific expectations regarding what you want to see when they are finished (perhaps one drawing and/or one model). A good closing exercise after the first Design Studio is to discuss how the work environment functioned. Were shared tools in a good place? Did we have all the tools we needed? What can we do as a group to make our studio a better work environment?
OK, now I have a room full of cardboard constructions and drawings. What have the students learned?
Assessing studio learning is effectively done through peer critique. This echoes portfolio review and other innovative processes for student-centered assessment, and is used throughout the design professions. Peer critique can go quickly and efficiently with students grade 3 and above. Here’s how it works:
- Students get a ten-minute warning to wrap up.
- Students clean up the studio and leave out a drawing and/or a model.
- Students gather around one table group with their work in front of them.
The instructor is facilitator. The instructor asks, "Look around at your classmate’s work. Pick out a model or drawing that shows an interesting solution to the design challenge. I will ask you to share two reasons why you think it is an effective solution.”
When hands go up, call on a students and ask them to explain why it is effective. Once they have made one or two good points, say “thank you!” and move onto the next student. Keep the discussion moving, and encourage the students to say, “this is successful because…” rather than “I like.” You will hear the students using the language of design and note that they are comparing their own work to that of their peers. This dialogue reveals student understanding and can often reveal student intent that is hard to gauge from the product alone. If you have a large class, do peer critique on a few projects each week instead of all at once.
Some parts worked, but some parts didn’t. I think my students need more structure. How can I modify this to fit my students’ abilities?
The kind of product students make can be vastly variable. You can simply start with a discussion of design and brainstorming. This is a core element of design process. You can also work with very specific challenges, like this one, to introduce the design process with very clear constraints. Small steps towards working on open-ended problems will help scaffold students who are unaccustomed to working this way at school.
There are many great resources online for design thinking. See the links at the bottom of this post.
OK, the kids liked it, and I liked it. How do I explain the benefits to my school and parents?
Design thinking, which is a variation of problem based learning, is an effective means of differentiating for student strengths. It reveals strengths in 2D and 3D spatial reasoning. It reveals inventiveness, collaboration, empathy and resilience. It encourages self-direction, ideation, and collaboration. Design thinking can become a part of your teaching toolkit and a means for sharing student capacities that are not usually assessed. The most significant investment is in the educator’s shift to a student-centered space of possibility, even if just for one afternoon a week. This reveals to students that you trust them with their learning.
More Resources on Design Thinking