upper waypoint

The STEAM-Powered Writing Workshop

Save ArticleSave Article
Failed to save article

Please try again

The writing workshop has been at the heart of my upper-elementary classroom since I began teaching 13 years ago, but the tech tools my students use to publish their work have evolved with the times. In recent years, Plasq’s ComicLife has become an indispensable digital addition to my students’ writing toolkit. What, at first glance, may look like a few motivating bells and whistles has, for me, become essential and transformative. ComicLife is ideal for the differentiated classroom. I rely on it to not only challenge eager writers, but also to reach reluctant ones. The tool’s intuitive, drag-and-drop design is simple enough to use with grades 4 and up. Beginners can work from pre-made templates, and more advanced or ambitious students can create their own designs from scratch.

Audience & Authenticity

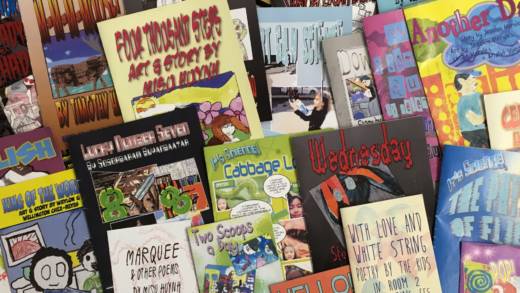
As research on how students learn drives a shift toward authentic learning, teachers are, more than ever, looking for real-world contexts around which to build inquiry-based curricula. Learning to fine-tune narrative voice and identify an audience are key to developing fluidity as a writer, but often traditional activities designed to hone these skills are artificial (i.e., “Imagine you are a pilgrim”-style canned prompts and scenarios). ComicLife breaks the seal on the stale paradigm of the teacher as the students’ only audience. My students write with the understanding that their work will ultimately be published as comic books or graphic mini-novels for other kids their age; their audiences are much bigger than just me. Something real is at stake.

Steam Connections

Publishing any piece of writing on ComicLife will involve the STEAM T (technology), A (art/design) and M (math) strands. The more complex the layout, the more real-world (and Common Core-aligned) math a project will involve. For example, measuring for panel size and margins; setting angles and degrees for image rotation; computing panels per page to meet page requirements set by printing services (multiples of four); creating and adhering to a printing budget. To make a ComicLife design even STEAM-ier, students can use the software to publish their science writing. For examples, click the titles to the right. Both were whole-class endeavors that involved writing about engineering experiments, thereby incorporating all five STEAM strands into a single project.

Process: Layout

My students do their comic book/graphic mini-novel layout and illustrations as a last step, after the writing process. I make sure their writing is polished, final-draft quality before they begin this phase. Then we follow the steps below.

  1. Separate the entire piece of writing into “snapshots” or “moments.” Usually just a sentence or two for each panel, although some students choose to lay out their work more like a picture book, with a single illustration above a paragraph or two of text (like this one). Hit enter a few times between each chunk of text.
  2. Choose a graphic novel style (or blank project) ComicLife template and then lay out the book, adding a panel for each snapshot/moment and balloons for dialog. If you will be printing the books, make sure to set margins at the beginning of the process. Altering them later will be a hassle that involves resizing any panels that extend too far into the margins. See print or E-Book Options below.
  3. Copy and paste each chunk of narration into text boxes or balloons for dialog, omitting quotation marks and dialog tags. This step involves some genre translation that I always capitalize on as a teachable moment: In prose, we rely on punctuation and dialog tags to indicate who the speaker is. In comics and graphic novels, balloons point out who’s talking. This is also the stage where students decide whether some bits of narration will be replaced with illustrations. In panels where they decide an image will work in place of text, I ask them to leave themselves a note in a text box about what to draw there.
  4. Export this rough mock-up as a PDF (and print if desired) to serve as a map to follow as students create illustrations for each panel. As they work on their art, they will often end up splitting or combining panels to fit their aesthetic and page/panel limits.

Process: Illustration

Technique

Sponsored

For a great primer on drawing for comics and graphic novels, check the YouTube series by Marvel comic artist Stan Lee, How to Draw Comics the Marvel Way. The KQED Art School/PBS Learning Media presentation, Graphic Novels with Thien Pham, demonstrates one approach to panel lay out introduced in the Lee videos.

Tools: Hi- and Low-tech Options

If you have access to multiple computers and graphics tablets, like Wacom’s Bamboo Tablet, students can draw directly onto a blank canvas in Photoshop or a free in-browser image editor like Pixlr Editor. I’ve tried a Wacom tablet with my upper-elementary grade students, but some of them didn’t quite have the fine motor development necessary, so it was often more of a frustration than a help. Another drawback to graphics tablets (besides price) is that they are not Chromebook compatible.

For my students, dry erase lap boards and markers work best. (To eliminate the temptation to deface the backs of the boards, order two-sided models.) Students can erase and rework a line drawing until it’s “perfect,” then scan it and alter it if necessary for subsequent panels. My students draw in black, add color to their scanned images in Pixlr (which runs in the browser on Chromebooks), then save finished work to their image libraries and download to the computer where they’ll be accessing ComicLife. Pixlr is free and easy to use on Chromebooks (open images in Drive then choose “open with Pixlr”), but the app can be buggy. For example, there’s an option to save images to Google Drive, but I’ve never been able to do this successfully. I recommend choosing “save to image library,” but be aware that the step can sometimes take several tries. Another option is to screenshot the image. I’ve also run into problems using Pixlr in browsers other than Chrome.

Many of my students combine both hi- and low-tech illustrating techniques to create collages that layer their drawings over background that they find in Google image searches. For example, the graphic mini-novel Super-novaman (created as part of this lesson in a mentor author unit on Brian Selznick) features characters a few fourth grade artists drew on whiteboards, scanned and opened in Pixlr, then colored and layered over images they found online. The comic-style pixelated effect was achieved using a ComicLife image filter.

For Tiptoeing Sunlight (created as part of this lesson in the same Brian Selznick author study), a fourth-grade student author layered colored pencil drawings over photographs of her grandmother’s garden, the setting of her graphic vignette.

Process: Fonts, Filters & Fine Tuning

After all the images have been scanned, created or altered in a photo editor, students can drag them into the appropriate panels, and tinker with image filters, font, and background colors and patterns until they achieve desired results. At this point, I offer some guidance on the connection between form and content. For example, you wouldn’t use an over-the-top, horror-style font on a graphic mini-novel about something serious like a grandparent’s death. If students can’t find the right font on ComicLife, there are tons of free ones to download from sites like 1001FreeFonts.

Publishing Options

  1. Save the final comic/mini-graphic novel as “images” in the “save as” menu, and post on a (free) class blog. Check my class blog, Room2Ruminations, for digital versions of the ComicLife projects my students have created.
  2. If you have classroom Kindles or tablets, you can save comics as epub docs and upload them to the tablets. First you’ll need to download an ebook management system like Calibre (free) to format books correctly, then upload to your device.
  3. You can save work as PDFs and print yourself, but the quality isn’t great and this process guzzles ink, which gets expensive fast.
  4. If you’ve got the funding, you can have the comics printed by an online digital printing service like KA-BLAM (you must upload on Firefox). An eight-page comic book costs around $2 to print (less than it would cost in ink and paper to print yourself). The quality is professional and the finished products are huge motivators for reluctant writers. We’ve had comic book sales featuring author signings to recoup printing costs. If you go this route, make sure your books adhere to the dimensions KA-BLAM specifies. (Go to “Page set-up” in ComicLife and enter dimensions there.) Below are pictures of examples my students created.

Editor’s Note:

Sponsored

If you want to learn more about how to make digital comics in your classroom, take our free, online course Making Digital Comics on KQED Teach.

lower waypoint
next waypoint