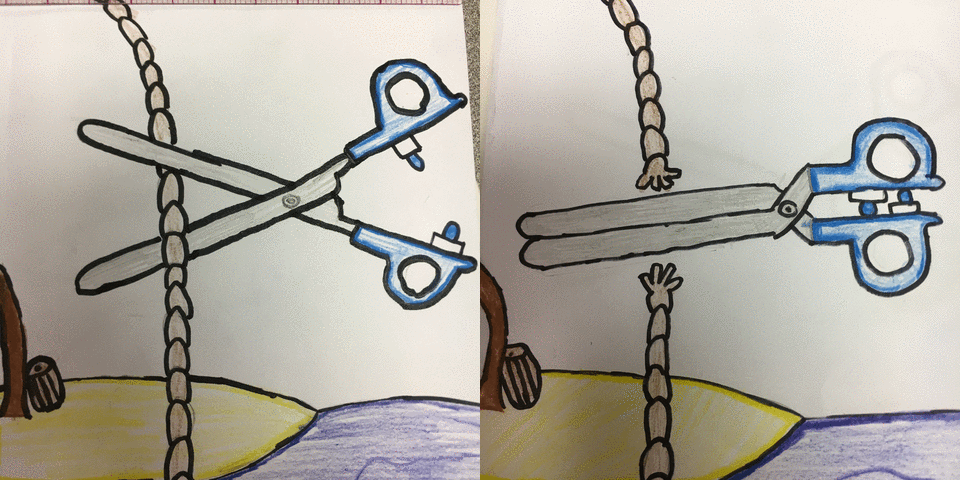
GIF is short for Graphic Interface Format, usually a short video clip that repeats.
What the students were laughing at was not especially important, let’s just say it had something to do with Lebron James’ finger and his nose. It was silly yet endearing, and it made the lightbulb in my mind go off. Kids on phones, sharing animated GIFs of celebrities is a common pastime. Students know how to create their own GIFs, but they rip the photos or videos from Google. Instead of cutting and pasting a GIF, why not have the students create their own? From scratch?
The students had a decent introduction to drawing lines, shapes, using value and space. I would let them use colored pencils, tell them not to worry too much about value and form, but think more of the movement of their pictures. The GIF would have to stay simple, a two step animation process, made and produced by the student from pencil and paper to publish-ready format.
The Process
The first thing I highly recommend is that you take the KQED Teach course “Digital Portfolios with Maker Ed.” Then choose a platform. I chose Google Docs as my portfolio platform because the students are familiar with Google Docs and their work can be easily shared.
Teaching Tip: remind students, especially seniors, to share their work with their personal gmail and Google docs, so that they may take the work with them after high school. Often, their student gmail account closes after graduation.
Next up, teach some Art History and culture. Most kids know about flipbooks, and some have made a flipbook before. I found it fun to show students that flipbooks were our GIF, and that we adults managed to entertain ourselves GIF style as kids with flip books. My favorite video on flipbooks, is created by none other than Dave Pilkey of Captain Underpants fame. This video, Flip-O-Rama Workshop will get them a taste of what they’re about to create, and bring them back to their favorite grade school graphic novel. We will use the basic process shown on the video.
You may also want to familiarize students with early animation pioneers, even before Mickey Mouse flew a plane and drove a steamboat. An Atlantic Monthly article entitled Before Walt Disney: 5 Pioneers of Early Animation is a great source and includes videos made by George Melieres and Thomas Edison:
Now have your students analyze some fine art GIFs. It’s time for #pinkiesup. Fine art GIFs are amazing and pretty cool. Giphy’s artists page is a perfect place to start. Students are already very familiar with Giphy but probably not the artist’s page. You can also have student’s google fine art GIFs.
Now, have your students work to produce their animated GIFs.
The Materials Needed:
- Paper, at least 8.5 x 11
- Pencils, preferably 4B or softer
- Colored Pencils
- Ruler
- Eraser
- SmartPhone or Chromebook with camera
- Rubric for GIF project
Teaching Tip: As always, remind students to draw lightly. Mistakes can be erased and forgotten if drawn lightly. Only apply final color and drawing when you’re sure you have what you want. Also be sure to remind the students that they are to use the same process as shown in the Flip-O-Rama Workshop.
- Fold paper in half.
- Draw a LIGHT one inch frame around each side of the two sides of paper so that the two drawings are matched up when it’s time to photograph the “flip” (this frame was not included in the Flip-O-Rama-Workshop but it really helps- they act as registration marks)
- Design your drawing in your sketchbook before starting final on folded paper. Choose a subject that is personally interesting.
- Open your folded paper like a book and draw first image on second piece of paper. Draw your two images with the 1-2 movement as seen in the video. The second image with the movement will be on top piece of folded paper. Keep the drawings simple, and easy to replicate as they will have to draw pretty much the same thing twice. Make sure the drawings line up perfectly (the bottom paper will show through to the top). Flip your images, and make sure that they are lined up, and look smooth, not jerky. Photograph each image, carefully lining up each image around the frame, and download to gifmaker.me
- Marvel at your creation and upload the GIF onto a Google Doc (with name, period and “GIF” in the title) and then place into your portfolio and share with the teacher.
My students really enjoyed making their GIFs and some even shared theirs on social media. Here’s a great example.

And click here to view three more (Trampoline, Slam Dunk, and Broken Cell Phone.
