upper waypoint

DIY Fruit Roll-Ups: Making a Grown-Up Version of Childhood Nostalgia

Save ArticleSave Article
Failed to save article

Please try again

Making your own fruit roll-ups allows for plenty of personal touches. Photo: Kate Williams

I was not one of those “lucky” kids who got to feast on fruit roll-ups at lunch every day. We’d get the brightly colored, sticky sweet treats every once in a while (the rainbow colored rolls with the punch-out animal shapes that would stick to the roof of my mouth were my favorite), but I was far more likely to have one of those dreaded fruit leather bars from the natural grocery for dessert. Of course, this meant I coveted the other sugar-filled lunch boxes that surrounded me at my elementary school table and still think back fondly on fruit roll-ups.

I’m not sure that I would ever want to go so far as to attempt to re-create the exact flavor of those childhood treats; my taste skews far more savory than sweet these days. But it’s easy to adapt the basic premise of the roll-up (dehydrated fruit puree) to suit just about anyone.

I like to pair sweet mangoes with herbaceous cilantro and strawberries with spicy black pepper. Photo: Kate Williams

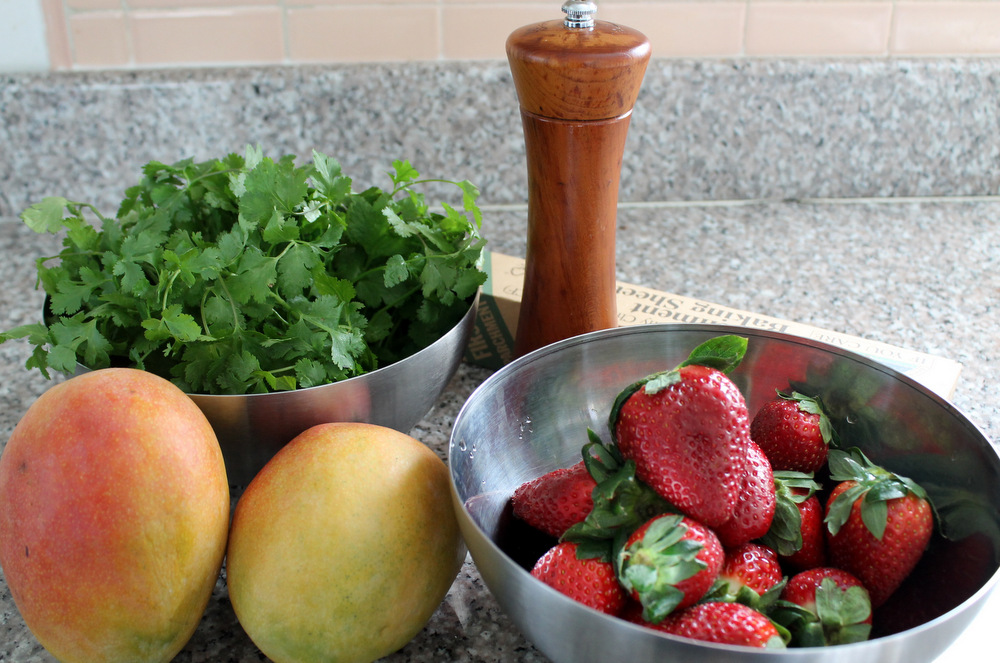
The best place to start is by using super-ripe fruit. If your grocery store has a sale section for produce, check there first. You don’t want to buy rotten fruit, of course, but the riper the fruit is to start, the sweeter it will be. Super-ripe fruit will need little, if any, additional sweetener. I like to be creative with my fruit roll-ups and add complementary herbs and spices to the fruit. I also like to make a couple of batches of roll-ups at a time to maximize my oven space. For these roll-ups, I’m pairing mango with fresh cilantro (and Sichuan peppercorns, not pictured) and strawberries with freshly ground black pepper. If you’re making these for kids or picky eaters, feel free to use milder flavorings like vanilla, or to skip the flavorings altogether.

Use a food processor to turn the cut up fruit into a smooth puree. Photo: Kate Williams

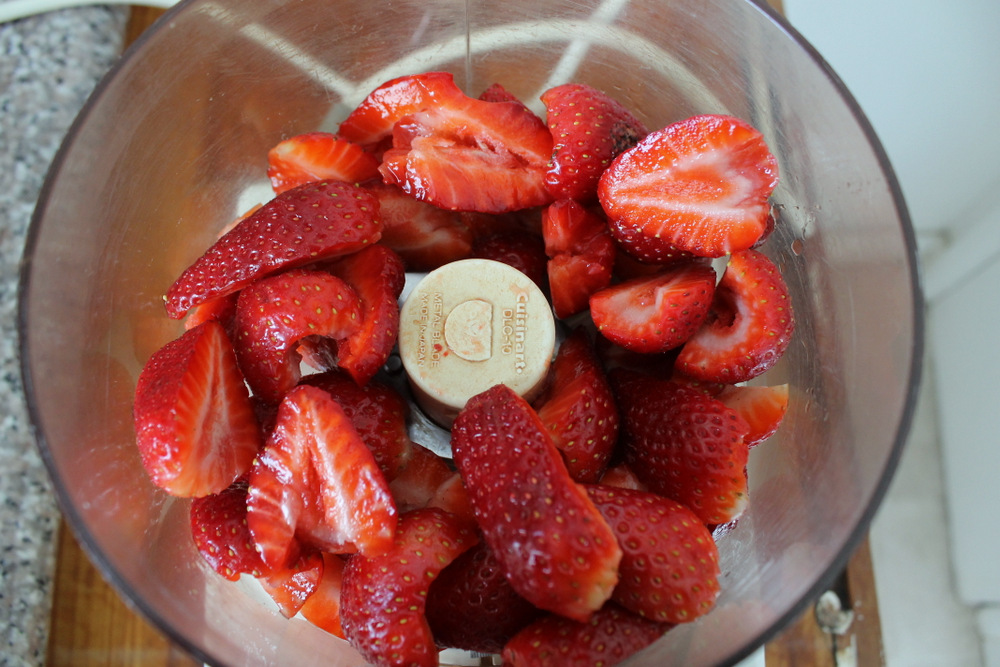
I like to use about a pound of chopped fruit per batch of fruit roll-ups. This means that for fruits with thick skin and a large pit, like mangos, I need to buy more like 1-and-1/2 pounds of whole fruit. If shopping in the aforementioned sale section, I’ll pick out a bit extra to account for the inevitable trimming of bruised or molded fruit. With berries or other fruit with little-to-no trim, I’ll pick out 1 pound to begin with. Once the fruit is chopped, I put it all in the bowl of a food processor and let it run until the fruit is completely pureed. (A blender will work too, as long as the fruit is soft).

I like to use honey as a sweetener for my fruit roll ups, but you can use regular ‘ol sugar or maple syrup if you’d prefer. Photo: Kate Williams

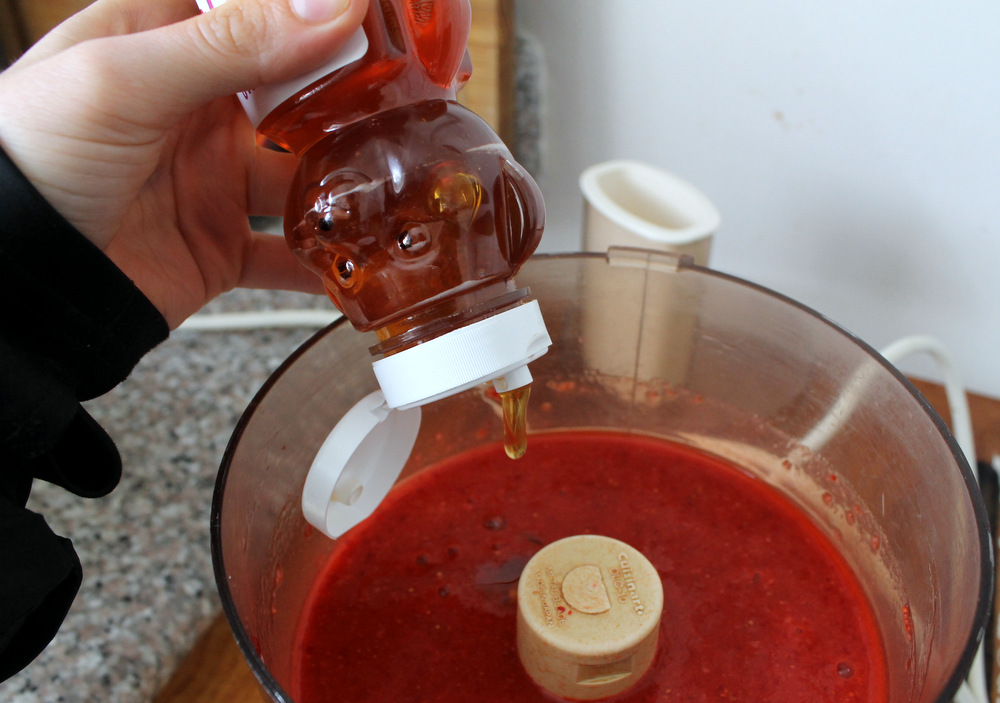
At this point, I’ll taste the puree and see if it needs any sweetener. I like to use honey instead of sugar because I like the flavor, but you can use any sweetener you’d like. The mango puree didn’t need any honey, but the strawberry did. I added a teaspoon or two, until I liked the level of sweetness. It’s important to remember, though, that the sweetness will concentrate in the oven. Don’t go too crazy here. I also like to add a pinch of salt to the puree to bring out the flavor of the fruit. You could also add lemon juice, if you’d like.

I like to reduce the fruit puree on the stove before dehydrating it in the oven. Here, I’ve reduced the mango puree from a thin, smoothie-like consistency (on the left), to a puree that looks more like applesauce (on the right). Photo: Kate Williams

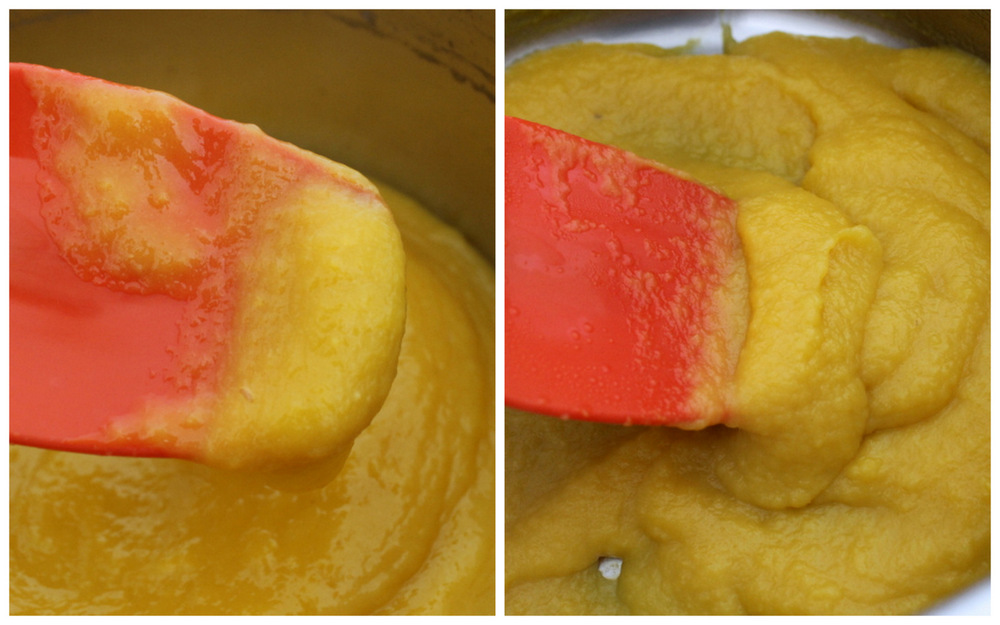
Next, I like to reduce the puree a bit on the stove before popping it into the oven. This step is not really necessary, but it does cut down on the amount of time you’ll need to monitor the oven. My oven is pretty finicky and requires attention no matter what I’m cooking, so I like to reduce the amount of time I’m dehydrating the fruit as much as possible. I simmer the puree for 10 to 20 minutes, or until it has noticeably thickened and looks more like applesauce than soup. Make sure to stir frequently as the sugars in the puree will want to scorch.

Spices like black pepper can be added directly to the reduced puree. Photo: Kate Williams

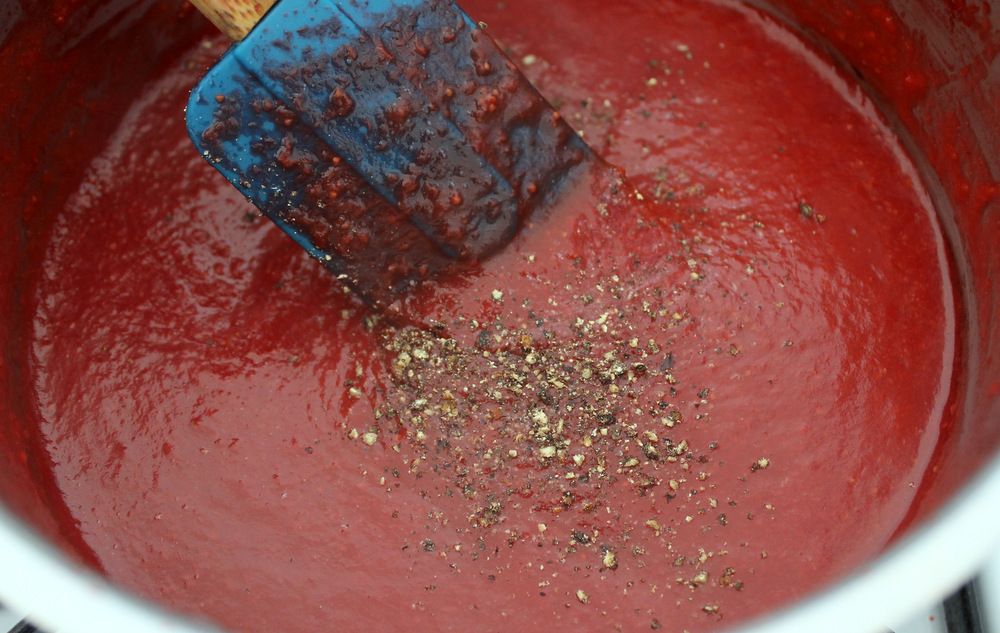
Once the fruit is reduced, I like to add any additional flavorings. I save this step for the last minute so that their intensity remains strong. Fresh herbs, like cilantro, work better when they’re steeped in the warm puree and then removed before dehydrating. Spices, like black pepper, will go into the puree and stay there.

Sponsored

Now flavored, I spread the thickened puree into a thin rectangle on a parchment-lined baking sheet. I like to use the flatter, pre-cut sheets of parchment because they, well, lay flat without assistance. (A Silpat liner is the best pan liner to use here, as it doesn’t wrinkle in the oven. But Silpats are way more expensive than parchment, so don’t splurge if you don’t think you’ll use it again. If you’ve already got one: Great! Use it!)

Spread the reduced puree into a large, thin rectangle using a large offset pastry spatula. Photo: Kate Williams

The best tool for spreading is a large offset pastry spatula, but you can use a flexible rubber spatula if that’s what you’ve got on hand. Spread the puree as evenly as possible, aiming for around 1/8 inch in thickness. You can go thicker if you’d like, but the puree will take longer to dry out. If you go too much thinner than 1/8 inch, the resulting fruit roll-ups will be on the brittle side. (It’s also much easier to burn a super-thin sheet of puree than a thicker one.)

To dehydrate the roll-ups, you can use an oven or a dehydrator. Ovens are more common, but more finicky than a dehydrator. If you own a dehydrator, you already know how to use it, so go forth and dehydrate away! If you’re using an oven, set the temperature to the lowest possible setting. You’re aiming for a temperature between 175 and 200 degrees. My oven has vague settings, so I turn it to somewhere on the dial less than 200 but not totally off. An oven thermometer will be your friend here.

You’ll know the puree is fully dehydrated when it is no longer sticky and can be easily peeled back from the parchment paper. Photo: Kate Williams

Place the baking sheet of fruit puree in the oven and let it bake until it has transformed into flexible fruit roll-up material. It will no longer be wet and sticky, and should easily peel off of the parchment paper. This step will take anywhere from 4 to 6, or even more, hours, depending on the oven temperature, the thickness of the puree, and the amount of water still left in the fruit. My sheet of mango fruit roll-ups took 4 hours and my sheet of strawberry took close to 6 hours. Periodically check on the oven’s temperature, fiddling with the dial or opening and closing the oven door to keep the temperature in the target range.

Finally, let the dehydrated fruit roll-ups cool to room temperature before cutting them into whatever shapes you’d like. I chose to go with easy, fruit-by-the-foot style shapes here. I used a pizza wheel to cut the fruit sheets into long strips, placed the strips on clean wax paper, and rolled ‘em up.

Roll the cooled and cut fruit roll-ups on a sheet of waxed paper. Photo: Kate Williams

Recipe: DIY Fruit Roll-Ups

Makes 8 to 12 roll-ups

Note: If you’d like to double the recipe to make two sheet trays of fruit roll-ups, divide the puree into two saucepans in step 3 to decrease the time needed to reduce the puree.

Ingredients:

  • 1-1 1/2 pounds ripe fruit (like strawberries, mangos, or apples)
  • Honey, to taste
  • Salt, to taste
  • Herbs, spices, and seasonings of choice, to taste (optional)

Sponsored

Equipment:

  • Baking sheet
  • Parchment paper or Silpat liner
  • Food processor or blender
  • Offset or thin rubber spatula
  • Oven thermometer
  • Pizza cutter, pastry wheel, or scissors
  • Optional: Dehydrator
    Instructions:
  1. Line a baking sheet with parchment paper or a Silpat liner. Set aside. To prepare the fruit, peel, hull, core, and/or de-pit the fruit so that you’re only working with the fruit’s flesh. Chop the fruit into large chunks and weigh the pieces. You want around 1 pound of chopped fruit.
  2. Place fruit in the bowl of a food processor, and process until fruit has turned into a smooth puree. Taste the puree and season it with honey and salt as needed, keeping in mind that the sweetness will increase as the fruit dehydrates.
  3. Transfer the puree to a medium-to-large saucepan. Bring the puree to a low simmer over medium heat and cook, stirring frequently to prevent scorching, until the puree has noticeably thickened. Depending on the water content of the puree, this step will take 10 to 20 minutes. You’re looking for a texture more like applesauce than jam; you still want it to be easily spreadable.
  4. Once the puree has cooked down, add flavorings. For mango, I like to add a handful of cilantro leaves, which I steep for 10 minutes and then remove, as well as a few pinches of ground Sichuan peppercorn. For strawberry, I like to add a generous grinding of black pepper. Cinnamon and nutmeg would pair well with many different fruits, as would vanilla bean and cardamom.
  5. Meanwhile, preheat the oven to the lowest heat it will hold, ideally between 175 and 200 degrees. If you own a dehydrator, you can use it instead of the oven.
  6. While the reduced puree is still warm, pour the puree onto the prepared baking sheet. Using an offset spatula, spread the puree into a large rectangle about 1/8-inch thick. The thinner the rectangle, the faster the fruit will dry and the stiffer the resulting roll-up will be. Try and spread the puree as evenly as possible (this will be easier or harder depending on the fruit).
  7. Place the baking sheet in the oven and let the puree bake until it is longer be sticky and should peel easily off of the parchment paper, at least 4 to 6 hours. You may need to check on the oven periodically to monitor the temperature. If the oven is getting too hot, open the oven door occasionally to let it cool off. Take this time to rotate the baking sheet to ensure that the fruit is baking evenly.
  8. Once the puree has dehydrated, remove the baking sheet from the oven and let it cool to room temperature. Using a pizza cutter or pastry wheel, slice the fruit into strips of whatever dimensions you’d like. I like to pull the strips off of the parchment and re-roll them into cylinders using wax paper, but they can also be rolled up in the parchment paper used for baking. Store the fruit roll-ups in an airtight container for up to a week.

lower waypoint
next waypoint
Samosas aren’t from India…Wait, what?We Recreated an It's-It Ice Cream Sandwich at Home — With an Oakland Twist.Springtime Delight: Rhubarb Puff-Tart PocketsFood Labeling: How to Identify Conventional, Organic and GMO ProduceLGBT Pride: Remembering The Brick Hut Cafe - Part 1Bay Area Bites Guide to 7 Exceptional Japanese Izakayas in the East BayBored of Apples and Walnuts? Try Adding Date Charoset to Your Passover Table This YearStore-Bought Ramen Noodles: You Don’t Always Get What You Pay ForSoured Milks: What’s the Difference?Ending It All: How to Finish Your Dinner