upper waypoint

DIY Sriracha: Make it at Home and Never Worry About a Hot Sauce Shortage Again

Save ArticleSave Article
Failed to save article

Please try again

Make Sriracha hot sauce at home to ensure a constant supply. Photo: Kate Williams

Before Christmas, back when the Srirachapocalypse was nigh, I was privy to a long conversation on strategies for stockpiling the chile-garlic hot sauce. We talked about which stores still carried it, where was the best place to store it, how long can one last on Tabasco alone, and plenty of other topics including a comparison of the number of bottles currently in our kitchens. Me? I had one bottle, close to empty, in my fridge at the time. Still, I don’t necessarily put Sriracha on everything, and I wasn’t terribly worried about its pending depletion. But given the fact that so many other spice-loving folks were already hoarding the stuff, I figured there must be a better way to survive the shortage than buying out Berkeley Bowl’s supply.

With a little bit of patience and a pair of plastic gloves, it’s not too complicated to make Sriracha at home. Plus, heat, garlic, and sugar levels can be easily modified; a boon if you, like me, find Huy Fong Sriracha a bit too sweet.

Use easy-to-find red Fresno chiles for a medium-hot sauce, or add spicier chiles, like habaneros, for a more daring blend. Whichever you choose, pulse them to a mash in a food processor. Photo: Kate Williams

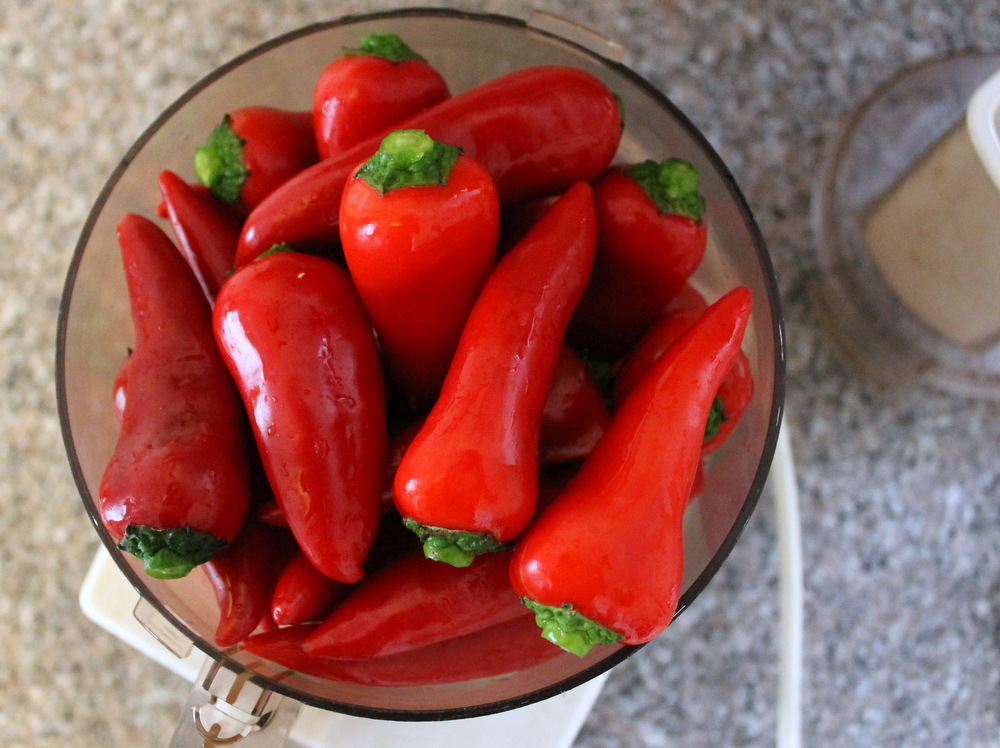
The first step is to make a pepper-garlic mash and let the mixture ferment for around two weeks. Traditionally, chile-garlic sauce is made with red serranos, but I prefer easier-to-find and slightly milder Fresno chiles. For the best flavor, I trim off just the top part of the stem, leaving the aromatic base. I pulse the trimmed chiles with 12 cloves of garlic in a food processor until they’ve broken down a bit before adding brown sugar and kosher salt to the mix. I keep it running until the chiles and garlic have turned into seed-sized bits, and they’ve released much of their juice.

Adding the whey drained off from a cup of yogurt will add live cultures to the chile mash, significantly speeding up the fermentation process. Photo: Kate Williams

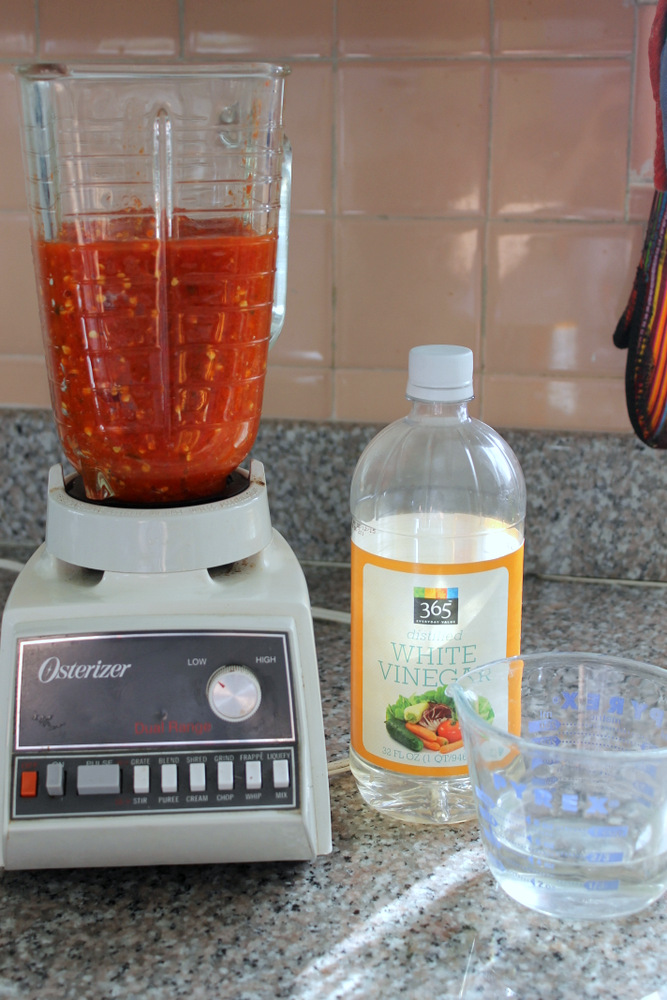
Technically, the chile mixture will ferment safely on its own, as the salt will inhibit the growth of any bad bacteria. Yet I like to give my ferments a little bit of a jump-start with some live cultures. The easiest place to get live cultures is from the whey that drains out of yogurt. I simply scoop a cup of yogurt into a coffee-filter lined strainer and let it drip until I’ve collected 1/4 cup of liquid. (It’ll take a few hours, so this is best to start ahead of time.) I pour the whey into the processor with the chile mash, and pulse to combine. Then I transfer the mixture into a 1-quart glass jar—but I don’t seal it.

The fermentation process will create a carbon dioxide by-product that will need a way to escape. At the same time, it is best to cover the jar to let in as little oxygen as possible. There are air-locks you can purchase that will screw on to canning jars, but I find that simply flipping the lid upside down and screwing the band on loosely will do the trick well enough.

Once fermentation begins, the chile mash will rise in the jar and bubbles will form throughout. The mash may separate from the liquid at the bottom of the jar. Photo: Kate Williams

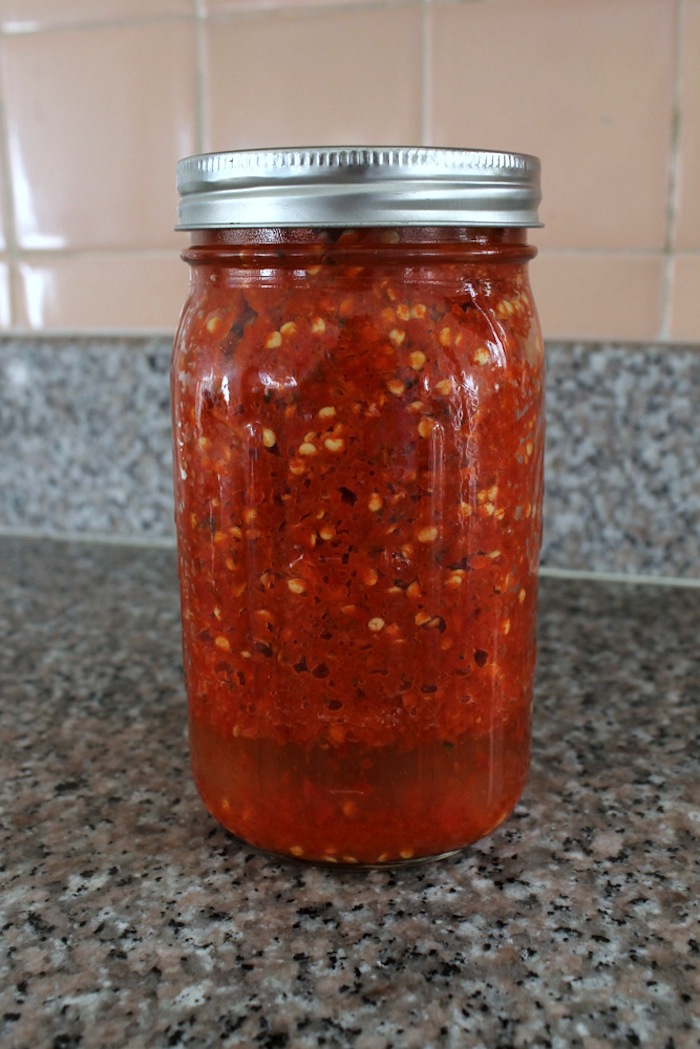
At this point, all the chile mash needs is time. For the first few days, you may not see any changes in the jar; but at some point around day 3 or 4, the mash will appear to grow, form bubbles, and perhaps separate from the liquid at the bottom of this jar. This is good. Continue to monitor the jar. You can open the lid from time to time, take a whiff, and check for mold. The mash should smell sweet, spicy, and maybe a little sour. If anything smells super funky (like paint thinner), you’ll unfortunately need to chuck it and start again.

Sponsored

Depending on the ambient temperature of your kitchen, the fermentation process could take as little as a week, or as long as three. It hasn’t been very cold this winter, so I found that the chile mash took about 12 days to ferment properly. You’ll know that fermentation has slowed when the mash sinks back down to in the jar. At this point, it should smell like Sriracha. You’ll probably be more than ready to eat it.

After fermentation has slowed down, transfer the chile mash to a blender with distilled vinegar and puree. Photo: Kate Williams

But before digging in, you’ll need to turn the chunky chile mash into smooth sauce. First, transfer the mash to a blender (the stronger the motor, the better) with 1/2 cup of regular white vinegar. Slowly crank the blender up to high and puree the mixture as smooth as possible. Once it looks smooth, blend it some more.

When straining the mixture, use a spatuala to press as much of the chile flesh through the strainer as possible. Leave only a dry mixture of skins and seeds behind. Photo: Kate Williams

Now pour the vinegar and chile mixture through a fine-mesh strainer into a medium saucepan. I like to use a spatula or wooden spoon to smoosh as much of the chile flesh through the strainer as possible, leaving behind only the seeds and remaining pieces of skin. (If your strainer is on the small side, you will likely need to do this step in batches. Take your time, and consider this step to be your arm workout for the week.)

Finally, once I’ve smooshed the puree through the strainer, I bring the sauce to a simmer, and continue to cook it until the sauce has thickened enough to coat the back of a spoon. Now all that’s left to do is bottle the sauce; a plastic squeeze bottle is nice for serving, but I like the aesthetics of a glass bottle myself. Go ahead, use it on everything.

Recipe: DIY Sriracha

Makes about 2 cups

    Ingredients:
  • 1 cup plain yogurt with live cultures
  • 1 1/2 pounds red jalapenos or Fresno chiles, stems snipped off leaving green tops intact
  • 12 cloves garlic, peeled
  • 1/4 cup brown sugar
  • 1 tablespoon kosher salt
  • 1/2 cup distilled white vinegar
    Equipment:
  • Fine-mesh strainer
  • Coffee Filters
  • Food processor
  • Blender
  • 1-quart glass jar with two-part lid
  • Medium saucepan
  • Glass jar or plastic squeeze bottle for storage

Sponsored

Instructions:

  1. Line a fine-mesh strainer with a triple layer of coffee filters and set it over a liquid measuring cup. Spoon the yogurt into the strainer, cover, and refrigerate until the yogurt has released 1/4 cup of liquid, about 2 hours. Keep the thickened yogurt for a snack.
  2. Place the jalapenos, garlic, sugar, and salt in a food processor, and pulse until the chiles are finely chopped, stopping to scrape the sides of the bowl as needed. Add the whey and pulse to combine.
  3. Transfer the mixture to a 1-quart class canning jar and cover, turning the lid upside down so that the rubber gasket faces up. Screw band on loosely. You will want air to escape the jar.
  4. Let jar sit in a dark place at room temperature to ferment until the liquid level has risen and then fallen (bubbles will form in mixture), indicating that fermentation has slowed. This will take around 12 to 16 days.
  5. Transfer chile mixture to the jar of a blender, add the white vinegar, and puree until completely smooth, 1-3 minutes. Transfer to a fine mesh strainer set over a medium saucepan. Strain chile mixture into the saucepan, using a rubber spatula to push through as much pulp as you can. You’ll want to leave behind only the seeds and large pieces of chiles behind.
  6. Bring the mixture to a boil over medium-high heat. Reduce the heat to medium-low and simmer until the sauce thickens enough to cling to a spoon, about 15 minutes. Transfer to glass jar or plastic squeeze bottle and store in the refrigerator for up to 6 months.

lower waypoint
next waypoint
Samosas aren’t from India…Wait, what?Food Labeling: How to Identify Conventional, Organic and GMO ProduceSpringtime Delight: Rhubarb Puff-Tart PocketsCheck, Please: How to Pay without looking like a fool or making everyone uncomfortable.Josey Baker Bread: Baking for Bros, with Gluten-Free Adventure Bread RecipeWe Recreated an It's-It Ice Cream Sandwich at Home — With an Oakland Twist.Bored of Apples and Walnuts? Try Adding Date Charoset to Your Passover Table This YearDIY Bone Broth - You Really Should be Making It at HomeTaste Test: Store-bought Raw Sauerkrauts are Surprisingly DistinctiveFromage de Chat (aka Cat Milk Cheese)