upper waypoint

Book Review: Flour by Joanne Chang

Save ArticleSave Article
Failed to save article

Please try again

flour bakery

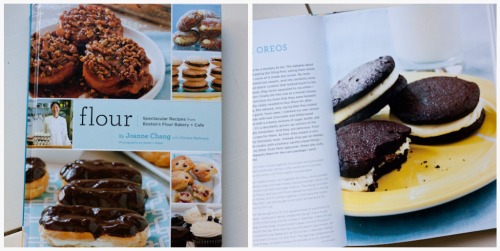
I'm biased. I'll come right out and say it. Even if this was the worst cookbook known to man (which it's so, so not), I probably wouldn't say so. You see, I have a long relationship with Flour Bakery. When you're a graduate student in English literature who sits inside and reads all day in a city that suffers an impossibly long winter, bakeries are your second home. And for me, Flour was it. If you ask me the top three things I miss about Boston, Joanne Chang's lovely bakery would be in there somewhere. And that's why I was thrilled to receive a review copy of her brand new cookbook, Flour: Spectacular Recipes from Boston's Bakery and Cafe.
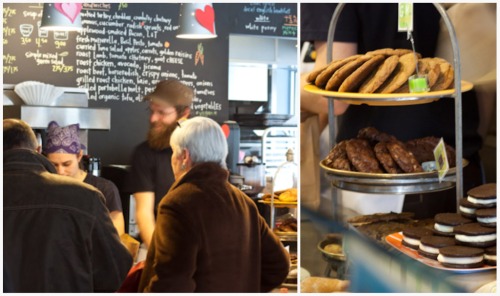
Flour Bakery
Treats at Flour Bakery on a cold February day

In addition to the recipes which I'll discuss in a moment, the cookbook is a keeper for many other reasons. In the introduction, Chang describes how she went from Harvard student to consultant to small-time local cookie purveyor to doing stints at local and international restaurants and eventually opening the bakery. It's a story of both luck and passion and a healthy dose of hard work--the story of someone who took a circuitous route and eventually came around to doing what they love. And that love shines through from the moment you step into the bakery and from the moment you turn to page 1 of the book. First, the photographs by Keller + Keller truly capture the classic, nostalgic, and equally playful nature of many of Chang's desserts. The organization of the book is logical which is not always the case with cookbooks. She begins with "Joanne's Top 12 Baking Tips" which are helpful but, truthfully, don't contain any groundbreaking information if you bake much at home (she covers temperature of ingredients, freezing dough, and over whipping). However, the "Techniques" chapter is absolutely fabulous. In your day-to-day baking cookbook, these tips are rarely covered: it's here that Chang talks about blind baking, how to do a crumb coat on a cake, cooking perfect sugar, and filling a pastry bag. For some, these may be simple, but for others, Chang's precise explanation will make you feel as though she's standing right beside you in the kitchen.

Now, the recipes: Chang keeps it simple with Chapter titles such as "Breakfast Treats," "Cookies," and "Cakes." And for anyone who has been to Flour Bakery, the book is especially exciting because the pages contain all the typical customer favorites such as Pop-Tarts, Double Chocolate Cookies, Sticky Buns, that incredible Banana Bread, and those devilishly chocolaty Chocolate Cupcakes. I'm in pastry cookbook heaven. I don't really know where to start, so I begin where any self-respecting baker would: Homemade Oreos.
Sponsored

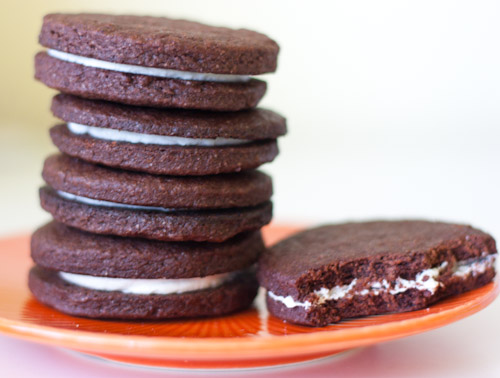
Homemade Oreos
Homemade Oreos!

Now I've made a few different Oreos in my day, so I ended up tweaking Joanne's recipe a bit to suit my own tastes. I changed the chocolate profile slightly, preferring a bit more cocoa powder than chocolate chips. I also found Joanne's 'log and cut' method difficult with this particular dough so I use a 'roll and cut' method here, and a different filling. I know lard and vegetable shortening are a tad bit controversial in some circles, but I find that the filling is much better with it. My coworkers will tell you--they're the best thing they've had in a long time. And we eat a lot of pastries. So next time you're in Boston you know where to go. And until then, you've got a few "Oreos" to tide you over.

Homemade Oreos
Adapted from: Flour
For this recipe, the type of chocolate you're buying really matters. I only use Valrhona chocolate. It's certainly more expensive, but if you just visually compare it to other cocoa powders on the market, it's so much darker and the flavor is unbeatable. A good rule of thumb for any recipe where chocolate is really the star: use the best chocolate you can afford. Do so here.

Ingredients:
1 cup (2 sticks) unsalted butter, melted and cooled slightly
3/4 cup granulated sugar
1 teaspoon vanilla
3/4 cup semi-sweet chocolate chips, melted and cooled slightly
1 egg, room temperature
1 1/2 cups all-purpose flour
1 cup Dutch-processed cocoa powder
1 teaspoon kosher salt
1/2 teaspoon baking soda

Filling: (Adapted from Smitten Kitchen's recipe)
1/4 cup (1/2 stick) unsalted butter, room temperature
1/4 cup lard or vegetable shortening
1 1/2 cups sifted confectioners sugar
1 tablespoon + 1 teaspoon vanilla

Method:
1. In a medium bowl, whisk together the butter and granulated sugar until well combined. You may also use a stand mixer with a paddle attachment. Mix in the vanilla and chocolate until just combined, and add the egg, continuing to mix until thoroughly incorporated.
2. In another medium bowl, stir together the flour, cocoa powder, salt, and baking soda until well mixed. Using a spatula, stir the flour mixture into the chocolate mixture. The dough will start to seem pretty floury, so you can just mix with your hands if that's easier. It should have the consistency of Play-Doh.
3. Divide the dough in half and wrap each disk in plastic wrap. Chill in the refrigerator for one hour.
4. Preheat the oven to 325 F.
5. Remove the disks from the refrigerator and let sit at room temperature for 5-8 minutes to make them easier to work with. Using a rolling pin roll out each disk to about 1/4-inch thickness.
6. Using a 3-inch cookie cutter, cut out as many circles as you can out of the dough. Quickly bring it back together and re-roll the scraps, repeating the process of cutting out the circles. If it become tacky or difficult to work with, place back in refrigerator for ten minutes to firm back up. Repeat with second disk.
7. Transfer the dough to parchment-lined cookie sheets. Bake for 20-22 minutes or until the cookies are firm to the touch. Check them frequently after 18 minutes. Unfortunately, you can't judge by color because they're already black. Allow to cool completely on baking sheet before you fill.
8. To make the filling: place the butter and shortening in a medium bowl and mix at low speed until combined. Gradually add the sugar and vanilla and beat on high for 2-3 minutes until nice and fluffy.
9. Assemble the cookies: use a pastry bag fitted with a 1/2 inch round tip or simply use a teaspoon to scoop out about 1 rounded tablespoon of filling onto one cookie. Place another cookie right on top to spread the filling towards the edges. Repeat until all cookies are filled.

Sponsored

Makes: 16-18 sandwich cookies

lower waypoint
next waypoint
Samosas aren’t from India…Wait, what?We Recreated an It's-It Ice Cream Sandwich at Home — With an Oakland Twist.Springtime Delight: Rhubarb Puff-Tart PocketsFood Labeling: How to Identify Conventional, Organic and GMO ProduceLGBT Pride: Remembering The Brick Hut Cafe - Part 1Bay Area Bites Guide to 7 Exceptional Japanese Izakayas in the East BayBored of Apples and Walnuts? Try Adding Date Charoset to Your Passover Table This YearStore-Bought Ramen Noodles: You Don’t Always Get What You Pay ForSoured Milks: What’s the Difference?Ending It All: How to Finish Your Dinner