Homemade Pasta
Serves: 4-8 people (depending on how hungry you all are)
Ingredients:
3 1/2 cups of all-purpose flour
4 - 6 eggs (the more eggs you add, the richer the dough)
1/2 tsp salt
1 tsp olive oil
1 Tbsp warm water
Preparation:
Preparing Dough by Hand
1. Set flour on a marble or wooden counter or board, making a well in the center.
2. In a bowl, mix the eggs, salt and olive oil.
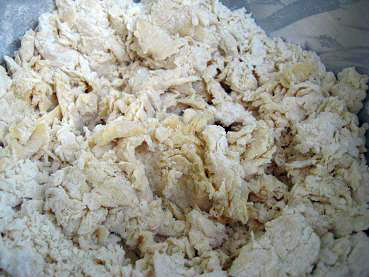
3. Pour the egg mixture into the well and slowly incorporate the flour into the egg, mixing everything together as you go along.
4. Add the warm water slowly if you need to moisten the dough (I almost always do this). Sometimes you may need it all, sometimes you will only need a bit.
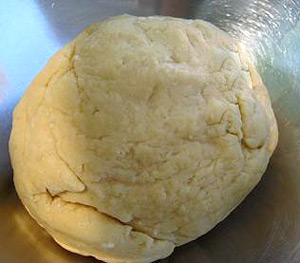
5. Collect the mixture into a ball.
Preparing Dough Using a Mixer with a Dough Hook
1. Place the flour into your mixing bowl.
2. In a separate bowl, mix the eggs, salt and olive oil.
3. Turn the mixer on low and then slowly pour the egg mixture into the bowl, incorporating the egg into the flour.
4. Add the warm water slowly if you need to moisten the dough (I almost always do this). Sometimes you may need it all, sometimes you will only need a bit.
5. When the egg is added into the flour and you have a rough dough, take everything out of the bowl and set it on a marble or wooden counter or board.
6. Collect the mixture into a ball on a marble or wooden counter or board.
Preparing Dough by Using a Food Processor
1. Place the flour into your processor’s bowl.
2. In a separate bowl, mix the eggs, salt and olive oil.
3. Pulse the processor while slowly pouring the egg mixture into the bowl and incorporating it into the flour.
4. Add the warm water slowly if you need to moisten the dough (I almost always do this). Sometimes you may need it all, sometimes you will only need a bit.
5. When the egg is added into the flour and you have a rough dough, take everything out of the bowl and set it on a marble or wooden counter or board.
Kneading the Dough
1. Knead the dough for 10-15 minutes. When you’re done, it should be smooth with everything fully incorporated. Be sure not to stop too soon (even if your arms are tired) as your dough won’t stretch well later and you’ll regret it.
2. Let the dough rest in a bowl covered with plastic wrap for at least an hour on the counter or up to a day in the refrigerator.
Making the Pasta
A. Rolling out the Dough by Hand
1. Line a cookie sheet with paper towels that have been sprinkled with flour.
2. Spread some flour onto your counter or board and set the dough on top of it.
3. Cut a 1/2-inch slice off your dough ball, and keep the rest covered with the plastic wrap.
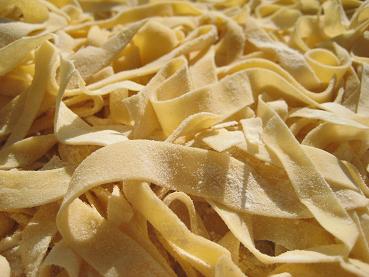
4. Using your rolling pin, roll your dough to your desired thickness (I like it on the thin side) and then cut into whatever shape you’d like. I think pappardelle, tagliatelle, and fettuccini are the easiest to cut.
5. Set the cut noodles onto the cookie sheet, being sure not to clump them too much. Sprinkle on more flour if needed.
6. Continue until you are out of dough.
Making Individual Shapes by Hand
1. Line a cookie sheet with paper towels that have been sprinkled with flour.
2. Spread some flour onto your counter or board and set the dough on top of it.
3. Cut a 1/2-inch slice off your dough ball, and keep the rest covered with the plastic wrap.
4. Make whatever shapes you’d like (I think orecchiette is the easiest as you just make little balls and then press your knuckle into them), being sure not to make your shapes too thick or too big as they won’t cook well. About.com has a nice pasta gallery you can look at if you’re interested.
5. Set the cut noodles onto the cookie sheet, being sure not to clump them too much an sprinkling on more flour if needed.
6. Continue until you are out of dough.
Note: I won’t provide pasta-maker instructions as I rarely use mine and each machine comes with a helpful manual.
Cooking the Pasta
1. Add the pasta to salted boiling water. Be sure to have a nice full pot so there’s enough room for the pasta to move around and cook in separate batches if your pot isn’t big enough.
2. Boil for 3-5 minutes, or until the pasta seems cooked through.
3. The pasta should be firm, but cooked through, when you take it out. Just be sure not to let it get mushy.
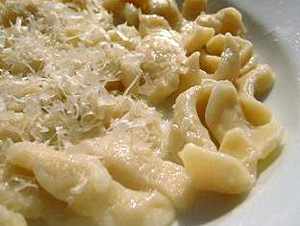
4. Serve with your favorite sauce.
Freezing the Pasta
An entire batch usually makes two full dinners in our house, so I freeze the other half for later use. Just follow these simple directions:
1. Take your fresh (uncooked) noodles still lying on the cookie sheet and cover them with a layer of paper towels.
2. Stick the cookie sheet in the freezer for about an hour.
3. When the noodles are frozen, place them in a freezer bag or container and freeze until ready for use.

Fettuccini with Heirloom Tomatoes, Fresh Basil, Ricotta Cheese, and Parmesan
Makes: 4 Servings
Ingredients:
Half a batch of freshly prepared and cooked fettuccini
1 -2 pounds of heirloom tomatoes chopped
1/2 cup fresh ricotta cheese
3 Tbsp chopped basil
Olive oil
2 Tbsp freshly grated Parmesan Cheese
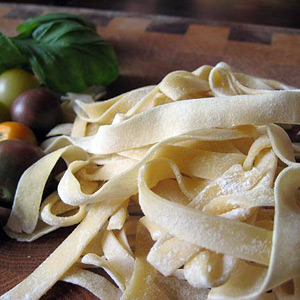 I only make homemade pasta a few times a year, but when I do, I am always surprised at how easy it is. One thing I never forget is how good it tastes. Making pasta from scratch is always worth the effort as the freshness of the flavor and the silkiness of the texture exceeds that of any noodle you can buy, unless you’re lucky enough to have a good local shop near your house that makes it daily.