Major support for MindShift comes from
Landmark College
upper waypoint

Slowing Down Time With Time-Lapse Photography

Save ArticleSave Article
Failed to save article

Please try again

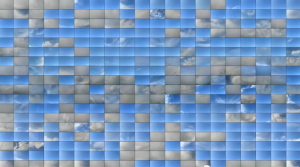
A screenshot of a time-lapse montage of the San Francisco sky.
By Ken Murphy

Watching how the passage of time changing the landscape around us offers a fascinating glimpse into all kinds of natural phenomenon: the change in weather, time, and nature.

Time-lapse is a photographic technique that allows us to tune into events that normally unfold at a pace too slowly to observe directly: the movement of clouds, the rising and setting of the sun, or the incremental growth of plant life.

Whether you're a science teacher, a parent or kid interested in photography, or someone who just wants to learn something new, time lapse is a great way to observe the world from a different vantage point.

The technique entails shooting images at regular intervals, then playing them back to create a moving image. In this sense it’s like shooting a film or video. The difference is that with traditional film and video, images are captured at the same rate they're played back (e.g., at 24 frames per second), whereas with time-lapse, the images are captured at a much slower rate–in other words, at a much longer interval between shots. When these images are played back at typical video frame rates, it looks like fast-forwarded reality.

The shooting interval can vary greatly, and depends on the subject and the desired effect. An interval of a few seconds is ideal for the movement of people or traffic on a city street. A slightly longer interval of five to 10 seconds works well for patterns of weather such as clouds or fog. At longer intervals, the sun and the shadows it casts move quickly across the frame. Much longer shooting intervals might work well for events that unfold at a much slower pace: the construction of a building or the changing of seasons.

Sponsored

SHOOTING TIME-LAPSE

Time-lapse photography doesn't require expensive products or lots of expertise. You can get started easily, and get cool results with inexpensive, off-the-shelf gear.  Here’s what you need:

A camera: Compact digital cameras can easily get you started. Don’t worry too much about megapixels: a single frame of HD video (1080p) is just over 2 megapixels; any recent compact digital camera far exceeds that. Of course, digital single-lens reflex (DSLR) cameras work great as well.

Next, you’ll need some way to trigger your camera to take pictures at regular intervals. Some cameras have a timer (the technical term is “intervalometer”) built in. If not, they’re often sold as accessories by the camera manufacturer, particularly for DSLRs (one can usually find less expensive off-brand timers that work fine). Another approach is to use desktop software that controls your camera remotely via a USB cable, such as iStopMotion for Mac, and GBTimeLapse for PC (the latter only works only with Canon Cameras).

For those on the geekier side of the spectrum, there is the Canon Hacker’s Development Kit, or CHDK, which is an open-source firmware replacement for Canon PowerShot cameras. The CHDK temporarily replaces your camera’s operating system, adding a huge number of features, including intervalometer functionality. There is also gPhoto, an open-source program for remote-controlling a variety of cameras from the command line of your Mac or Linux computer (if you don’t know what a command line is, this might not be your best option).

Once you have your camera set up with a timer, mount it on a tripod and go shoot something! Point it out the window at the clouds, or at your sleeping cat. One rule of thumb is to shoot in fully manual mode: set aperture, shutter speed, and white balance to something that works for the scene. Leaving the camera in auto can result in sudden changes in exposure that create a distracting flicker in your final movie.

CREATING YOUR MOVIE

After shooting and downloading the images to your computer, they must be assembled into a movie. Quicktime Pro (for Mac or PC) will do this for you, as will iStopMotion. And for the geeks, there are open source tools such as ffmpeg.

If you want to keep it really simple, you can forget all of the above and just shoot with a regular video camera, and speed up the footage with video editing software. There are also apps for iOS and Android that will do everything for you: Shoot at set intervals using the built-in camera, and create the movie.  With these approaches, you probably won’t match the quality of a decent still camera.

LEARN MORE

If you find yourself getting the time-lapse bug, there are some great online resources. MiLapse is a time-lapse guru with a YouTube channel and some great tutorials. There’s also an active and helpful online community at Timescapes with a very useful FAQ. This time-lapse primer on the BBCEarth site is worth checking out as well.

Here are some time-lapse movies to offer a little inspiration:

San Francisco to Paris in 2 Minutes (shot out the window of an airplane):

Some great night-time time-lapse of the Milky Way:

Earth from the ISS (do not try at home):

And finally, here are a couple of my own projects:

San Francisco MUNI demolition and construction time-lapse (I was lucky enough to have a front-row seat from my living room to a three-day round-the-clock construction project):

Panoramic-time lapse movie shot from Pier 14 in San Francisco, using a camera mounted on a motorized tripod:

“A History of the Sky.” This is a time-lapse visualization of the sky for an entire year; each little window represents a single day:

Ken Murphy is an programmer, artist, musician and all-around tinkerer who enjoys making time-lapse movies. You can see more of his work at Murphlab.


lower waypoint
next waypoint