upper waypoint

Improve Your Summer Camping Trips with Sweet and Savory DIY Snacks

Save ArticleSave Article
Failed to save article

Please try again

Homemade smoky beef jerky and fig and pistachio “Lara Bars” are a great addition to any camping trip. Photo: Kate Williams

Despite the fact that it rarely feels like summer in July—thanks a lot, Karl the Fog—I try to make the most of the long days of summer. Day hikes and weekend camping trips are the perfect excuse to kiss the dreary grey away and experience summer like it was meant to be: hot and sunny. There are countless parks in which to camp and hike, but no matter where I choose to go, I make sure to pack quality snacks.

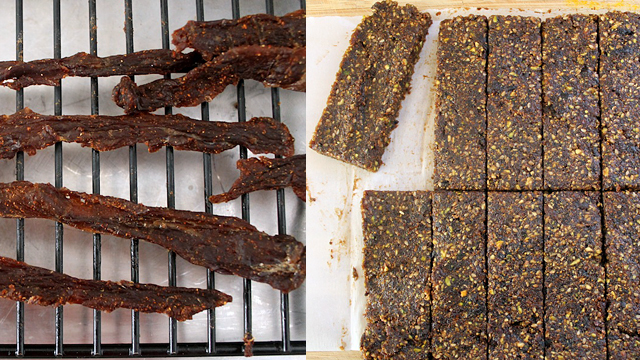
Buying snack bars and jerky is a quick solution, but I much prefer homemade versions. They’re easy to make, customizable, and far cheaper than anything you can find at REI. A mix of savory and sweet snacks is key for the most “balanced” bag of hiking treats, which is why I’ve made a batch each of smoky beef jerky and fig and pistachio “Lara Bars.” The beef jerky takes the most time to prepare, so we’ll start there.

Use grass-fed beef for the most robust jerky. Photo: Kate Williams

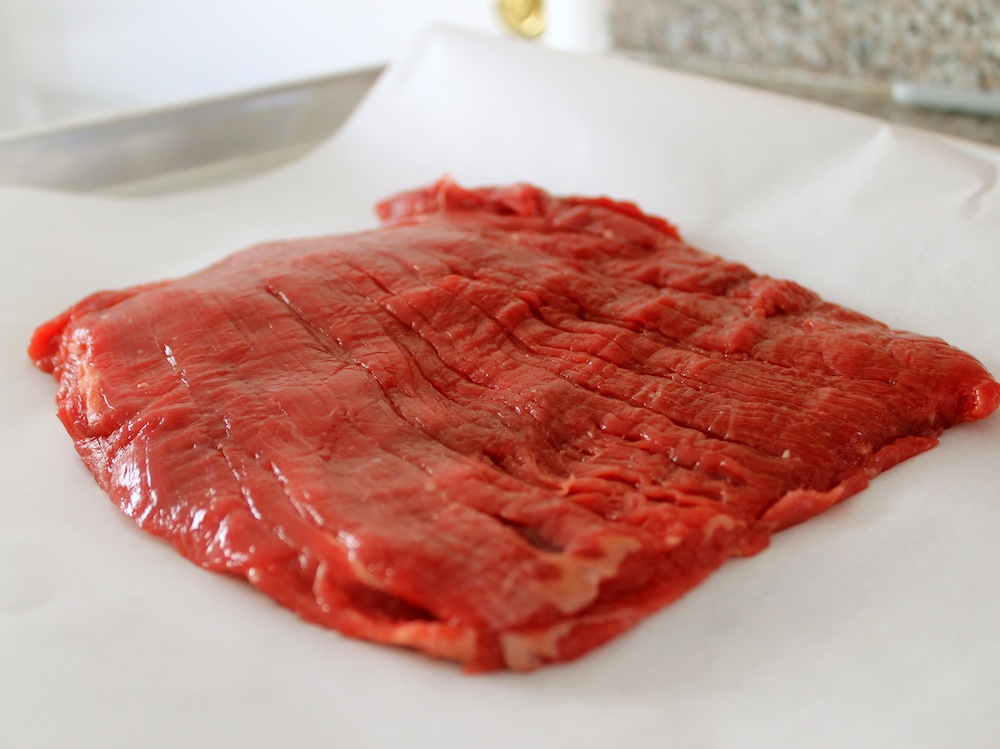
The biggest problem with store-bought beef jerky is the overload of salt and spices infused into the meat. Many varieties use MSG for a big jolt of flavor, but I think there is a better way to highlight the flavor of the beef: buy grass-fed. Yes, I know it is more expensive. However, grass-fed beef has a depth of flavor that really comes through in the final jerky, and it is well worth the extra couple of bucks per pound. I like to use flank steak, but you can use any lean cut of beef. Slice off any large pieces of fat on the surface of the steak. (The fat will go rancid faster than the meat, so I try to eliminate as much of it as possible.)

Slice the meat thinly across the grain before mixing it with a dry rub. Photo: Kate Williams

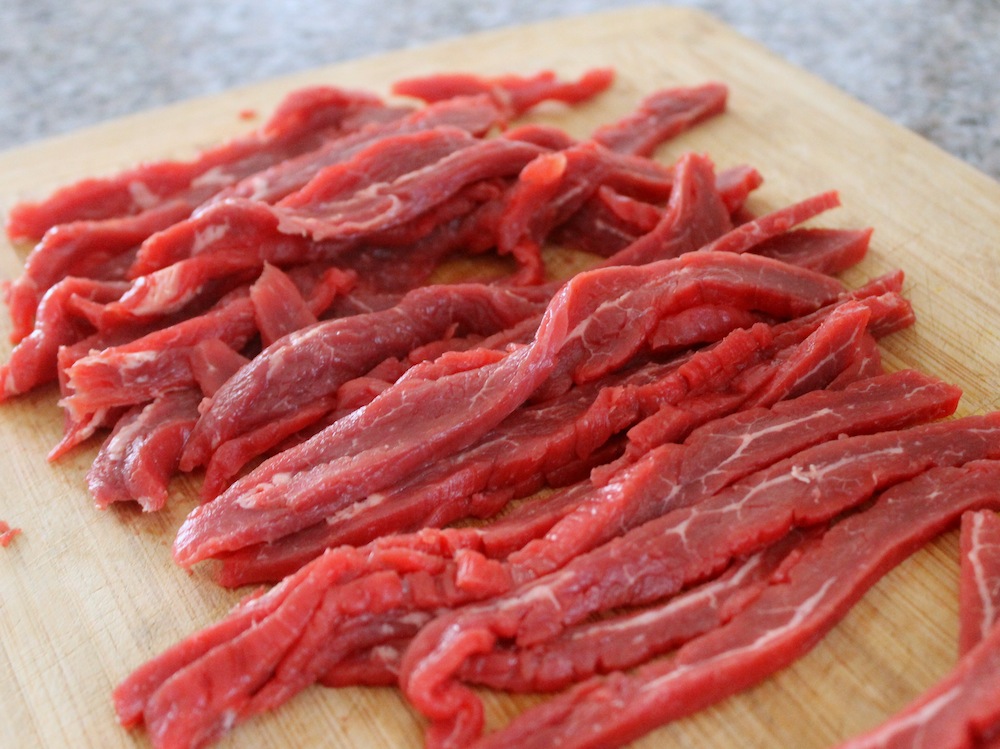
In order to slice the beef thinly, stick the meat in the freezer to firm up. But don’t freeze completely. Instead, pull it back out after about half and hour. Then use your sharpest knife to slice the steak into 1/4-inch thick slices across the grain. The grain is very easy to see on a flank steak; the “grain” refers to the long muscle fibers that run down the length of the steak.

This smoky rub includes sugar, smoked paprika, chile powder, chipotle chile power, cumin, and coriander in addition to kosher salt. Photo: Kate Williams

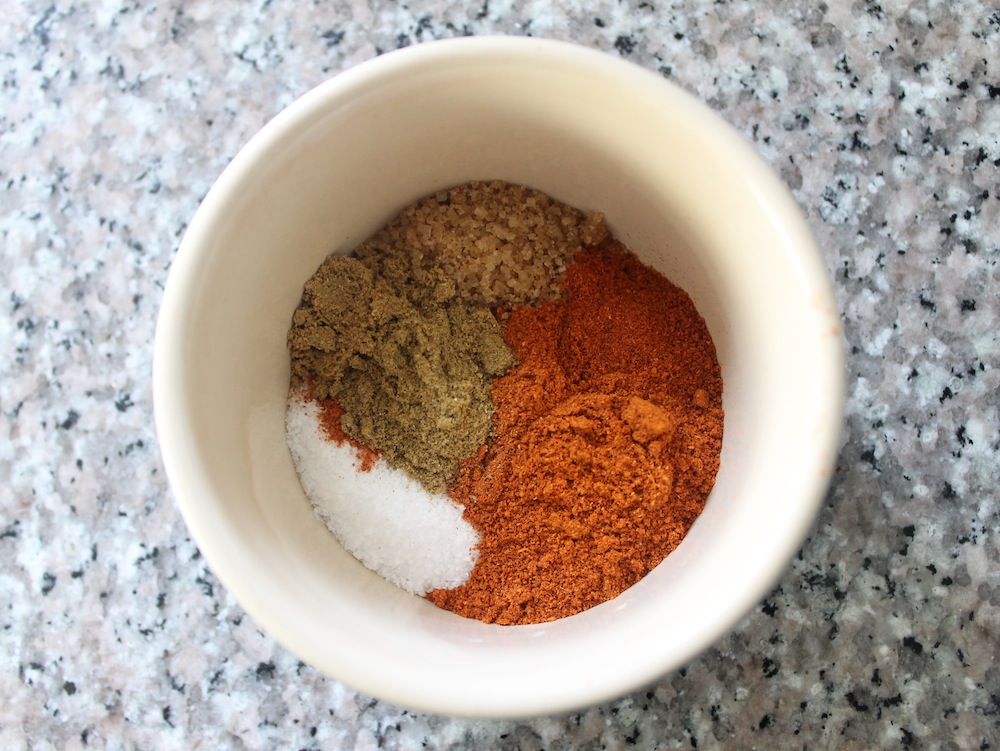
Once all of the steak is sliced, mix it with a spicy, smoky rub. Many jerky recipes use a wet marinade, but I prefer to keep the mix as dry as possible. After all, the steak will need to be dehydrated, and a wet marinade will just increase the necessary drying time. I like to use a mixture of kosher salt, Demerara (or brown) sugar, smoked paprika, chile powder, chipotle chile powder, cumin, and coriander. Each spice lends heat, smoke, and earthy flavor to the steak. Make sure to blend the dry rub thoroughly and evenly into the steak slices. Then cover the bowl and place it in the fridge to marinate overnight.

Spread the seasoned beef across a cooling rack to let the air circulate while it drys in the oven. Photo: Kate Williams

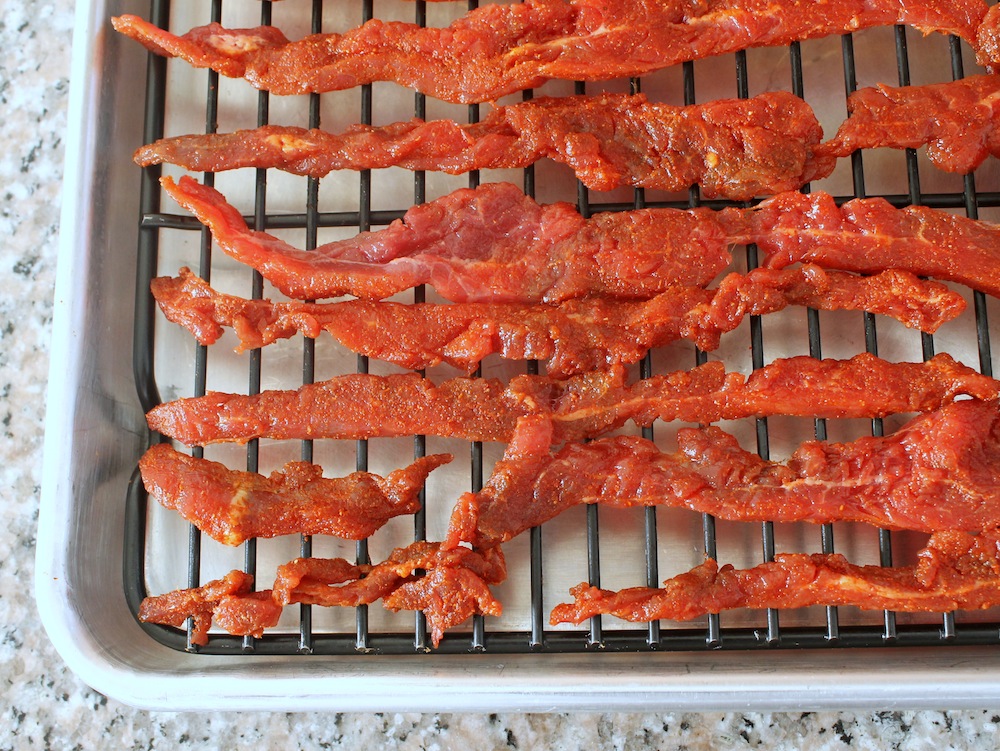
The next day, spread the steak slices across a cooling rack that is placed inside a rimmed baking sheet. The pieces can touch if they need to in order to fit on the rack. They shouldn’t, however, overlap. If you happen to own a dehydrator, you can use it to dry out the steak. I don’t own one, so I use my oven. My particular oven only gets down to about 200-225 degrees, which is about as high of a temperature as you’d want for any kind of dehydration process. To keep the temperature as low as possible and to keep the air circulating, prop open the oven door.

The jerky is finished when it has turned dark brown and is firm and dry in texture. Photo: Kate Williams

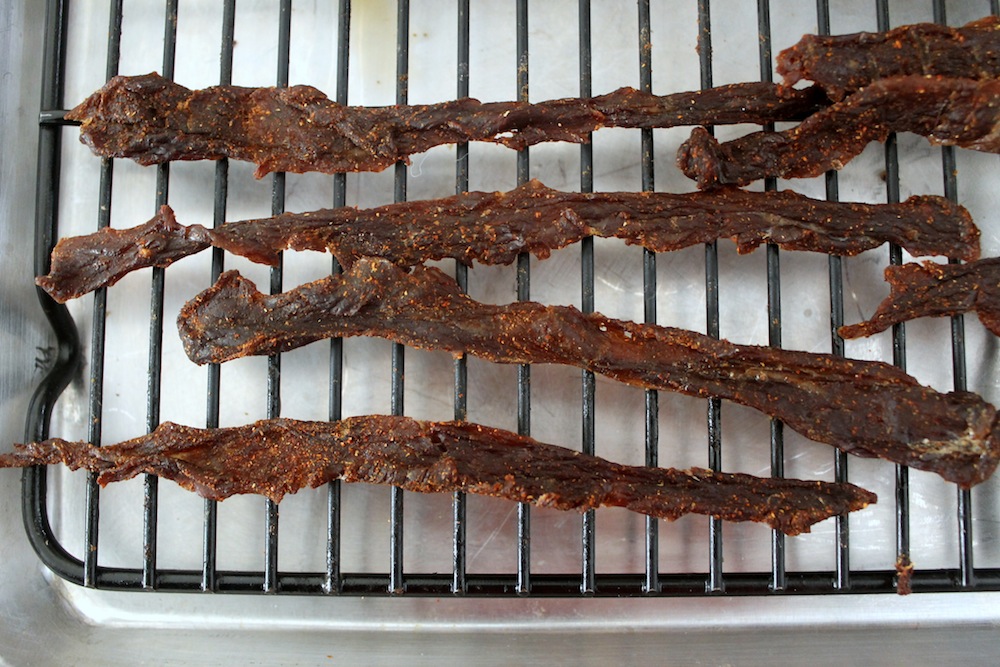
It will likely take at least 3 hours to turn the steak into jerky. After around 2 hours, begin to monitor the jerky, checking on it every 30 minutes. You’re looking for the slices of beef to turn dark brown and be firm and dry to the touch. Keep in mind, though, that the jerky should still be pliable and that it will continue to dry out after it comes out of the oven. Once the jerky is dried to your liking, remove the baking sheet from the oven and let the jerky cool to room temperature. Keep the jerky stored in an airtight ziplock container.

These Lara Bars contain just three ingredients (plus salt and spice): dried figs, raw pistachios, and raw sesame seeds. Photo: Kate Williams
These “Lara Bars” contain just three ingredients (plus salt and spice): dried figs, raw pistachios, and raw sesame seeds. Photo: Kate Williams

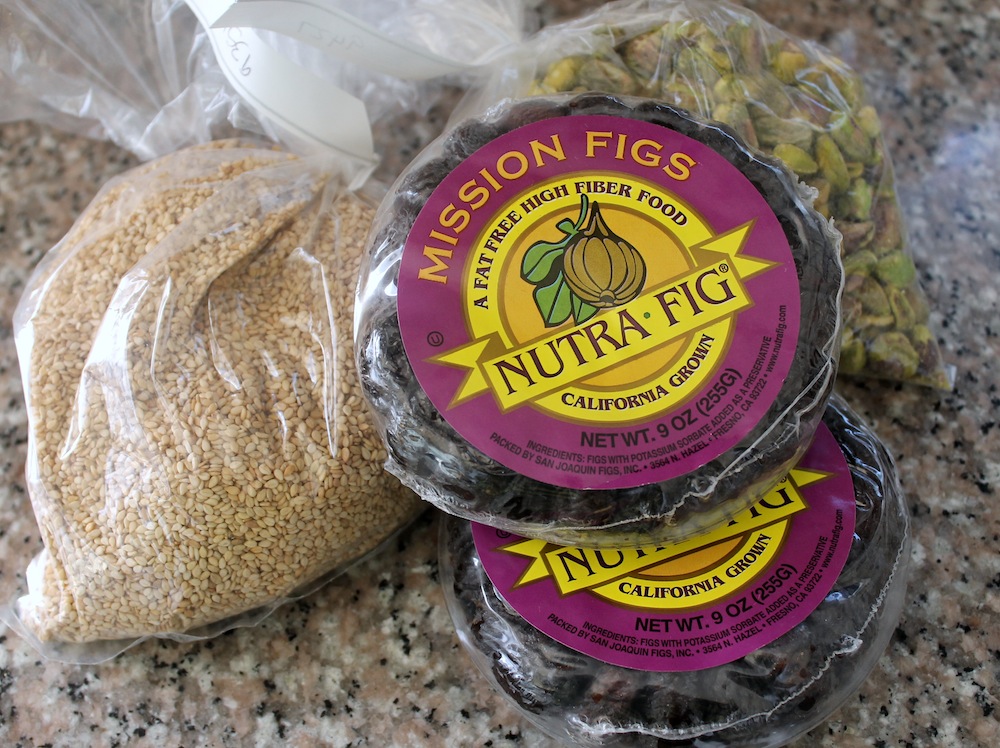
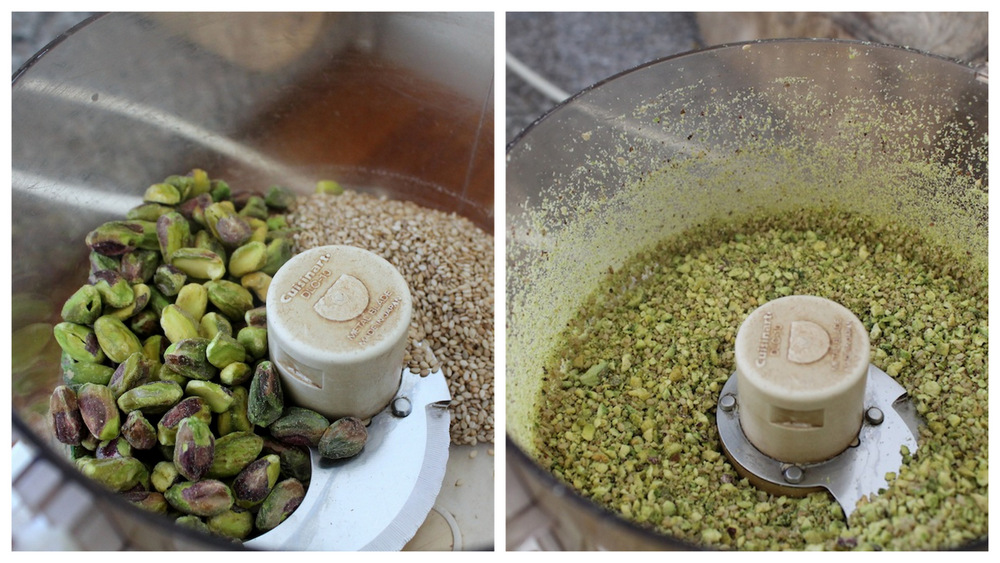
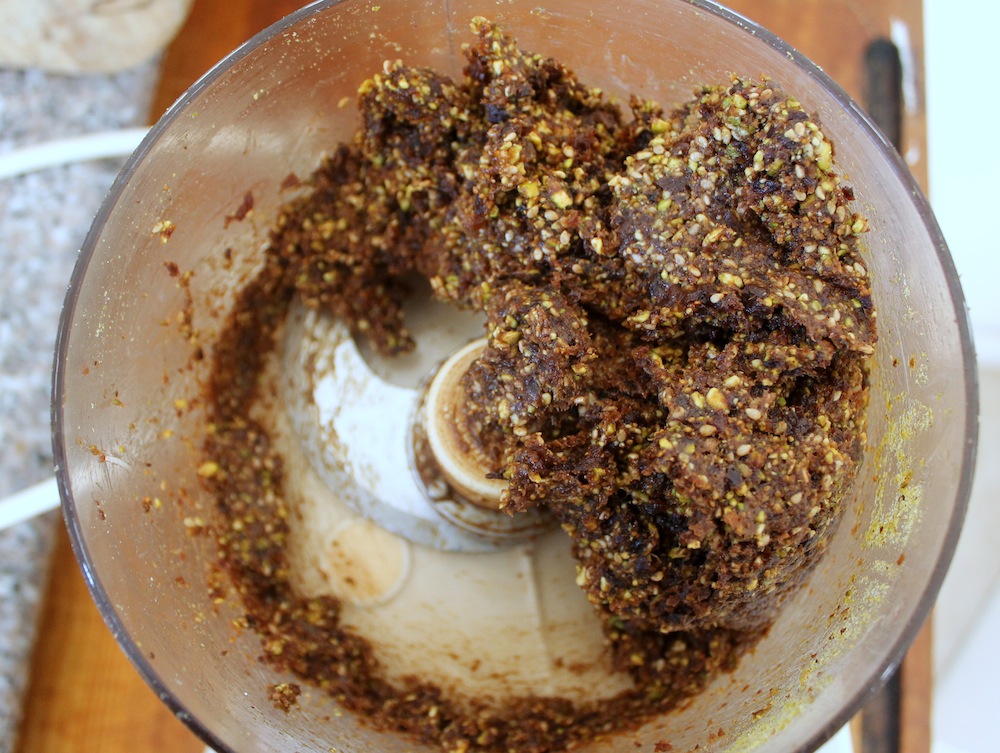
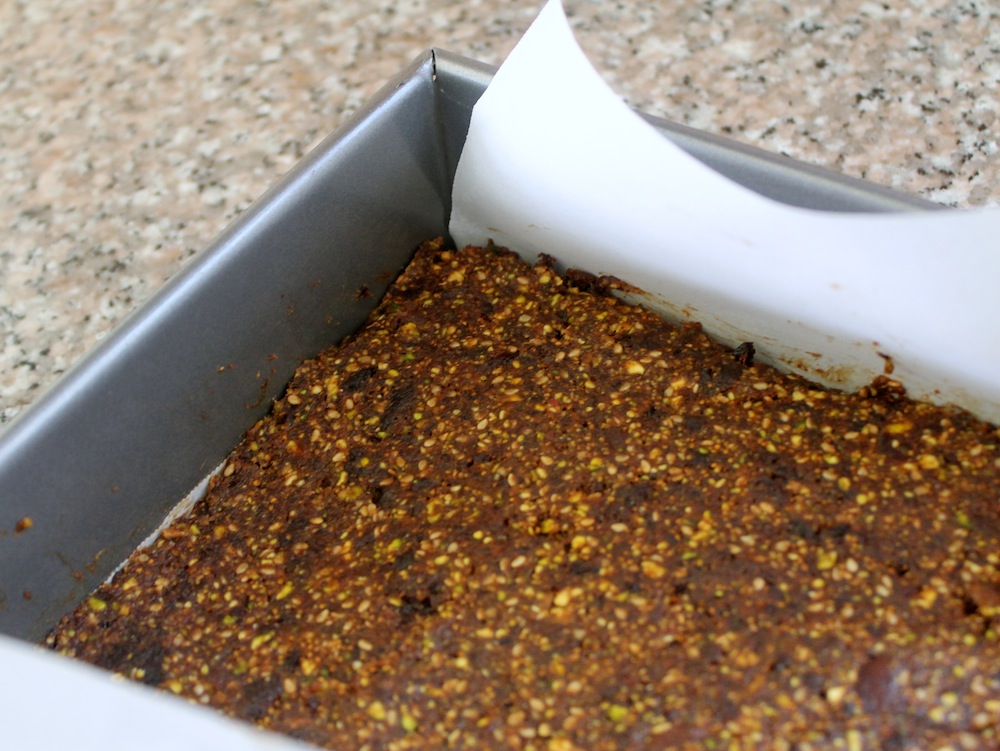
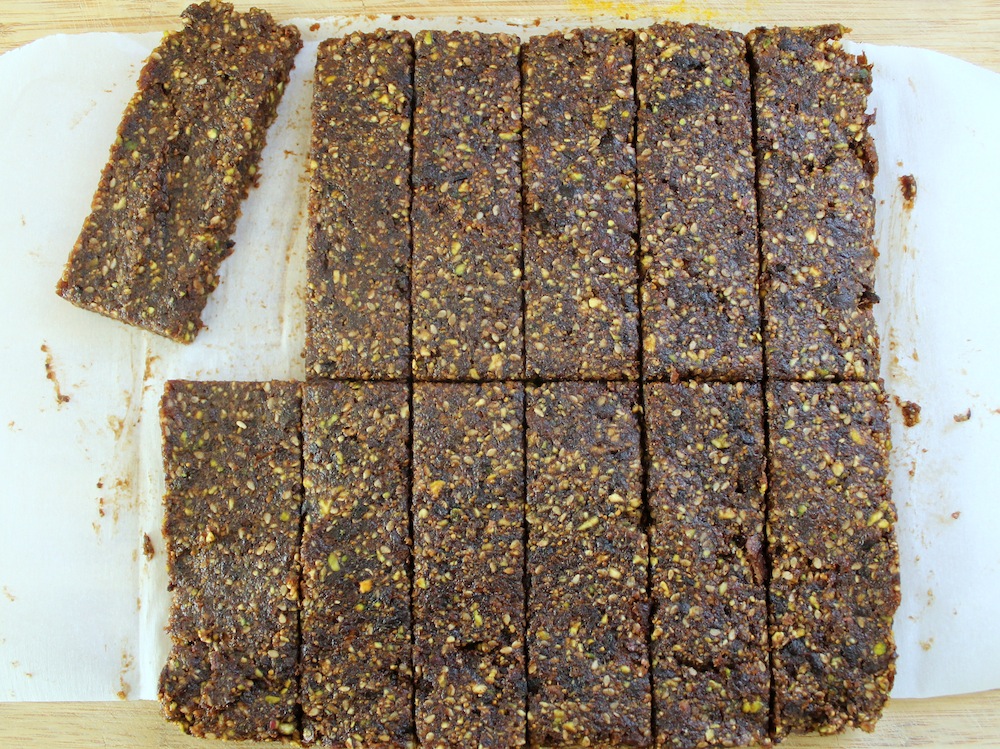
For a sweet component for camping trips, I can’t say no to those 3-4 ingredient Lara Bars. Making them at home wasn’t much of a stretch—they’re only dried fruit, nuts, and spices. And while the final result isn’t too much different than the store bought bars, they are far cheaper to make in bulk. Plus, the homemade version is infinitely customizable. Here, I’ve made fig and pistachio bars, but the sky’s the limit when it comes to your own version. Pick a favorite dried fruit and nut and go from there.

Sponsored

If your dried fruit is particularly dry, you will want to soak it a bit before making the bars. Ten minutes in hot water will do the trick. Once the fruit has sufficiently soaked, drain it well.

Grind the nuts and seeds until they have become a chunky meal. Photo: Kate Williams

As the fruit is soaking, grind the nuts in a food processor. I’ve used a mix of raw pistachios and sesame seeds. (If you’d like to toast the nuts, make sure to let them cool completely before grinding.) Pulse the nuts in the food processor until they’ve turned to a meal. I like to have some distinctive pieces in my bars, so I leave them a little chunkier. If you want the nuts to be fully incorporated into the bars, pulse them a little longer—just be sure to stop before they turn into nut butter. The nuts won’t grind much smaller once you’ve added the fruit, so make sure they’re at a good consistency before moving on.

Add the dried fruit and any seasonings to the ground nuts and continue to pulse until the mixture turns into a paste. Photo: Kate Williams

Add the soaked and drained fruit to the food processor along with a pinch of salt and any additional spices you’d like to add. I love the combination of figs and cardamom, so that’s what I’ve used here. Depending on the potency of the spice, you’ll want to add 1/4 to 1/2 teaspoon. Continue to pulse the mixture in the processor until the fruit has pureed and the mixture has formed a mass on the side of the processor.

Transfer the fruit paste to a parchment-lined 8x8 baking dish. Use wet hands or a rubber spatula to press the paste into the pan. Spread it evenly across the pan and smooth the surface out flat.

Press the paste into an 8x8 baking pan to shape the bars. Photo: Kate Williams

At this point, the bars will be too soft and sticky to cut, so it’s best to place the whole pan in the fridge to firm up for 30 minutes to an hour. Once the mixture is firm, pull the bars out of the pan (using the parchment as a handle) and transfer them to a cutting board. For Lara Bar-sized bars, cut into 12 even rectangles. If you’d like to get more creative, you can cut the bars into any shape you’d like.

For Lara Bar-sized bars, cut into 12 even rectangles. Photo: Kate Williams

Recipe: Smoky DIY Beef Jerky

Makes about 8 ounces

Note: This recipe is easily doubled. If doubled, you will need 2 cooling racks and 2 rimmed baking sheets.

    Ingredients:
  • 1 pound flank steak, trimmed of any large pieces of fat
  • 1 tablespoon kosher salt
  • 2 1/2 teaspoons Demerara sugar
  • 1 1/2 teaspoons smoked paprika
  • 1 1/2 teaspoons mild chile powder
  • 1/2 teaspoon chipotle chile powder, or more to taste
  • 1/2 teaspoon ground cumin
  • 1/2 teaspoon ground coriander
    Instructions:
  1. Place steak on a parchment-lined baking sheet and freeze, uncovered, until very firm (but before ice crystals form), 30 to 45 minutes.
  2. Meanwhile, mix the salt, sugar, smoked paprika, chile powder, chipotle chile powder, cumin, and salt together in a small bowl.
  3. Once the steak is firm, transfer it to a cutting board. Using a very sharp knife, slice the steak into 1/4-inch thick strips across the grain. (The grain is very easy to see on a flank steak; its long fibers (the grain) are distinct.) If the steak softens up too much as it is being cut, place it back in the freezer to re-firm for 15-20 minutes.
  4. Transfer the sliced steak to a medium bowl and coat thoroughly with the spice mixture. Rub the mixture into the steak using your hands. Cover the bowl and refrigerate for 24 hours.
  5. The next day, spray a cooling rack with nonstick oil spray or grease it with a little vegetable oil. Place the cooling rack inside a rimmed baking sheet. Preheat oven to its lowest temperature (aim for 200 to 225 degrees).
  6. Spread the steak slices across the cooling rack. The pieces can touch, but they shouldn’t overlap.
  7. Place steak in the oven and prop the oven door open with a wooden spoon. Bake the steak until the slices are dark, dry, firm, but still pliable, around 3 hours.
  8. Let jerky cool to room temperature and store in a ziplock bag. Homemade jerky will not last indefinitely; eat within a couple of weeks.

Recipe: DIY Fig and Pistachio “Lara Bars”

Makes 12 bars

Sponsored

Note: This recipe is easy to customize. You can substitute any variety of dried fruit for the figs and any combination of nuts and seeds for the pistachios and sesame seeds. You’ll need 1 1/2 cups dried fruit and 1 1/4 cups nuts. Feel free to play around with spices as well.

    Ingredients:
  • 1 1/2 cups dried figs
  • 1 cups pistachios
  • 1/4 cup sesame seeds
  • 1/4 teaspoon ground cardamom
  • Large pinch sea salt
    Instructions:
  1. Line an 8x8 pan with parchment paper, leaving at least a 2 inch overhang over two sides to act as a sling.
  2. If figs are somewhat dry, soak them for 10 minutes before making bars: Bring a kettle of water of a boil. Place figs in heatproof bowl, and cover with boiling water. Let sit for 10 minutes and then drain well.
  3. While the figs are soaking, combine pistachios and sesame seeds in a food processor. Pulse the nuts and seeds until they are ground into a chunky meal. The pieces will not get much smaller once the figs are added, so be sure to pulse the nuts and seeds until they’ve reached your desired texture.
  4. Add the soaked and drained figs, cardamom, and salt to the food processor. Continue to pulse until the mixture turns into a stiff paste and forms a ball on the side of the processor.
  5. Transfer the paste to the prepared pan and press until the mixture is pressed into a smooth, even rectangle. Refrigerate for 30 minutes, or until firm.
  6. Remove the fig mixture from the pan using the parchment paper sling. Transfer to a cutting board and slice into 12 rectangular bars. Wrap each bar individually in parchment paper and store in an airtight container. Bars will keep for at least 2 weeks.

lower waypoint
next waypoint
Samosas aren’t from India…Wait, what?Springtime Delight: Rhubarb Puff-Tart PocketsFood Labeling: How to Identify Conventional, Organic and GMO ProduceCheck, Please: How to Pay without looking like a fool or making everyone uncomfortable.Josey Baker Bread: Baking for Bros, with Gluten-Free Adventure Bread RecipeWe Recreated an It's-It Ice Cream Sandwich at Home — With an Oakland Twist.Bored of Apples and Walnuts? Try Adding Date Charoset to Your Passover Table This YearTaste Test: Store-bought Raw Sauerkrauts are Surprisingly DistinctiveDIY Bone Broth - You Really Should be Making It at HomeFromage de Chat (aka Cat Milk Cheese)