upper waypoint

Learn How To Butcher, Smoke and Can a Whole Fish with Chef Neil Davidson

Save ArticleSave Article
Failed to save article

Please try again

Admit it: When faced with fish, you buy fillets. But why? Is it the face? The fins? Fear of scales? Fear of bones? Well, get over it. Now that our local sport and commercial salmon fishing season is open, you might very well find yourself tempted--or treated--to a whole fish, and when that happens, it's handy to know how to handle it.

Chef Neil Davidson filleting a whole salmon. Photo: Wendy Goodfriend

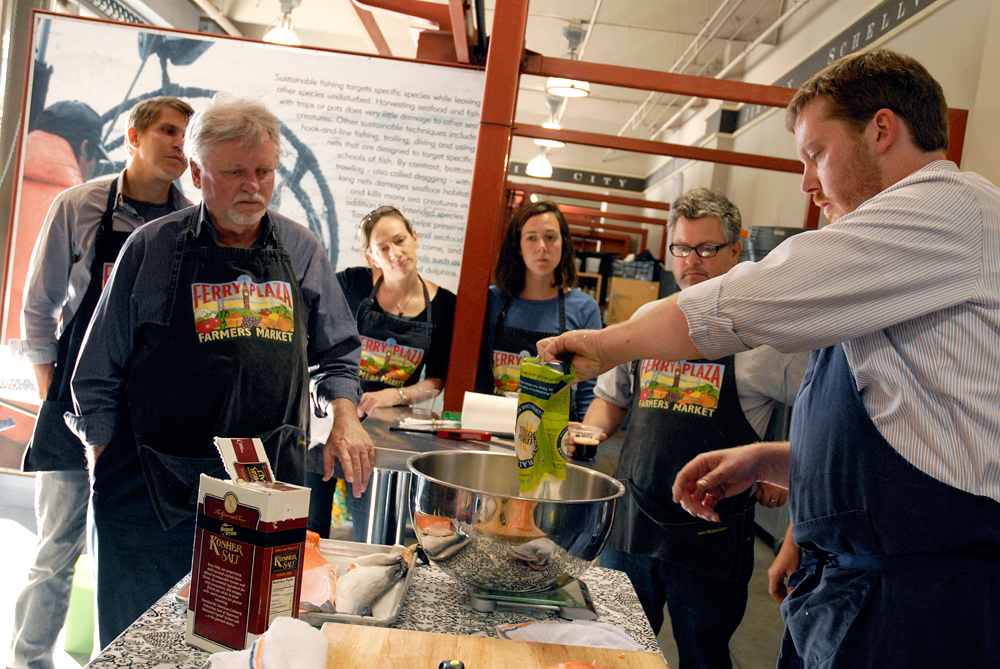
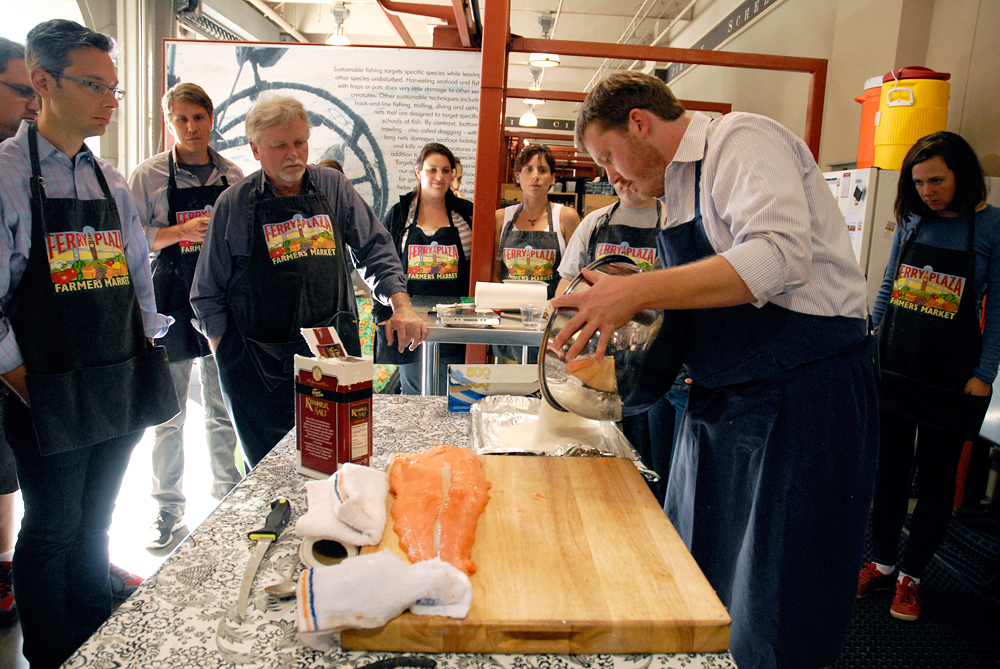
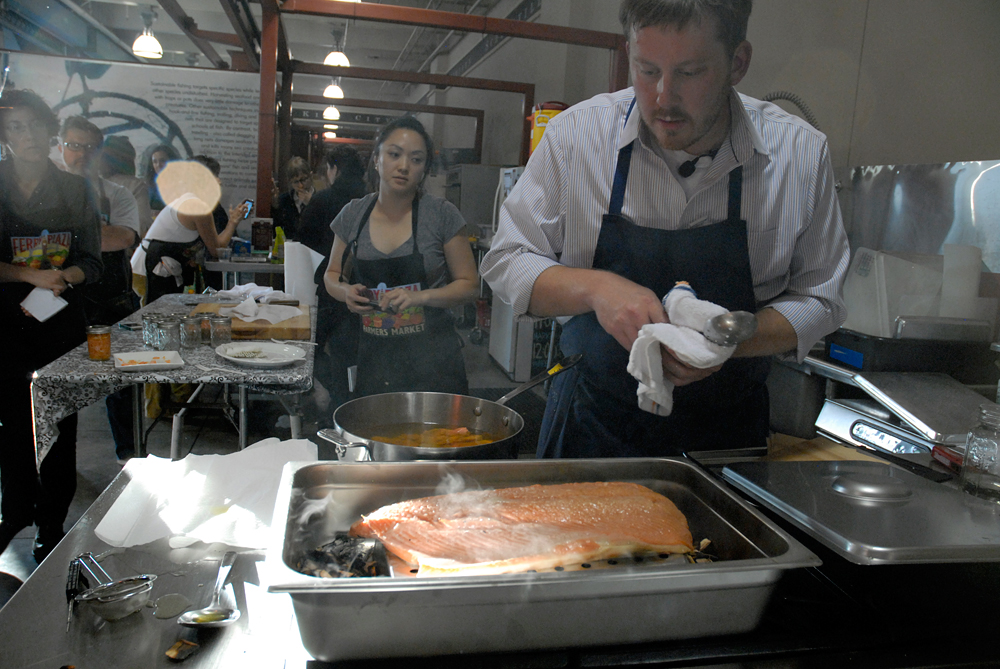
It's also much more economical, and sustainable, to feed yourself nose-to-fin on a whole wild fish. Maria Finn, Bay Area Bites writer, former commercial salmon fisherwoman, and author of The Whole Fish: How Adventurous Eating of Seafood Can Make You Healthier, Sexier, and Help Save the Ocean recently teamed up with chef Neil Davidson of Mission Gastroclub and the Whip Out food truck to teach a hands-on class in scaling, filleting, preserving, and smoking whole fish at home.

Maria Finn and Neil Davidson teaching Whole Fish Fabrication and Preservation Class. Photo: Wendy Goodfriend

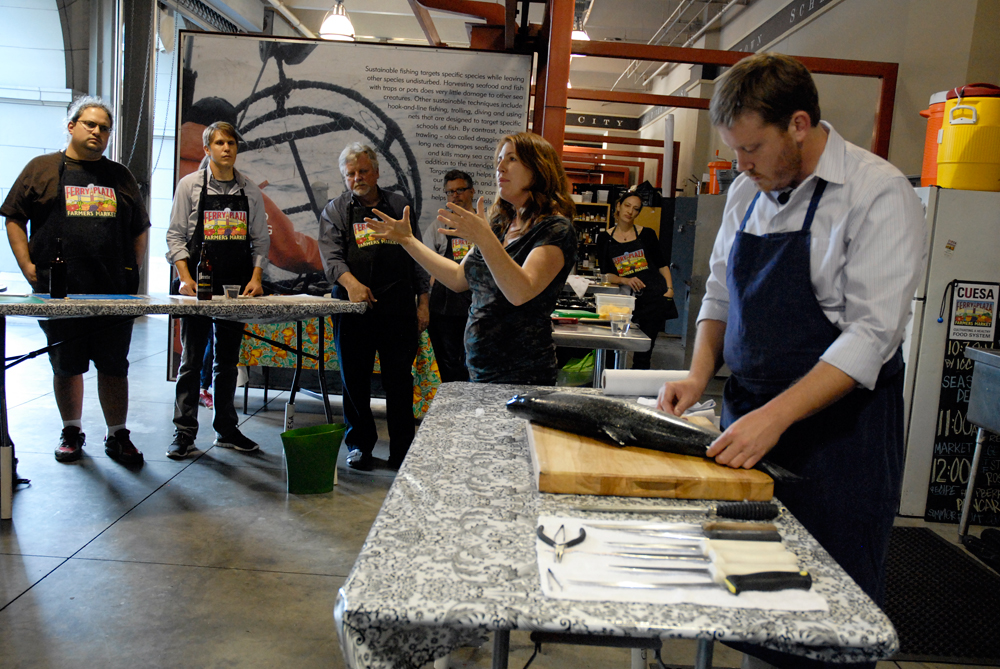
The class, presented by the Center for Urban Education about Sustainable Agriculture (CUESA) and Urban Kitchen SF, was held from 5:30 to 7:30pm last Thursday in CUESA's outdoor kitchen, under the porticos of the Ferry Building. It's not the most comfortable place for a cooking class; it's outside, after all, and instructions can be hard to hear over traffic noise as cars, trucks, and motorcycles screech and toot their way along The Embarcadero just yards away.

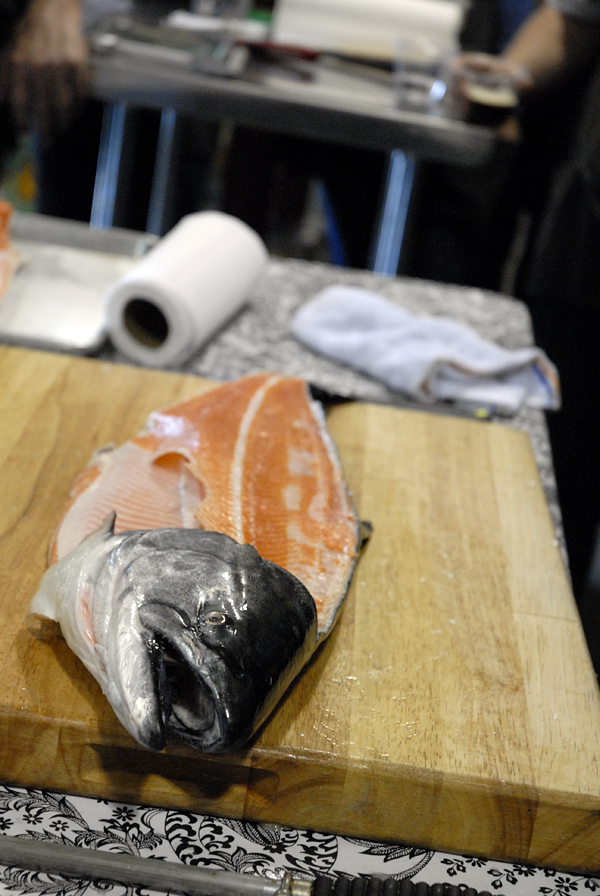
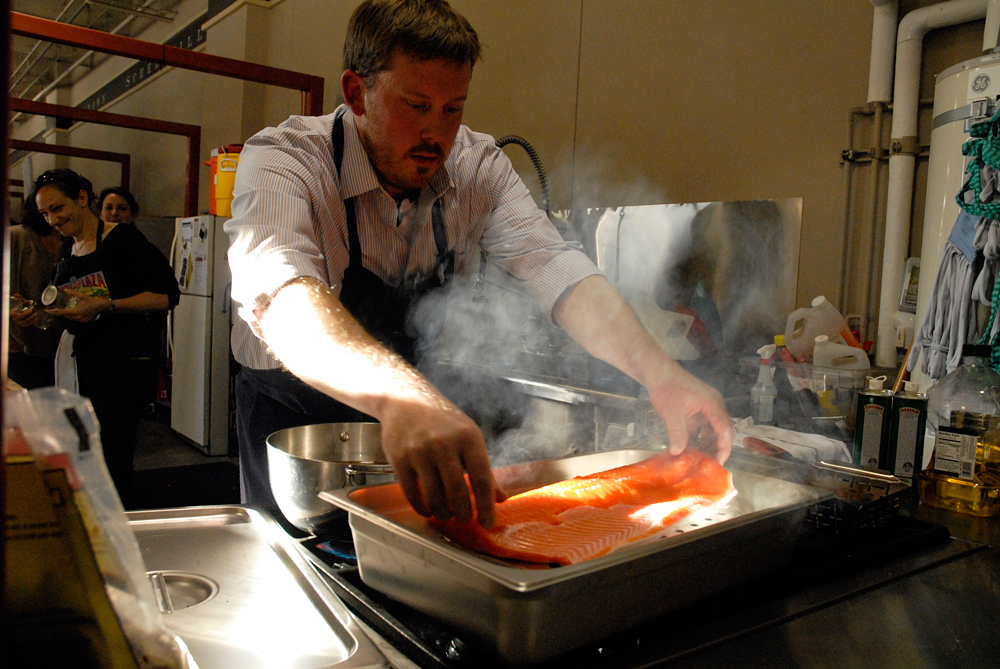
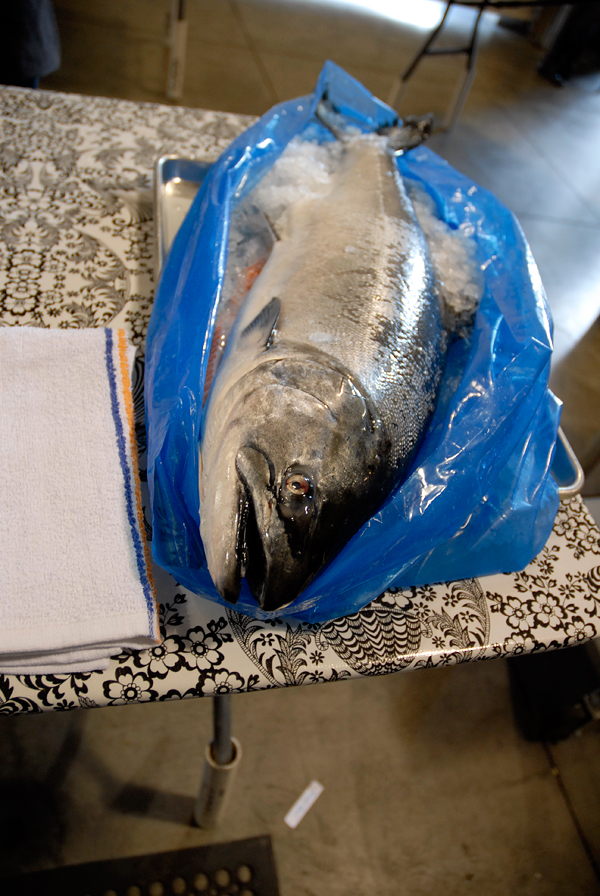
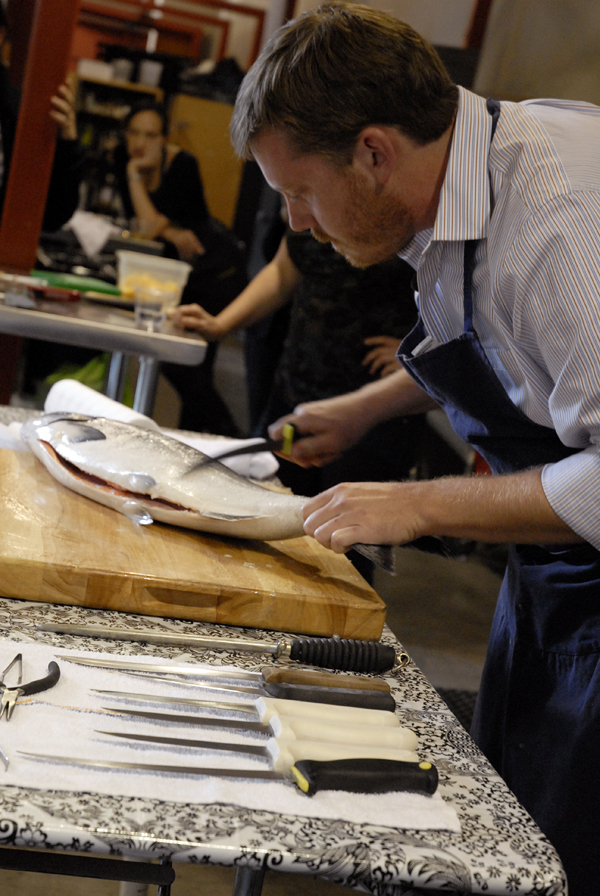
Still, it's hard not to be entranced by the massive, silvery whole salmon laid out in front of Davidson. This is the creme de la creme of Pacific Coast salmon: a wild king, fresh from the ocean just north of Sonoma County. Of course, as Finn points out, tasty, healthful dishes can be made from all five of our local salmon types, including pink, chum, silver, and sockeye. But for superlative texture and flavor, the king is king.

Whole King Salmon. Photo: Wendy Goodfriend

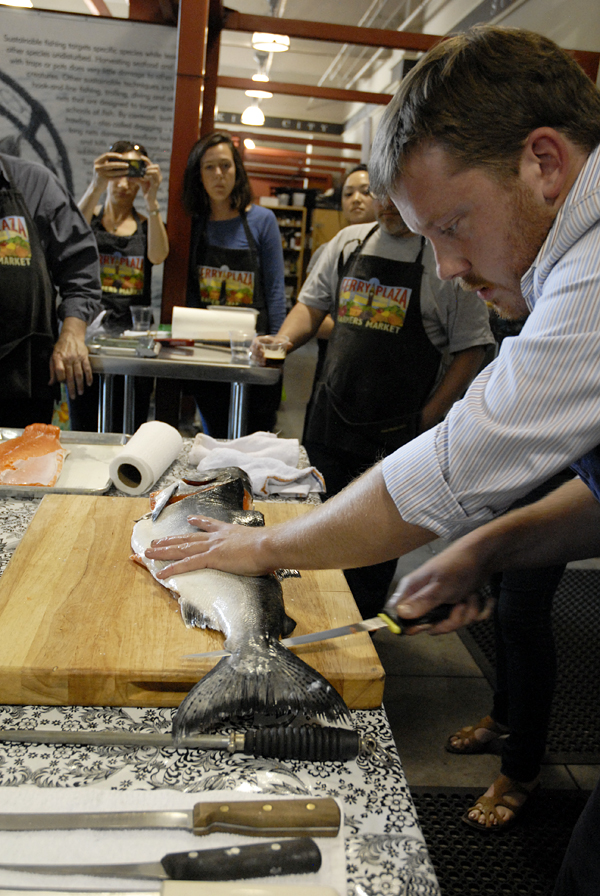
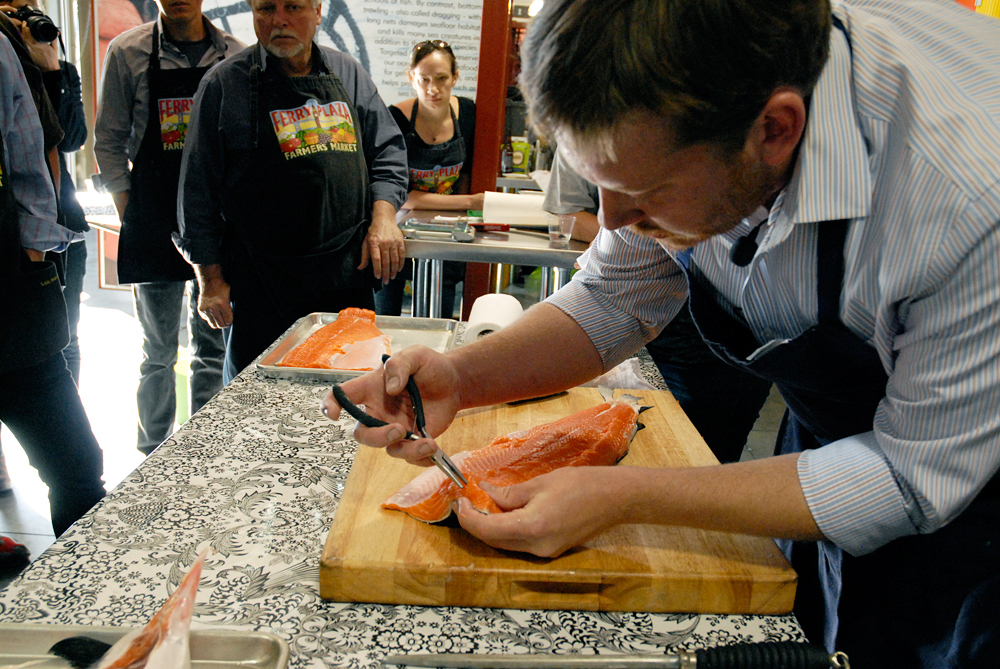
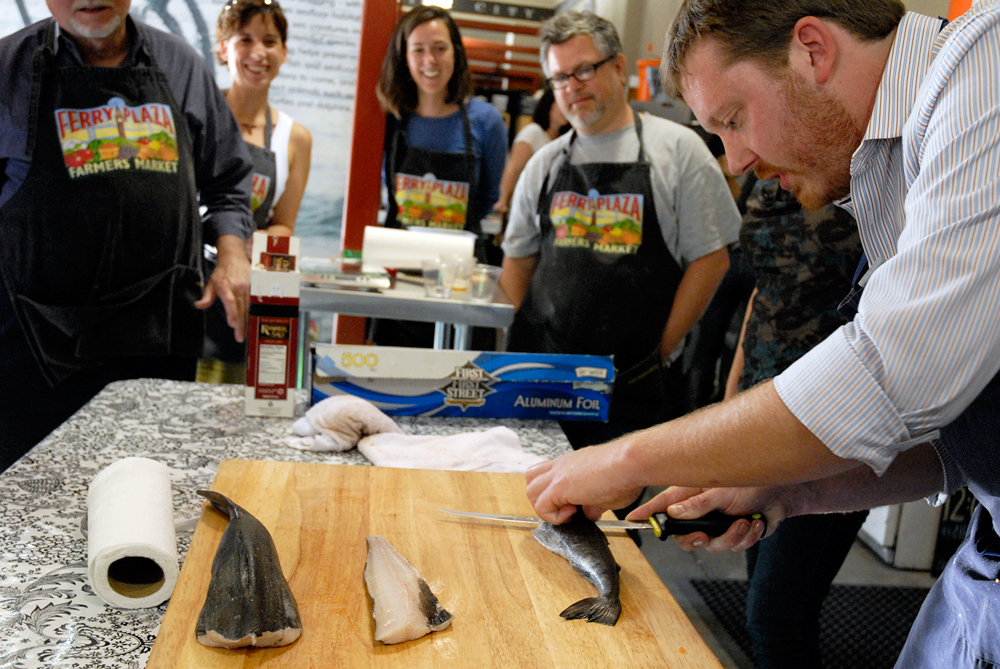
Davidson goes over the fish, telling us what to look for when choosing a fish: eyes that look clear and full, still sitting high in the socket, not sunken into the head; no cuts or slashes on the body; fins that are still in good shape. This fish has already been gutted, so there's just a neat cavity where the guts would have been. Picking up a thin, flexible, slightly curved filleting knife, Davidson quickly scrapes off the scales using the back (dull side) of the knife. This is a job to do outside, if possible, since the small, mica-like scales will pop off and fly everywhere.

Chef Neil Davidson removing scales from a whole salmon. Photo: Wendy Goodfriend

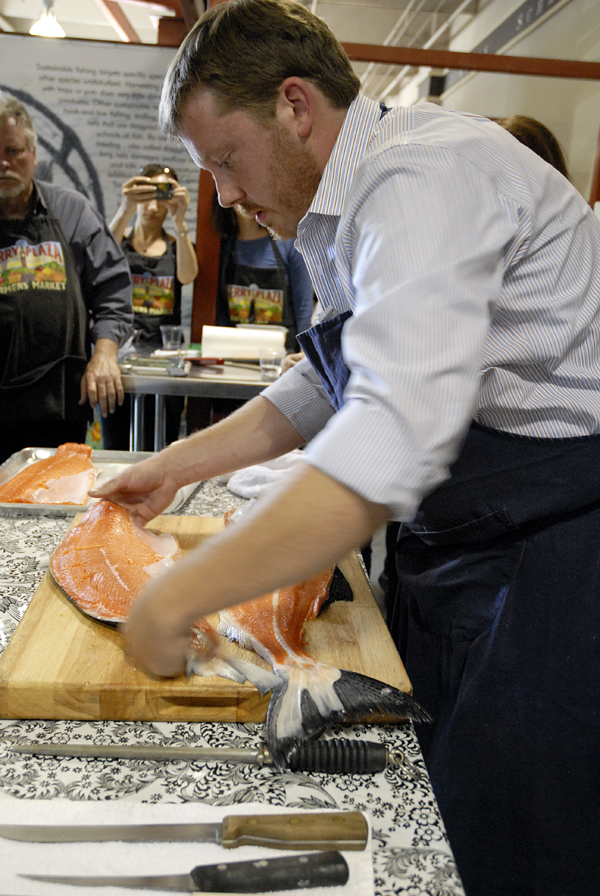
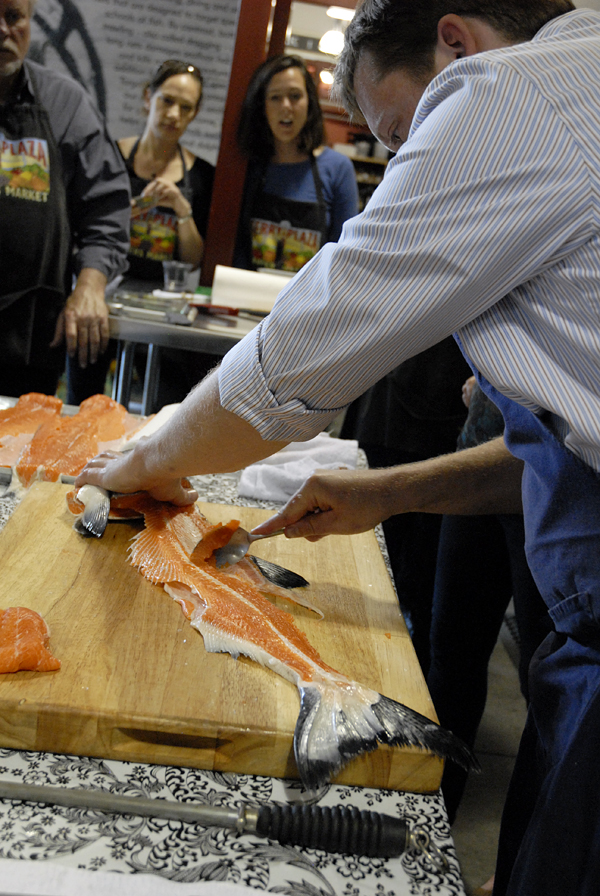
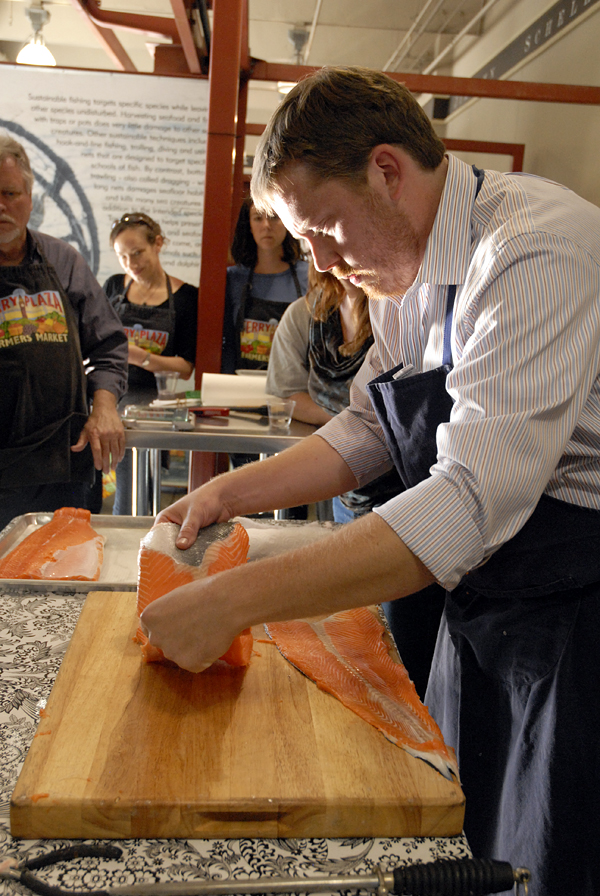
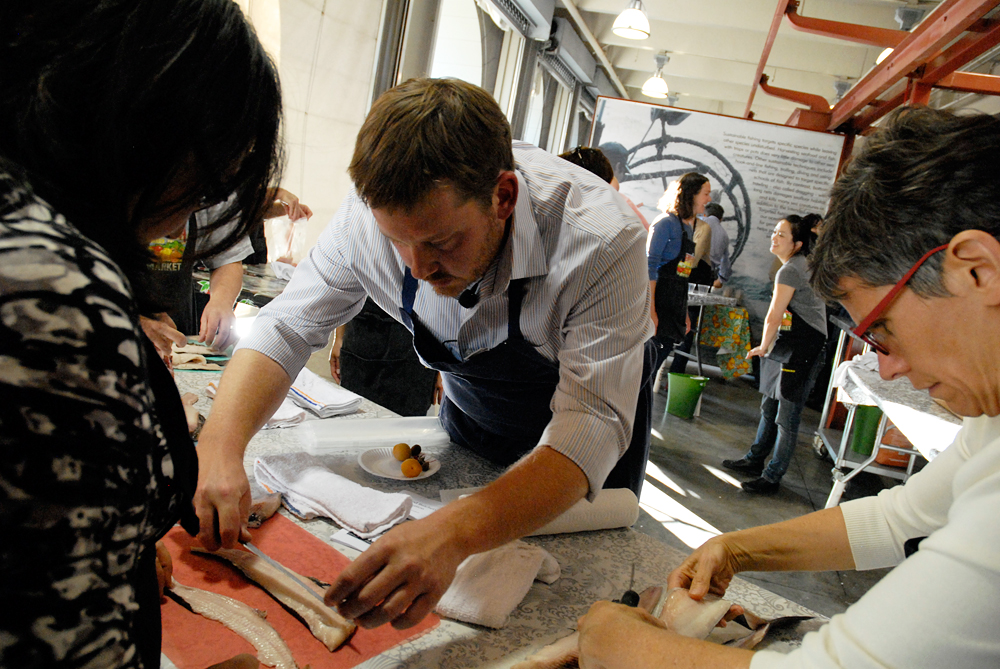
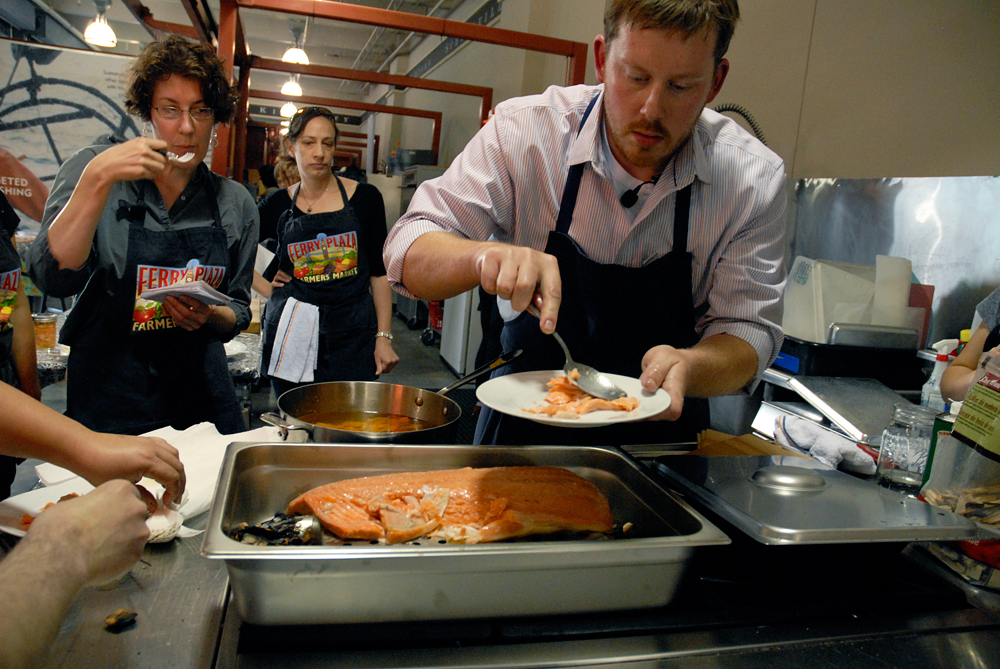
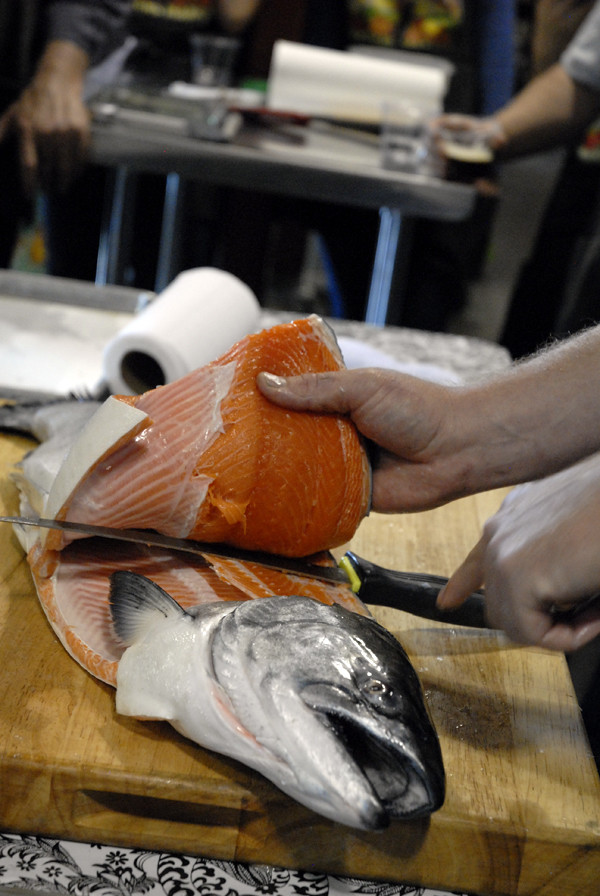
Once the fish is scaled, Davidson crunches his knife through the spine just behind the head, then slides it across the broad flanks of the fish along the ribs and spine all way to the tail, effortlessly freeing the whole long stretch of flesh from the bones. It looks easy only because he's been doing it professionally for years, from cooking school in Portland, OR to stints at The French Laundry and Ad Hoc. But, as he points out, the knife should be doing most of the work for you; what he's doing is mainly guiding it over the bones, following the structure of the fish. Angle the knife slightly downward, so that it won't cut up and into the flesh.

Chef Neil Davidson demonstrates filleting the king salmon. Photo: Wendy Goodfriend

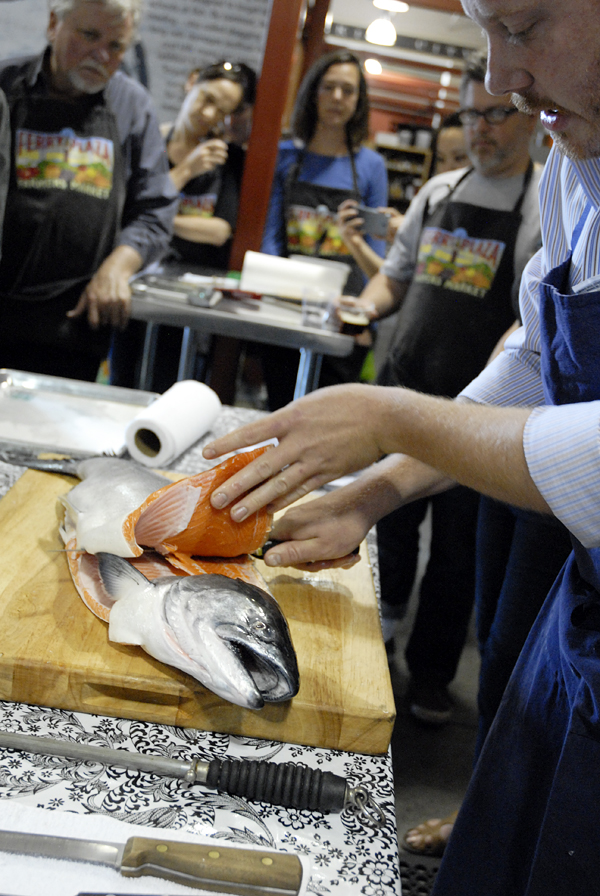
Filleting whole salmon side by Chef Neil Davidson. Video by Stephanie Rosenbaum

Sponsored

Along the bottom of each fillet is the belly meat, thickly streaked with white fat. As Finn points out, it's delicious (and full of beneficial omega-3 fats) but less meaty, which means it's often sliced off and discarded by fishmongers.

Salmon with one side filleted. Photo: Wendy GoodfriendChef Neil Davidson fillets other side of salmon. Photo: Wendy GoodfriendChef Neil Davidson displays cut fillet of salmon. Photo: Wendy Goodfriend

Once he's freed up both sides, he points out the other delicious bits still left: the thick ring of flesh just behind the head, known as the collar, that makes for a delicious roast, since it's so fatty; the cheeks; the flesh you can scrape from the bones with the edge of a spoon and use for salmon patties or croquettes. The head, boiled with ginger and seaweed, makes a good broth that can be mixed with miso for a Japanese-styled soup.

Chef Neil Davidson uses a spoon to scrape remains of salmon from bones to use for fish patties. Photo: Wendy Goodfriend

With needle-nose pliers (or bone tweezers), Davidson quickly yanks out the pin bones studding the fillet. For smoking, he'd leave the bones in, to help preserve the shape of the fish, but for grilling or poaching, fewer bones are preferable.

Chef Neil Davidson uses needle-nose pliers to remove pin bones from salmon. Photo: Wendy Goodfriend

Today, we're putting the fillets through a quick cure, to pull out some of the liquid before poaching. If you've ever made bacon, the process will be familiar. The cure is equal parts (by weight) of salt and sugar. Finn notes that some native tribes in Alaska add pine tips to their cures; this being Mediterranean-minded San Francisco, Davidson adds some shreds of preserved Meyer lemon rind to his. Davidson skins the fillet before curing; without the skin, the fish will cure faster.

Chef Neil Davidson  demonstrates how to cure the fish. Photo: Wendy GoodfriendChef Neil Davidson  demonstrates how to cure the fish. Photo: Wendy Goodfriend
Chef Neil Davidson demonstrates how to skin the fish. Photo: Wendy GoodfriendChef Neil Davidson demonstrates how to skin the fish. Photo: Wendy GoodfriendChef Neil Davidson demonstrates how to skin the fish. Photo: Wendy Goodfriend

To skin it, he lays the side of fish skin side down, close to the edge of the counter. He cuts straight down through the flesh (but not through the skin) about half an inch from the tail, making a little tab of skin to hold onto with the hand that's not holding the knife. Holding one end of skin taut as you cut helps steady the fish and make it easier to get all the way down to that sweet spot right between the flesh and skin. Then, he slides the knife parallel to the counter, cutting the flesh free from the skin in one steady motion.

Skinning a Whole Side of Salmon. Video by Stephanie Rosenbaum

    A few tips:

  • Take as few strokes with the knife as you can, and make sure they're long
  • Glide your knife through, don't saw up and down
  • Listen through your fingers and pay attention to what your knife is telling you
  • In my experience, if it feels like you're doing it perfectly, stop and take a look: You're probably missing the skin entirely and are just blithely sliding your knife between the fish and the counter
  • If you're planning to smoke your fish, leave the skin on, to protect the fish and make it easier to move in one piece

We get to practice our filleting and skinning, not on salmon, but on smaller, less expensive (and more approachable) black cod, each roughly the size of a trout. Finn assures us that black cod is also a great candidate for curing, poaching, and smoking.

Chef Neil Davidson demonstrates filleting black cod. Photo: Wendy GoodfriendChef Neil Davidson helps students butchering whole black cod. Photo: Wendy GoodfriendStudents in class working on butchering whole black cod. Photo: Wendy Goodfriend

To cure, Davidson lines a sheet pan with plastic wrap or aluminum foil, spreads out a thick layer of the salt/sugar mixture, tops it with the skinned fillet, then covers the fish with the rest of the mixture. Then goes into the fridge, ideally for one hour for every inch of thickness. If you're planning to smoke your fish, once the fish is cured, rinse off the salt/sugar mixture, pat the fish dry, and return the fish to rest in the fridge, uncovered, overnight. The surface will dry out and feel slightly tacky; the fish will take the smoke best like this.

On the stove, Davidson has been heating up a wide saucepan half-filled with olive oil, bringing it up to a temperature between 160-180ºF. Once the fish is cured, it's rinsed off, patted dry, then slipped into the warm oil to poach. In five minutes, the fish has paled and gone from translucent to opaque. Once it flakes easily, it's done. Scooped out of the oil, it's packed firmly into clean canning jars, to just below the lowest "ridge" of the screw-top indentations. The cooking oil (no need to use extra-virgin; a decent pure olive oil is fine) is poured through a fine-mesh strainer to completely cover the fish and fill the jar. Using a skewer, poke through the jar and make sure there are no air bubbles. Cover with canning jar lids and rings. It's best to store home-canned fish in the refrigerator. As long as the fish is thoroughly covered in oil, it can last for several months.

Poaching salmon in olive oil. Photo: Wendy GoodfriendCanning poached cured salmon. Photo: Wendy GoodfriendThe canned salmon steaming. Photo: Wendy Goodfriend

Davidson packs a few jars to demonstrate, then fills a plate for us to taste. It's moist, mild, and rich, much better than any store-bought canned salmon I've ever tasted.

Next, we move on smoking. Like scaling, this is best done outside, since the smoke from both the charcoal and the wood chips will smoke up any kitchen not equipped with near-professional quality vents over the stove (and plenty of windows). Using a perforated grilling tray, Davidson gets some charcoal glowing over the burner of the outdoor stove, then spreads it over the bottom of a heavy, 6-inch deep hotel pan. He tosses a handful of wood chips in another perforated tray, gets them burning, then douses them lightly with water to put out the flames, leaving them smoking. The smoking chip pan goes over the charcoal. Another perforated pan goes upside down over the chips and charcoal, and the salmon is laid out on top. A lid goes over the pan, and voila: it's a hot-smoking smoke box, which will cook and smoke the fish.

Stovetop preparations to poach and smoke salmon. Photo: Wendy GoodfriendChef Neil Davidson smoking the salmon on the stovetop. Photo: Wendy GoodfriendThe finished smoked salmon. Photo: Wendy Goodfriend

Two or three times, Davidson adds more smoking wood chips, slipping them onto the charcoal at the bottom of the pan. At 145-150ºF, the fish is cooked, lifting easily off the skin and with a lacquered-looking amber surface. He slides the fish onto a plate, and in moments, the heap of warm-from-the-smoker salmon is demolished, down to a smudge of oil and a few stray pin bones.

Chef Neil Davidson serves up the smoked salmon to enthusiastic students. Photo: Wendy Goodfriend

Recipe: Cured and Olive-Oil Poached Black Cod

Sponsored

Black cod, also known as sablefish, is less expensive than salmon, but has a firm, rich flesh that's well-suited to oil-poaching and canning. Recipe courtesy of Neil Davidson.

    Ingredients:
  • 1 black cod filet (1-2 lbs), skin removed
  • 1 cup sea salt
  • 1 cup granulated sugar
  • 4 cups olive oil
    Instructions:
  1. Make the cure by mixing the salt and sugar together. Line a tray long enough to hold the whole filet with plastic wrap. Put a thick layer of cure on the plastic. Lay the filet on the cure and cover with remaining cure, so that filet is fully covered. Refrigerate for 30 minutes; typically, you want to cure fish one hour for every inch of thickness.
  2. While the cod is curing, heat oil in a wide saucepan to 180ºF. Rinse cure off fish and pat dry. Add the fish to the hot oil. (It's fine to cut the filets to fit them in the oil.) Keep the oil between 160-180ºF. The fish should be cooked in no more than 2 minutes.
  3. Pack the fish firmly into clean canning jars. Strain the hot cooking oil into the jars, making sure the fish is completely covered and that there are no air pockets. The canned fish will keep in the refrigerator for two to three months, as long as the fish is kept completely covered in oil.

lower waypoint
next waypoint
Samosas aren’t from India…Wait, what?We Recreated an It's-It Ice Cream Sandwich at Home — With an Oakland Twist.Springtime Delight: Rhubarb Puff-Tart PocketsFood Labeling: How to Identify Conventional, Organic and GMO ProduceLGBT Pride: Remembering The Brick Hut Cafe - Part 1Cast Iron Skillet Cooking: Chicken Marbella recipeStore-Bought Ramen Noodles: You Don’t Always Get What You Pay ForGuide: Five Frozen Meals That Are Better Than You ThinkBored of Apples and Walnuts? Try Adding Date Charoset to Your Passover Table This YearCheck, Please: How to Pay without looking like a fool or making everyone uncomfortable.