That pot of oil is not going to spontaneously combust, as long as you use general kitchen common sense. Never leave the room with oil heating on the stove. Depending on your stove, it can take 10-12 minutes to bring a pot of oil up to the correct temperature. Check the oil's temperature frequently with your thermometer, and adjust the heat accordingly. Just washed sticky batter off your hands? Make sure your hands are absolutely dry before you get near that hot oil, as even a drop of water can make it sputter and spit in your face. Once you start frying, it shouldn't take longer than 2 to 3 minutes to finish a batch.
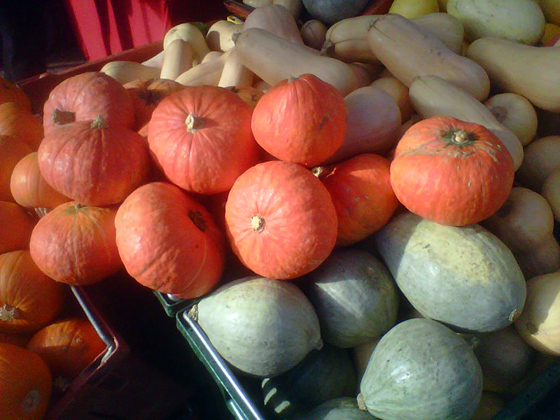
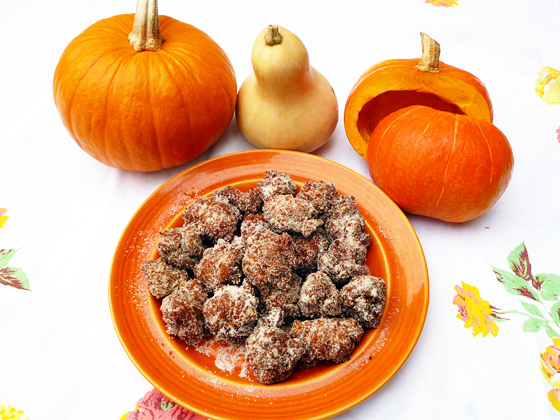
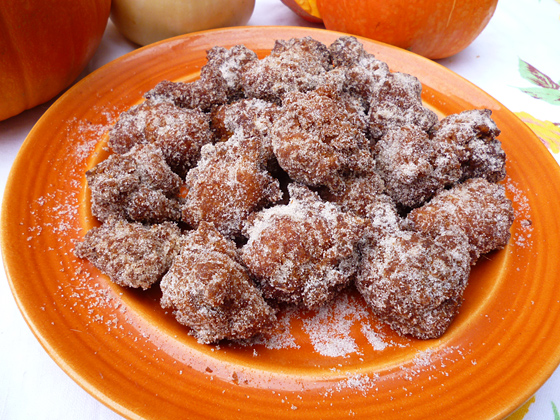
These pumpkin doughnut holes taste like fall to me, especially with some cold or hot mulled cider to wash them down. (Look for Rainbow Orchards' delicious, freshly pressed apple cider at farmers' markets around the Bay Area.) While you could use canned pumpkin in these, you'll have more fun and get a tastier result using pumpkin or winter squash you roast and mash yourself. Butternut and Sunshine kabocha squash are my favorites, but any dense-fleshed, flavorful squash will do.

Cut the squash in half lengthwise, then scrape out any strings and seeds. Place the squash face down on a lightly oiled or parchment- or Silpat-lined baking sheet and bake at 350°F for approximately 45-60 minutes, until the squash is very soft. When squash is cool enough to handle, scrape out flesh, discarding skin. Pile squash into a colander or sieve and let any excess liquid drain out for an hour or so. Some squash is really wet; others, not at all. It really depends on the squash, its growing conditions, and how long it's been off the vine.
Once squash has drained, it's time to make it smooth. The best way to do this is by cranking it through the fine disk of a food mill. Unlike a food processor, which just pulverizes everything, the food mill catches and separates any errant seeds, skin, and strings while quickly turning your squash into a velvety puree. You can also push your squash through a metal mesh strainer with a wooden spoon. Same effect, but it takes longer, and mashing, pushing, and scraping is less satisfying than cranking. Of course, you can just grab a potato masher or a wooden spoon and beat it smooth.
Any extra can go into soup, or be used as a base for pumpkin bread. I've been throwing a few spoonfuls into my buckwheat pancake batter all week. Covered and refrigerated, your squash puree should last at least a week.

Pumpkin Doughnut Holes
I've suggested a variety of flours here; you can use regular all-purpose white flour, a combination of white flour and whole-wheat pastry flour, or even a wheat-free mixture of oat and barley flours. I haven't tested this recipe with any gluten-free flour mixes, but I imagine they would probably work quite well. (If you do try this recipe using gluten-free flour, please post your feedback in the comments below.) You can also substitute 2 teaspoons of pumpkin pie spice for the mixed spices.
Prep Time: 15 minutes
Cook Time: 10 minutes
Total Time: 25 minutes
Yield: About 36 doughnut holes
Ingredients
2 cups all-purpose flour; 1 cup all-purpose flour and 1 cup whole wheat pastry flour, OR 1 cup oat flour and 1 cup barley flour
2 teaspoons baking powder
1/4 teaspoon salt
1/2 teaspoon ground cinnamon
1/2 teaspoon freshly grated nutmeg
1/4 teaspoon ground cloves
1/4 teaspoon ground ginger
2 tablespoons butter
1/2 cup sugar
1 large egg
1 teaspoon vanilla extract
1/4 cup plain yogurt or buttermilk
3/4 cup roasted and mashed pumpkin or winter squash
Vegetable oil for frying
Cinnamon sugar for dusting (1/2 cup sugar mixed with 1/2 teaspoon cinnamon)
Preparation
1. In a Dutch oven or other deep, heavy pot, heat 2 to 3 inches of oil over medium-high heat to 365°F on a candy or deep-frying thermometer. Pour the cinnamon sugar into a wide, shallow bowl or brown paper lunch bag. Line a baking sheet with two layers of paper towels.
2. While oil is heating, sift or whisk together the flour, baking powder, baking soda, salt, and spices into a large bowl.
3. Using a hand-held electric mixer or stand mixer, cream the butter and sugar. Add the egg, buttermilk, vanilla, and pumpkin, beating until smooth.
4. Add the flour mixture and mix gently on low speed until just combined, stopping once or twice to scrape down the sides of the bowl with a rubber spatula.
5. Dip two metal spoons into the hot oil. Scoop up a tablespoon of dough with one spoon, pushing it off into the hot oil with the other spoon. Continue to drop spoonfuls of dough into the hot oil in batches, being careful not to crowd the pan. Fry for 60 to 90 seconds per side, until golden brown and cooked through. Break open a “test doughnut” from the first batch to make sure the doughnuts are cooking correctly; adjust the heat level of the oil as needed.


