upper waypoint

Rainy Day Cooking: Boston Brown Bread

Save ArticleSave Article
Failed to save article

Please try again

Boston brown bread ingredients

So you thought you could put away the sweaters and pull out the tank tops, did you? Well, no whining. Remember all that basking you did in January? We need this rain, and it's also the last wintery chance to hunker down inside with a fat book and something really good burbling away on the stovetop. Something belly-filling and sturdy, like lentil, black bean, or split-pea soup, all started with a little pancetta or a chunk of ham hock.

Or, for oomph without the oink, a spoonful of Spanish pimenton (smoked paprika) and a handful of Tierra Vegetables' dried smoked onions--what they've dubbed "vegan bacon" for their savory, smoky punch. (Look for them at their farm stand in Santa Rosa or at their booth at the Ferry Plaza farmers' market on Saturday.)

Once you've got your soup, of course, you need bread. Now, the Bay Area is just lousy with fabulous bread. All by itself, the counter of Acme Bread can bring tourists to tears, or at least pitch them into a levain-noshing frenzy. But for the sweetest, most warming, baby-it's-cold-outside experience, you have to make your own. Now, in a future post, I'm going to tell you about baking locavore bread, using a levain starter made from Eatwell Farm's locally-grown wheat, with all the ingredients, even the salt, easily sourced from not too far away. But my starter is still a baby, only a few dozen hours old, its yeasty colonies not tough enough to lift even a little tiny pancake yet.

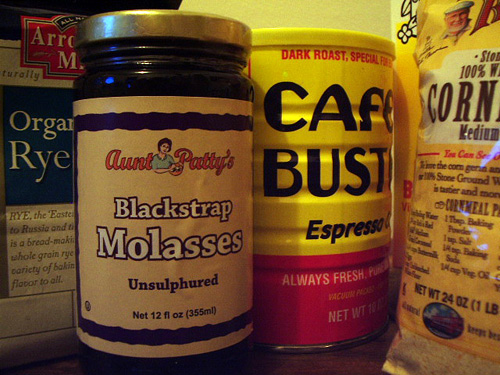
Until then, what you want is something distinctly non-local, as East Coast as a Red Sox cap or a lobster roll spilling from a toasted Pepperidge Farm bun. Yes, I'm talking about Boston brown bread. Hardly any of my San Francisco pals know from this old-fashioned treat; they're too busy chomping asparagus foccacia or folding injera around their spicy doro waat. By comparison, Boston brown bread is homely, a little dumpy, even. Like any recipe that uses an empty coffee can instead of a baking pan, it has an undeniable whiff of 1950s Fannie Farmer to it.

Sponsored

But you know what? It's good. In fact, it's really, really good, and good for you, too, packed with whole grains and rich in iron and fiber. Because it's steamed, not baked, it comes out completely moist without any added fat. A good thing, too, since the best way to eat it is slathered in cream cheese. Think of the best bran muffin you've ever had, then think of Amy Adams curled up in your lap, laughing at your jokes and feeding it to you bite by bite.

And did I mention that it's completely easy? Seven ingredients, one bowl, one spoon, and a couple of coffee cans. Actually, the hardest part may be getting the coffee cans, now that nothing but Peets/Blue Bottle/Four Barrel/Ritual Roasters will pass our lips. Then again, haven't you heard that Cafe Bustelo is the new PBR?

Admit it: you liked it back in your five-roommates-in-a-drafty-Victorian days, brewed up strong and cheap so you could make it onto the 33-Stanyan at any hour, day or night.

So drink up, then grease up. And remember to top each filled can with a little shower cap of foil or waxed paper, so it can rise without getting wet from the steam drips inside the pot.

Boston Brown Bread
Well wrapped, this stays tasty and moist for several days. It also freezes very well.

Makes: 2 loaves

Ingredients:
1 cup corn meal
1 cup whole wheat flour
1 cup rye flour
3/4 tsp baking soda
1 tsp salt
2 cups buttermilk
3/4 cup molasses
1 cup raisins

Preparation:
1. Generously grease 2 clean 12-oz coffee cans. Fill a deep pot (big enough to accommodate both cans) approximately 1/3 full with water. Bring to a boil over high heat.

2. While water is heating, stir dry ingredients together. Add buttermilk, molasses, and raisins. Stir gently until you have a thick, smooth brown batter.

3. Divide batter between prepared coffee cans. Top each can with a sheet of buttered aluminum foil or waxed paper, and tie down firmly with string or a rubber band. Put cans into pot of boiling water; water should come about half-way up cans.

4. Lower heat to a simmer, cover, and steam for 1 1/2 hours.

5. To test for doneness, remove 1 can from pot, remove foil, and stick a toothpick into the middle. Toothpick should come out nearly clean-if not, re-cover and steam for an additional 10 -15 minutes. When done, remove cans from water with tongs or two pot holders, remove foil, and let cool on a rack for at least 15 minutes before unmolding.

lower waypoint
next waypoint
Samosas aren’t from India…Wait, what?We Recreated an It's-It Ice Cream Sandwich at Home — With an Oakland Twist.Springtime Delight: Rhubarb Puff-Tart PocketsFood Labeling: How to Identify Conventional, Organic and GMO ProduceLGBT Pride: Remembering The Brick Hut Cafe - Part 1Bored of Apples and Walnuts? Try Adding Date Charoset to Your Passover Table This YearBay Area Bites Guide to 7 Exceptional Japanese Izakayas in the East BayRobots Are Trying To Pick Strawberries. So Far, They're Not Very Good At ItEnding It All: How to Finish Your DinnerThe new Caffe 817 in Old Oakland