upper waypoint

Halloween Treats: Candy-Dipped Marshmallow Pumpkin Pops

Save ArticleSave Article
Failed to save article

Please try again

Candy-Dipped Marshmallow Pumpkin Pops (Wendy Goodfriend)

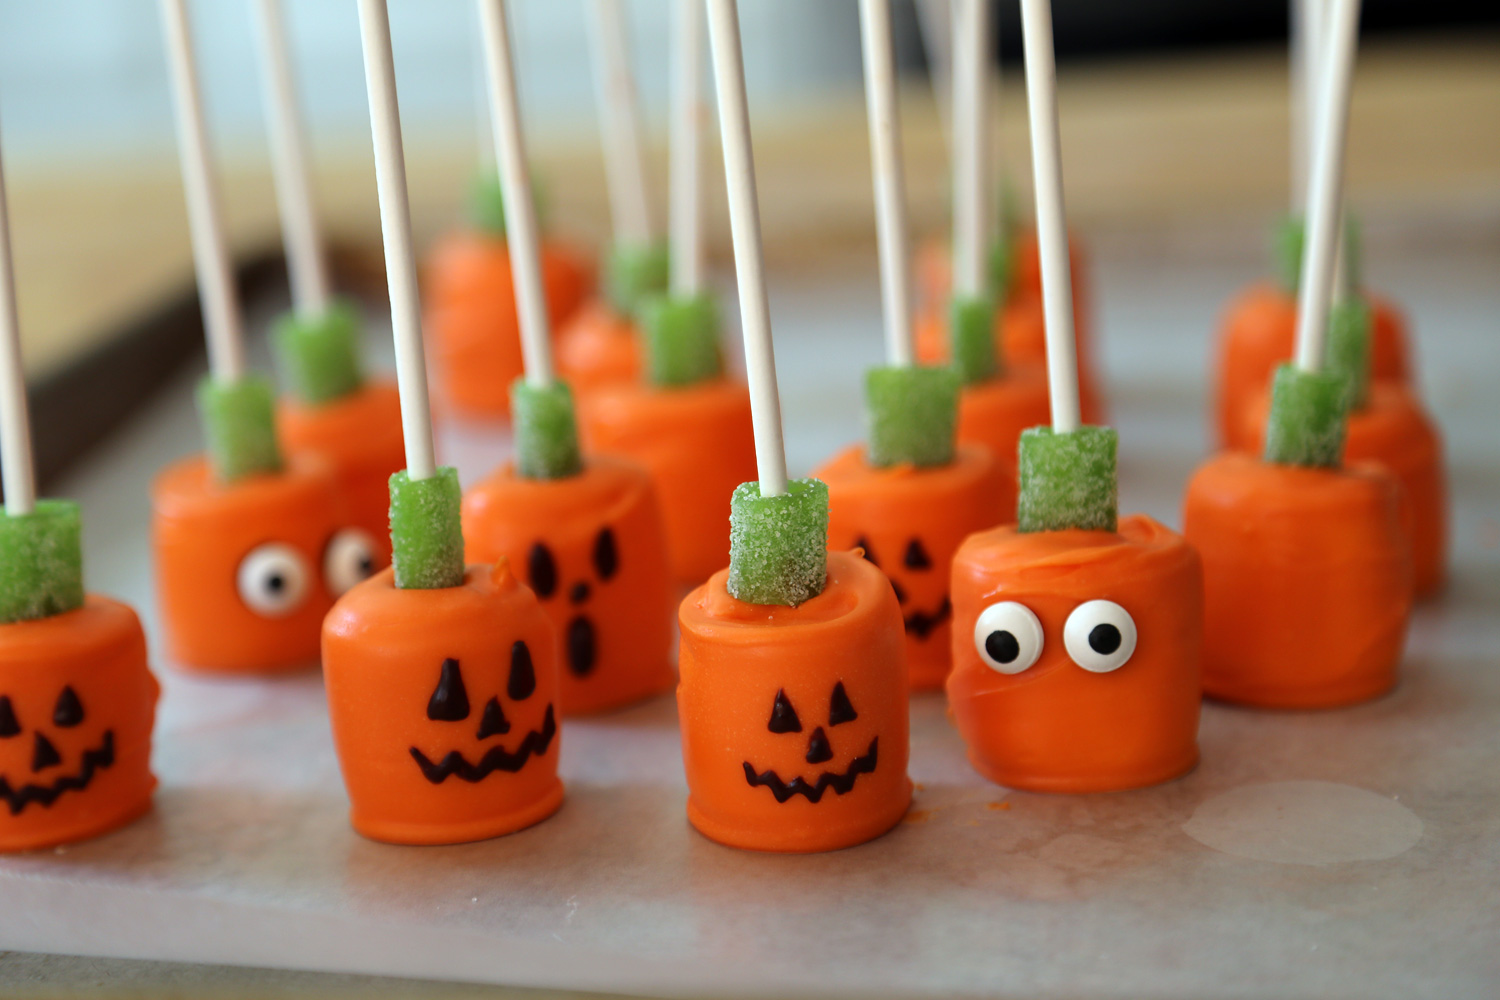
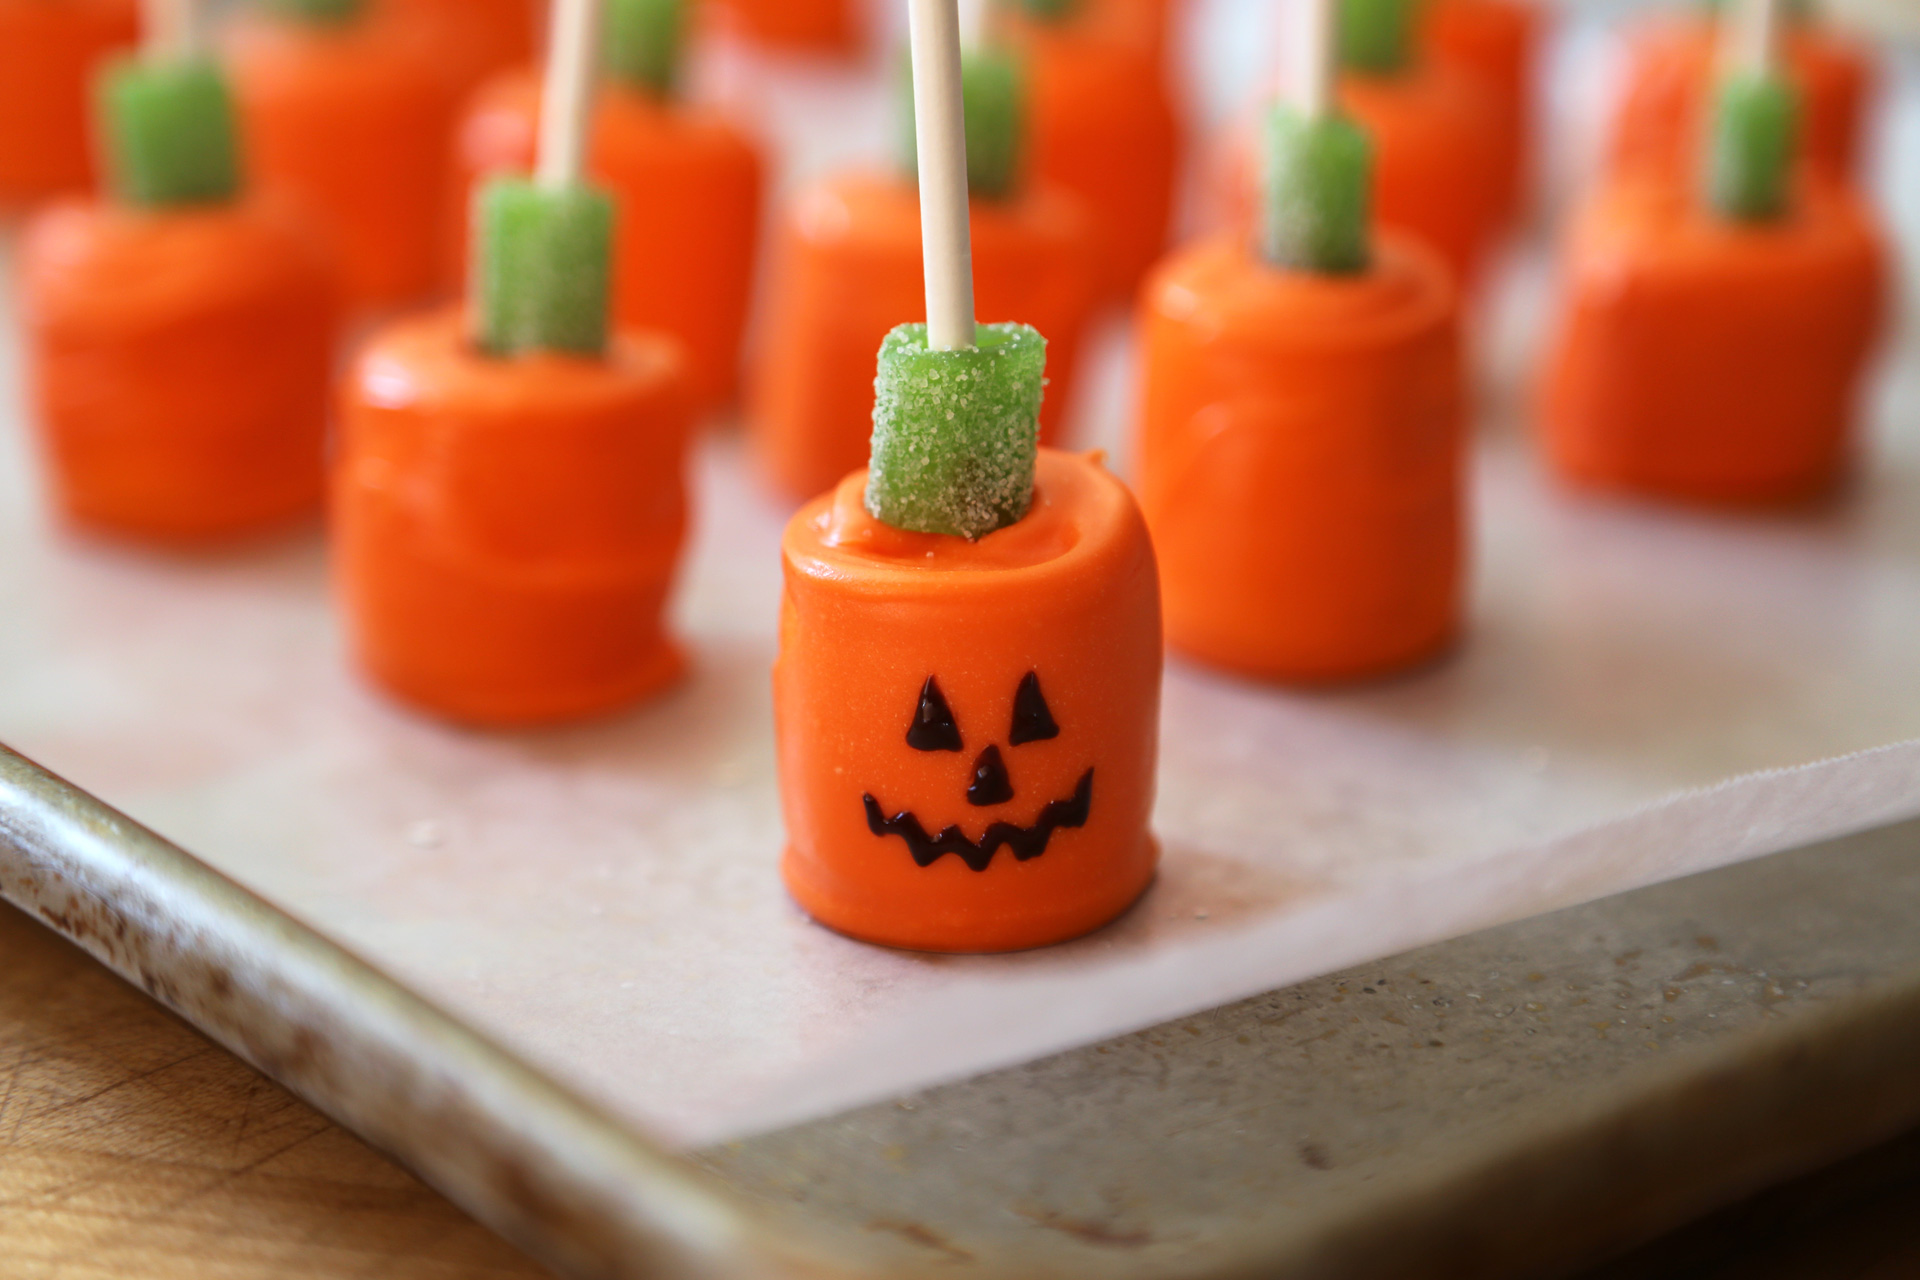
Everything really is better on a stick, and these amped up, sugar-rific pumpkin pops are no exception. They are just so adorable! So if you love a good sugar high, or just want to make your kids (or friends’ kids) really really happy (and watch them zoom around the house), then you need to get on this.

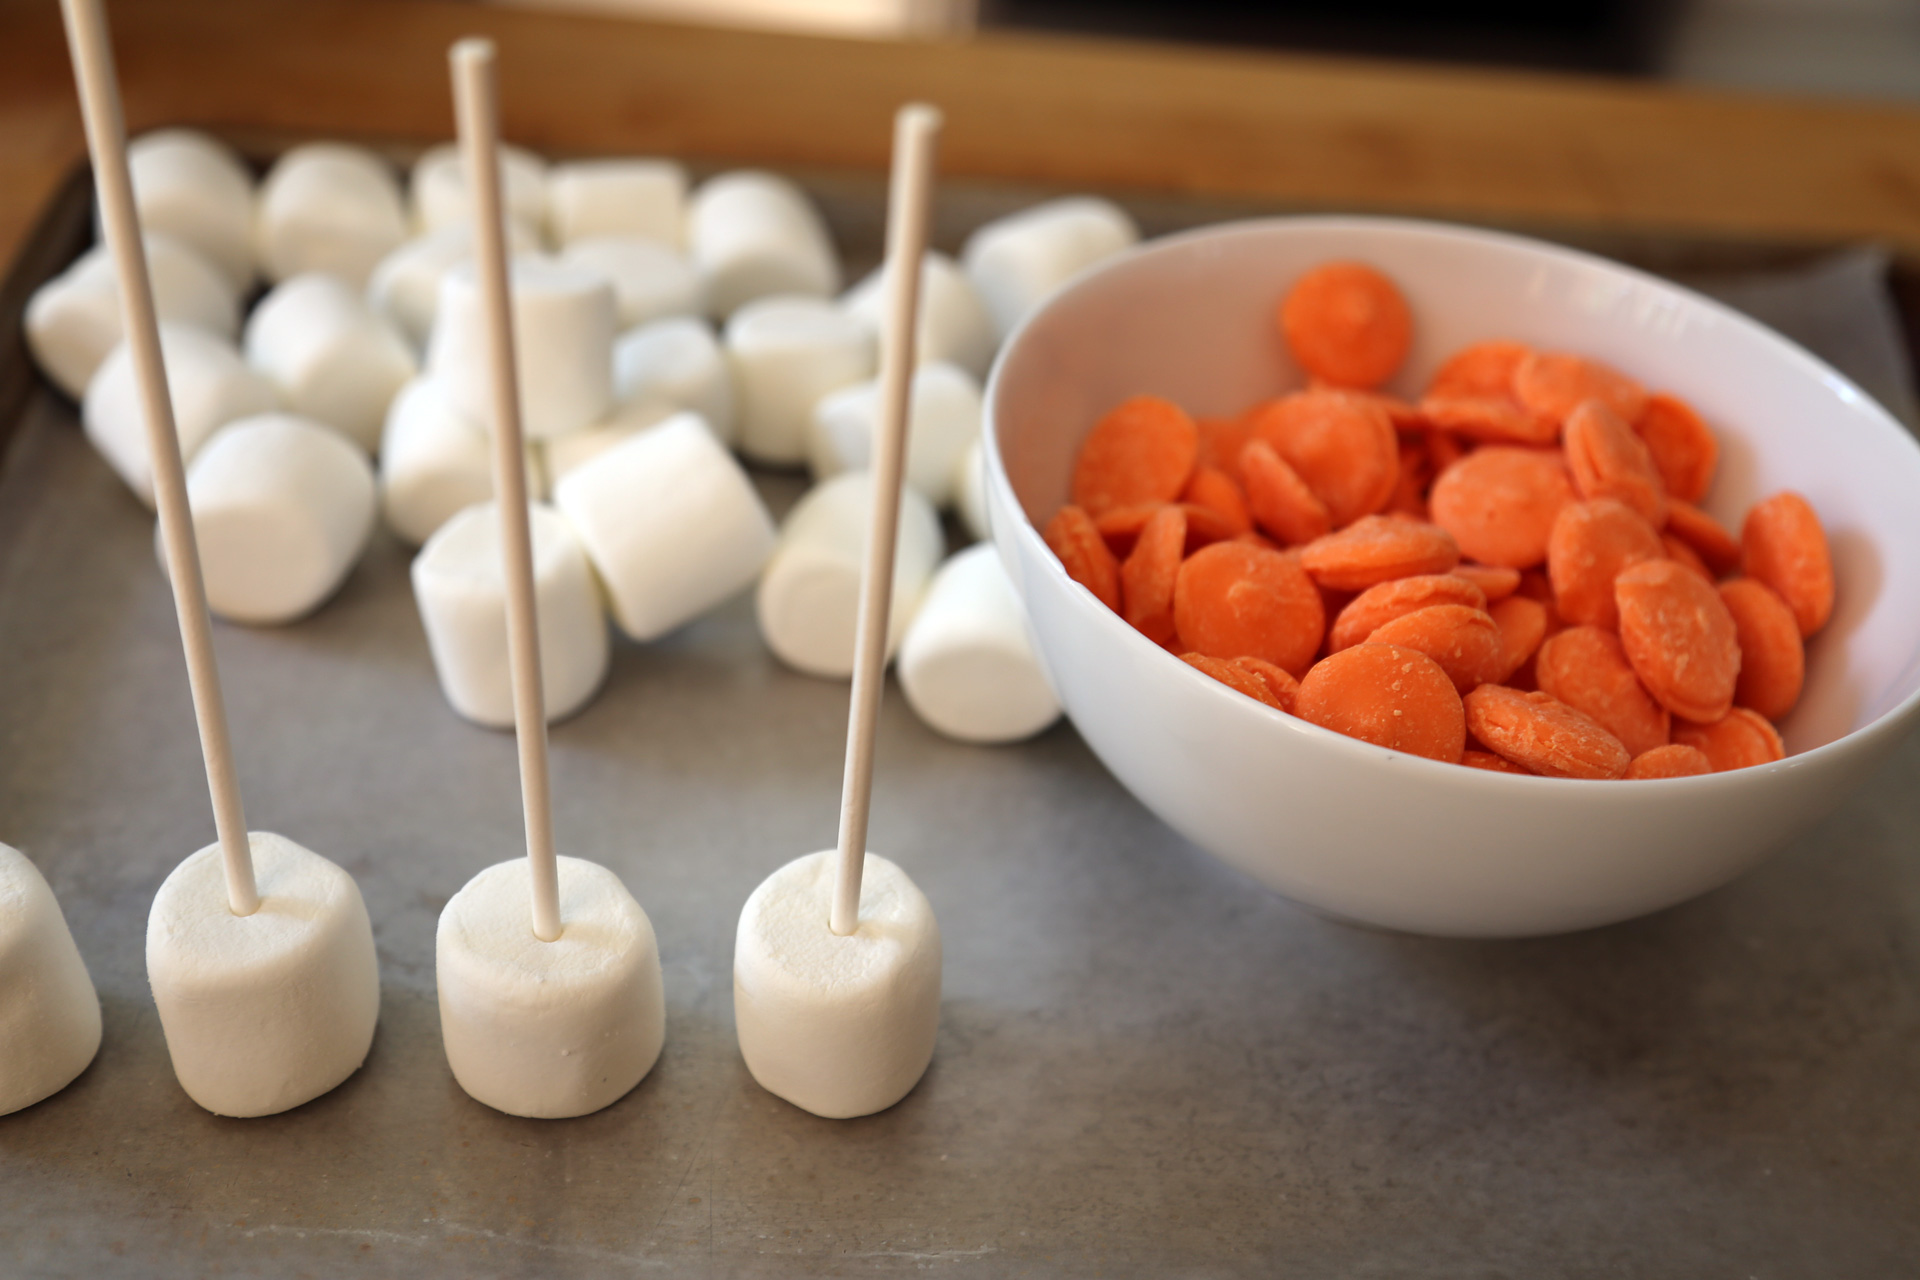
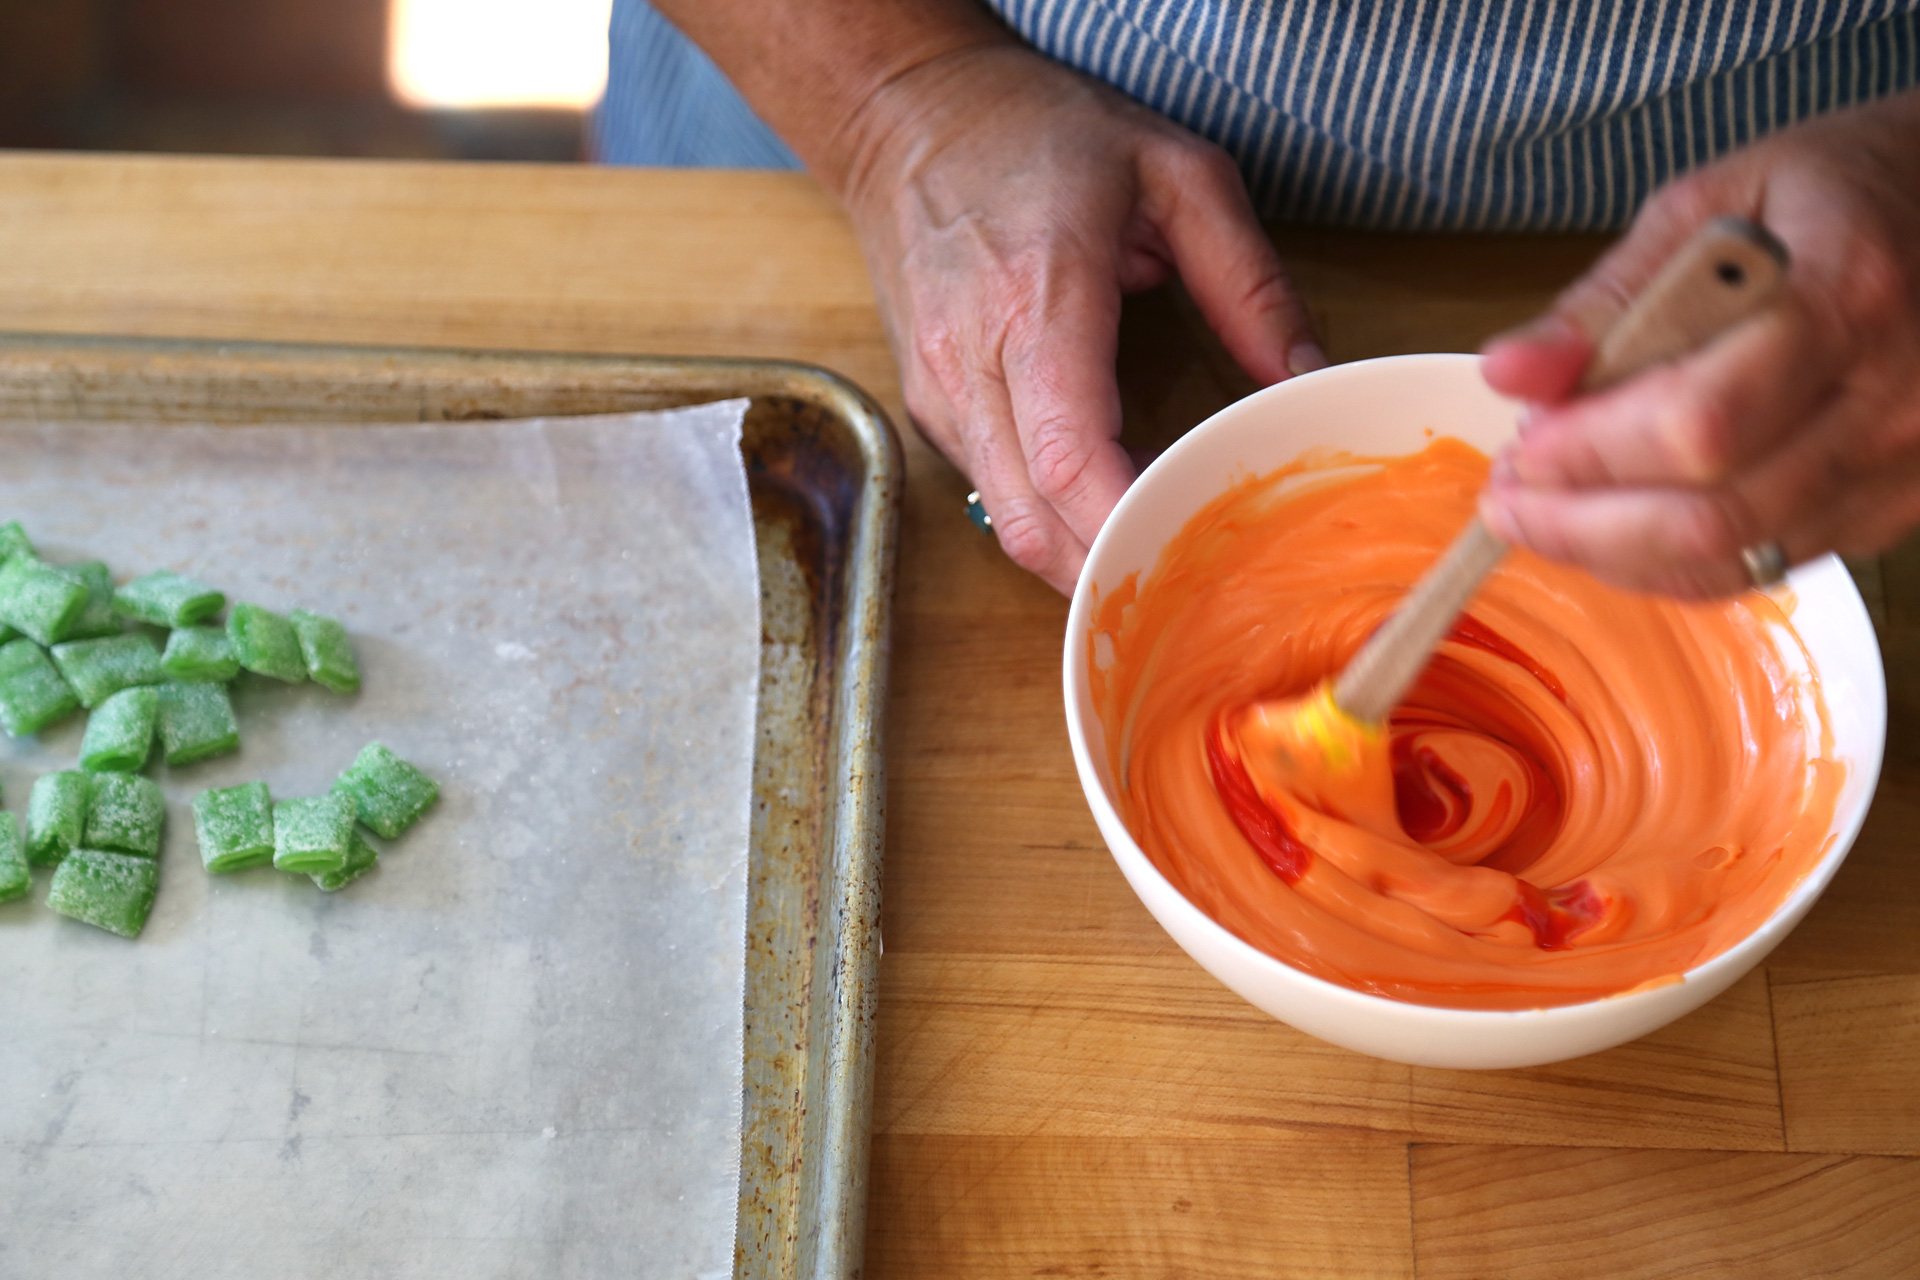
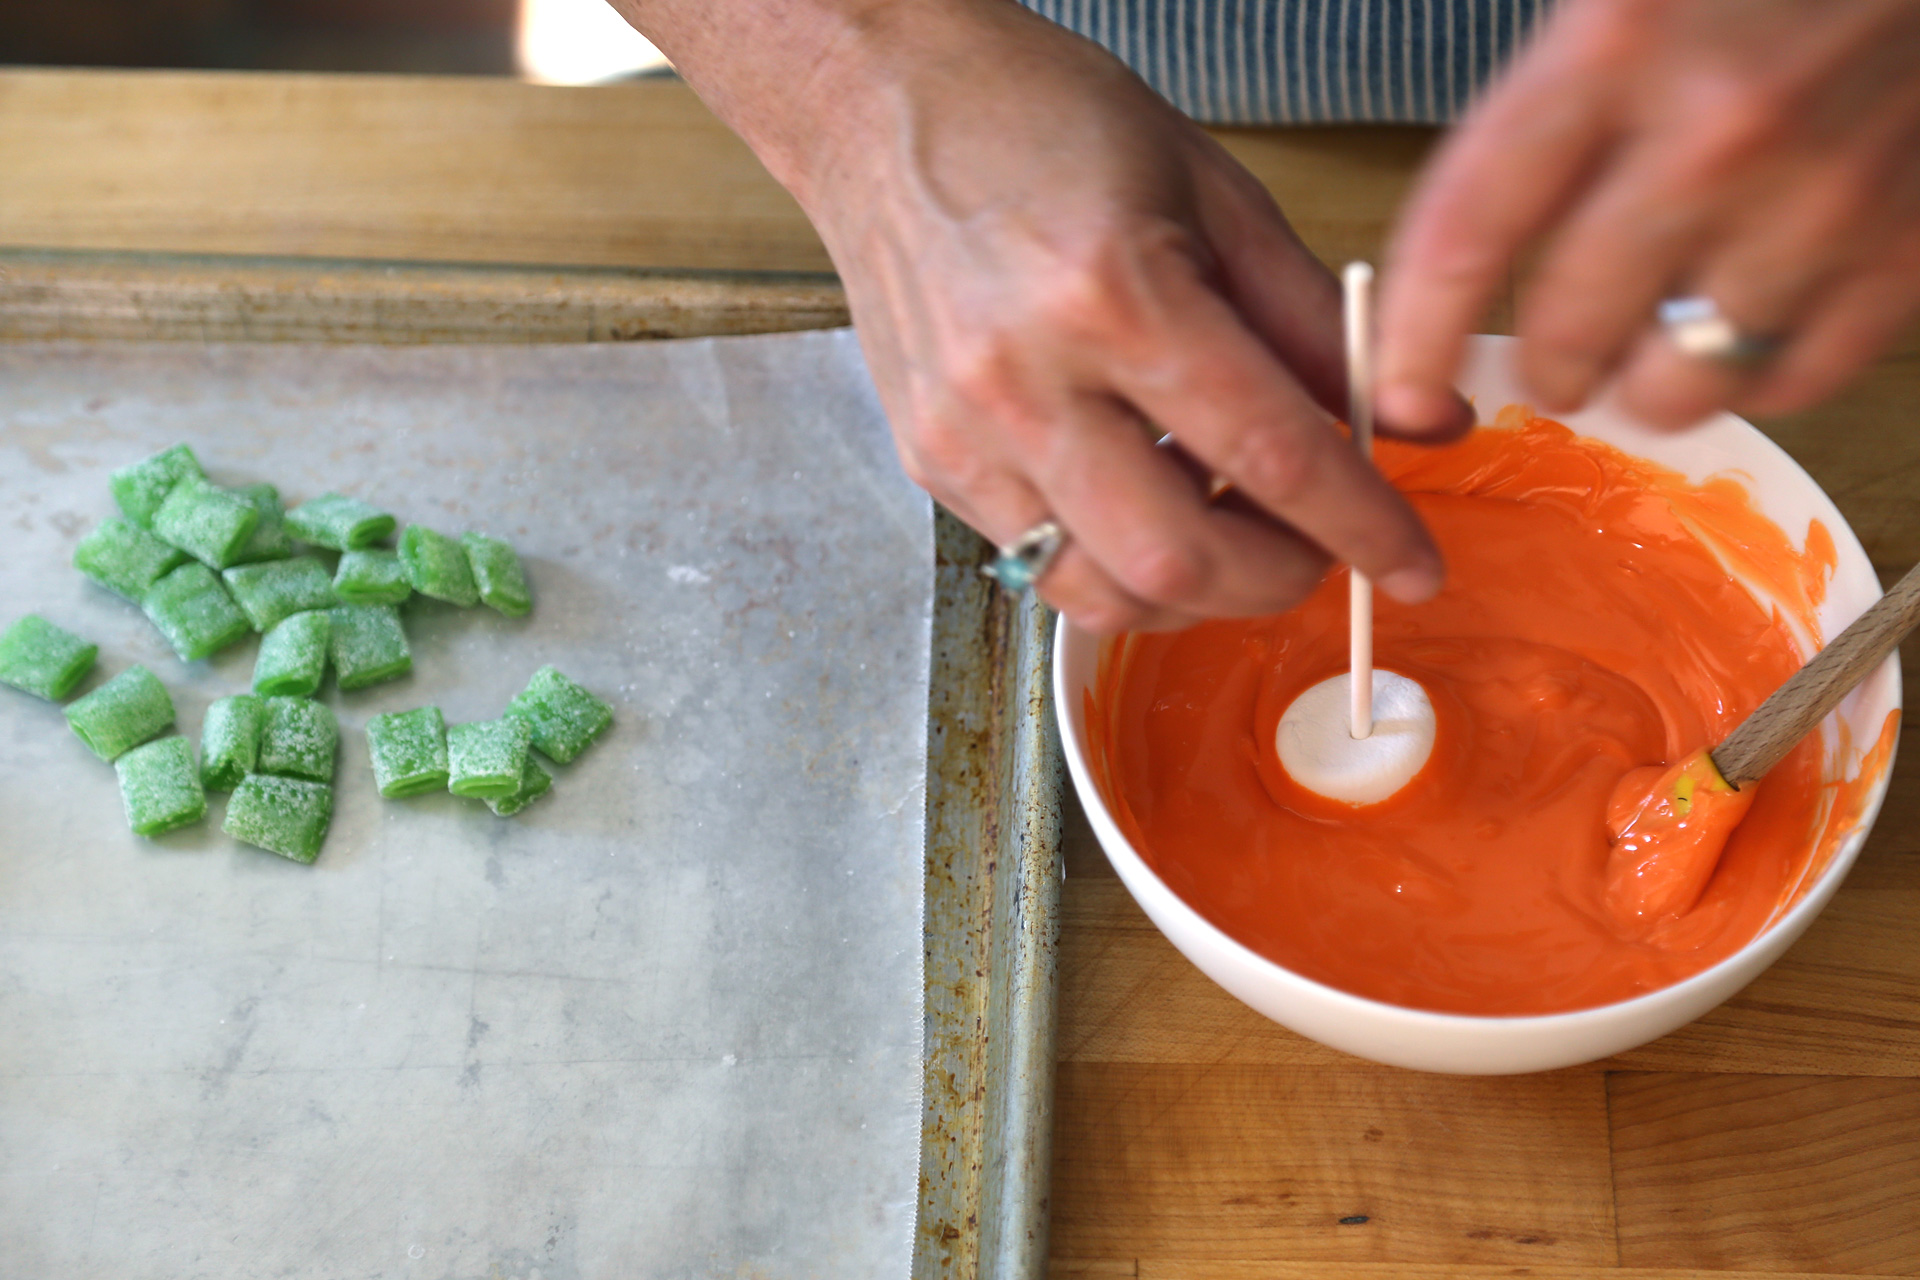
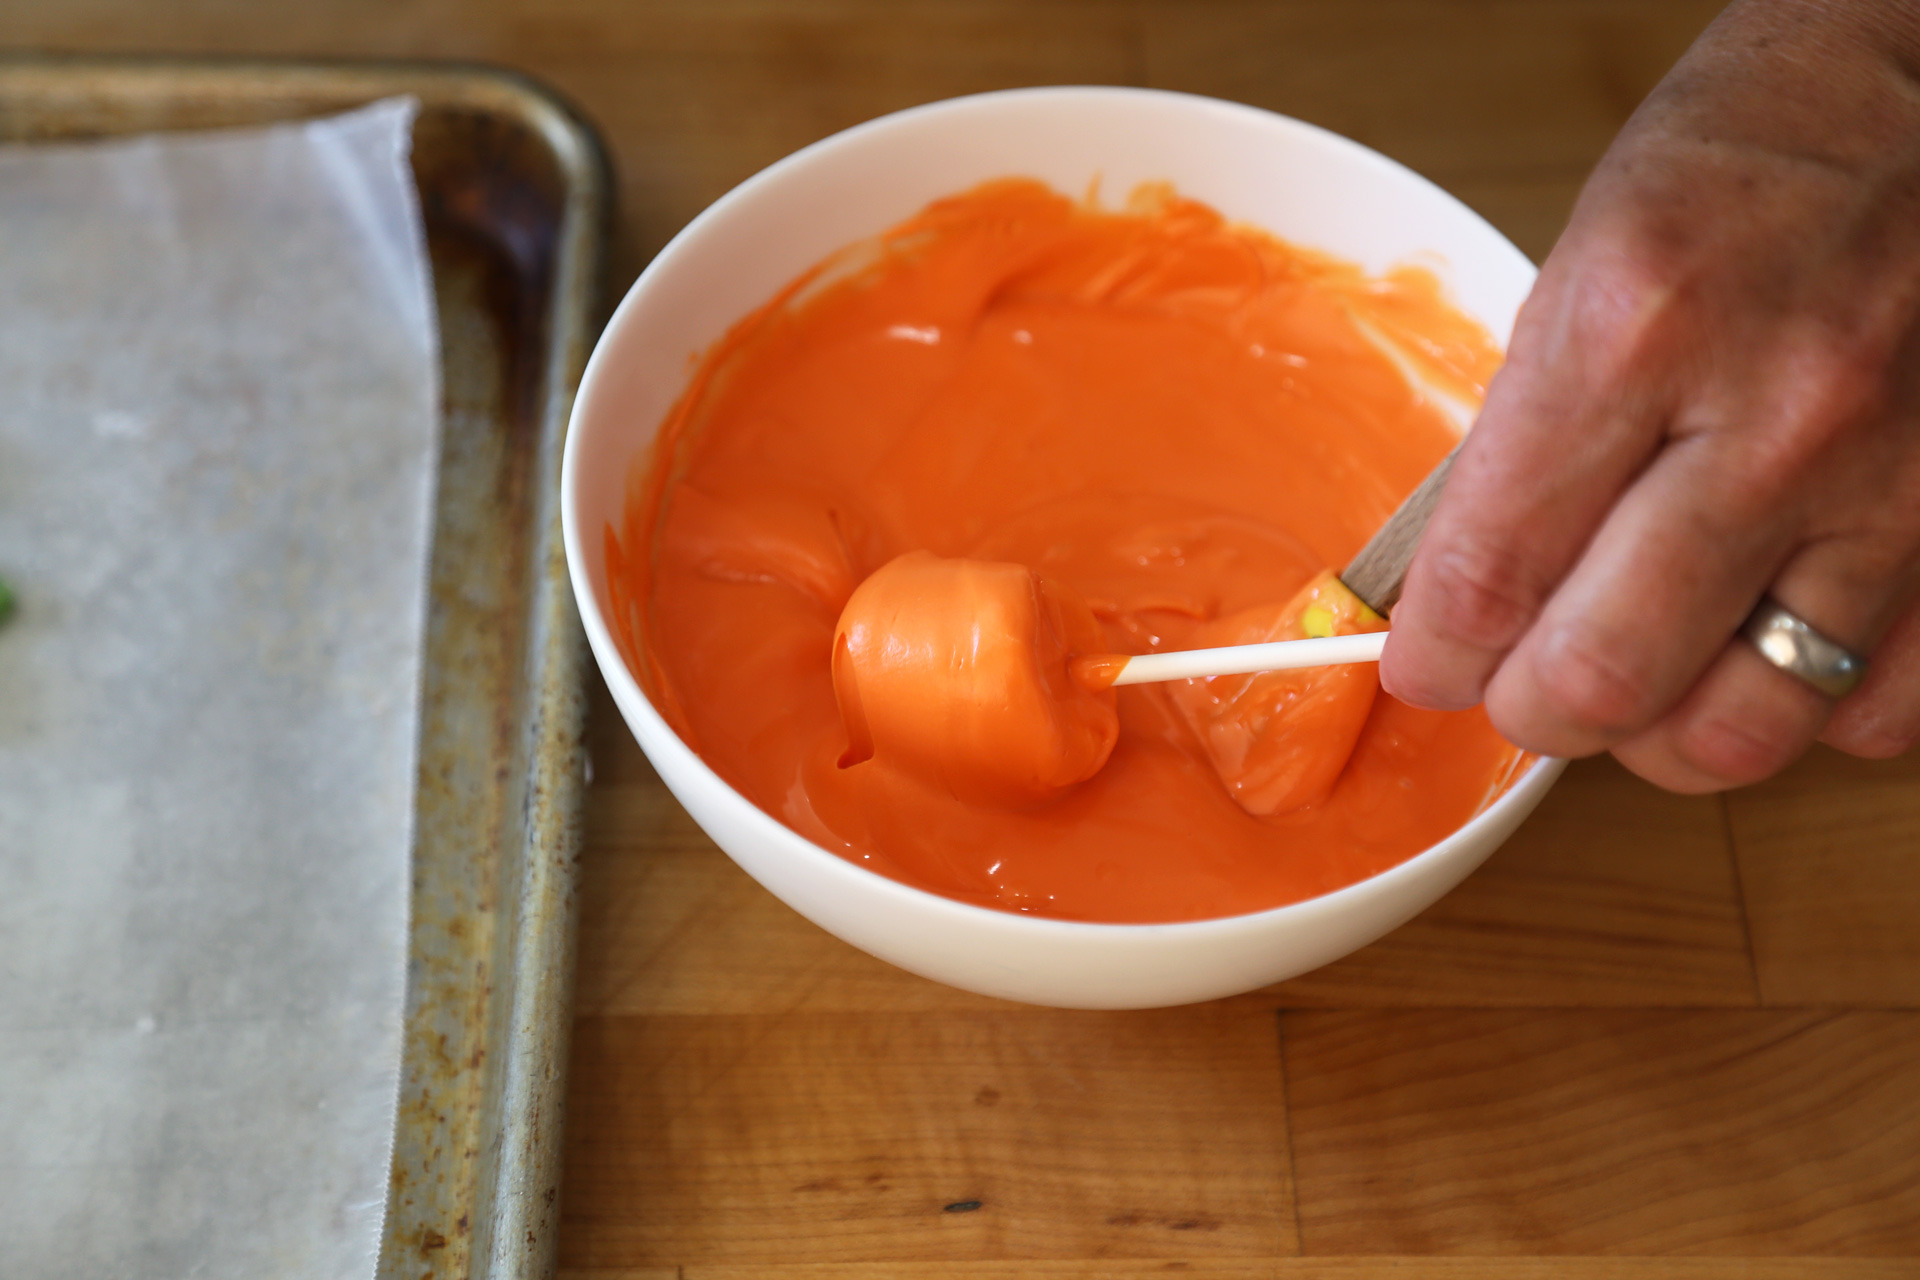
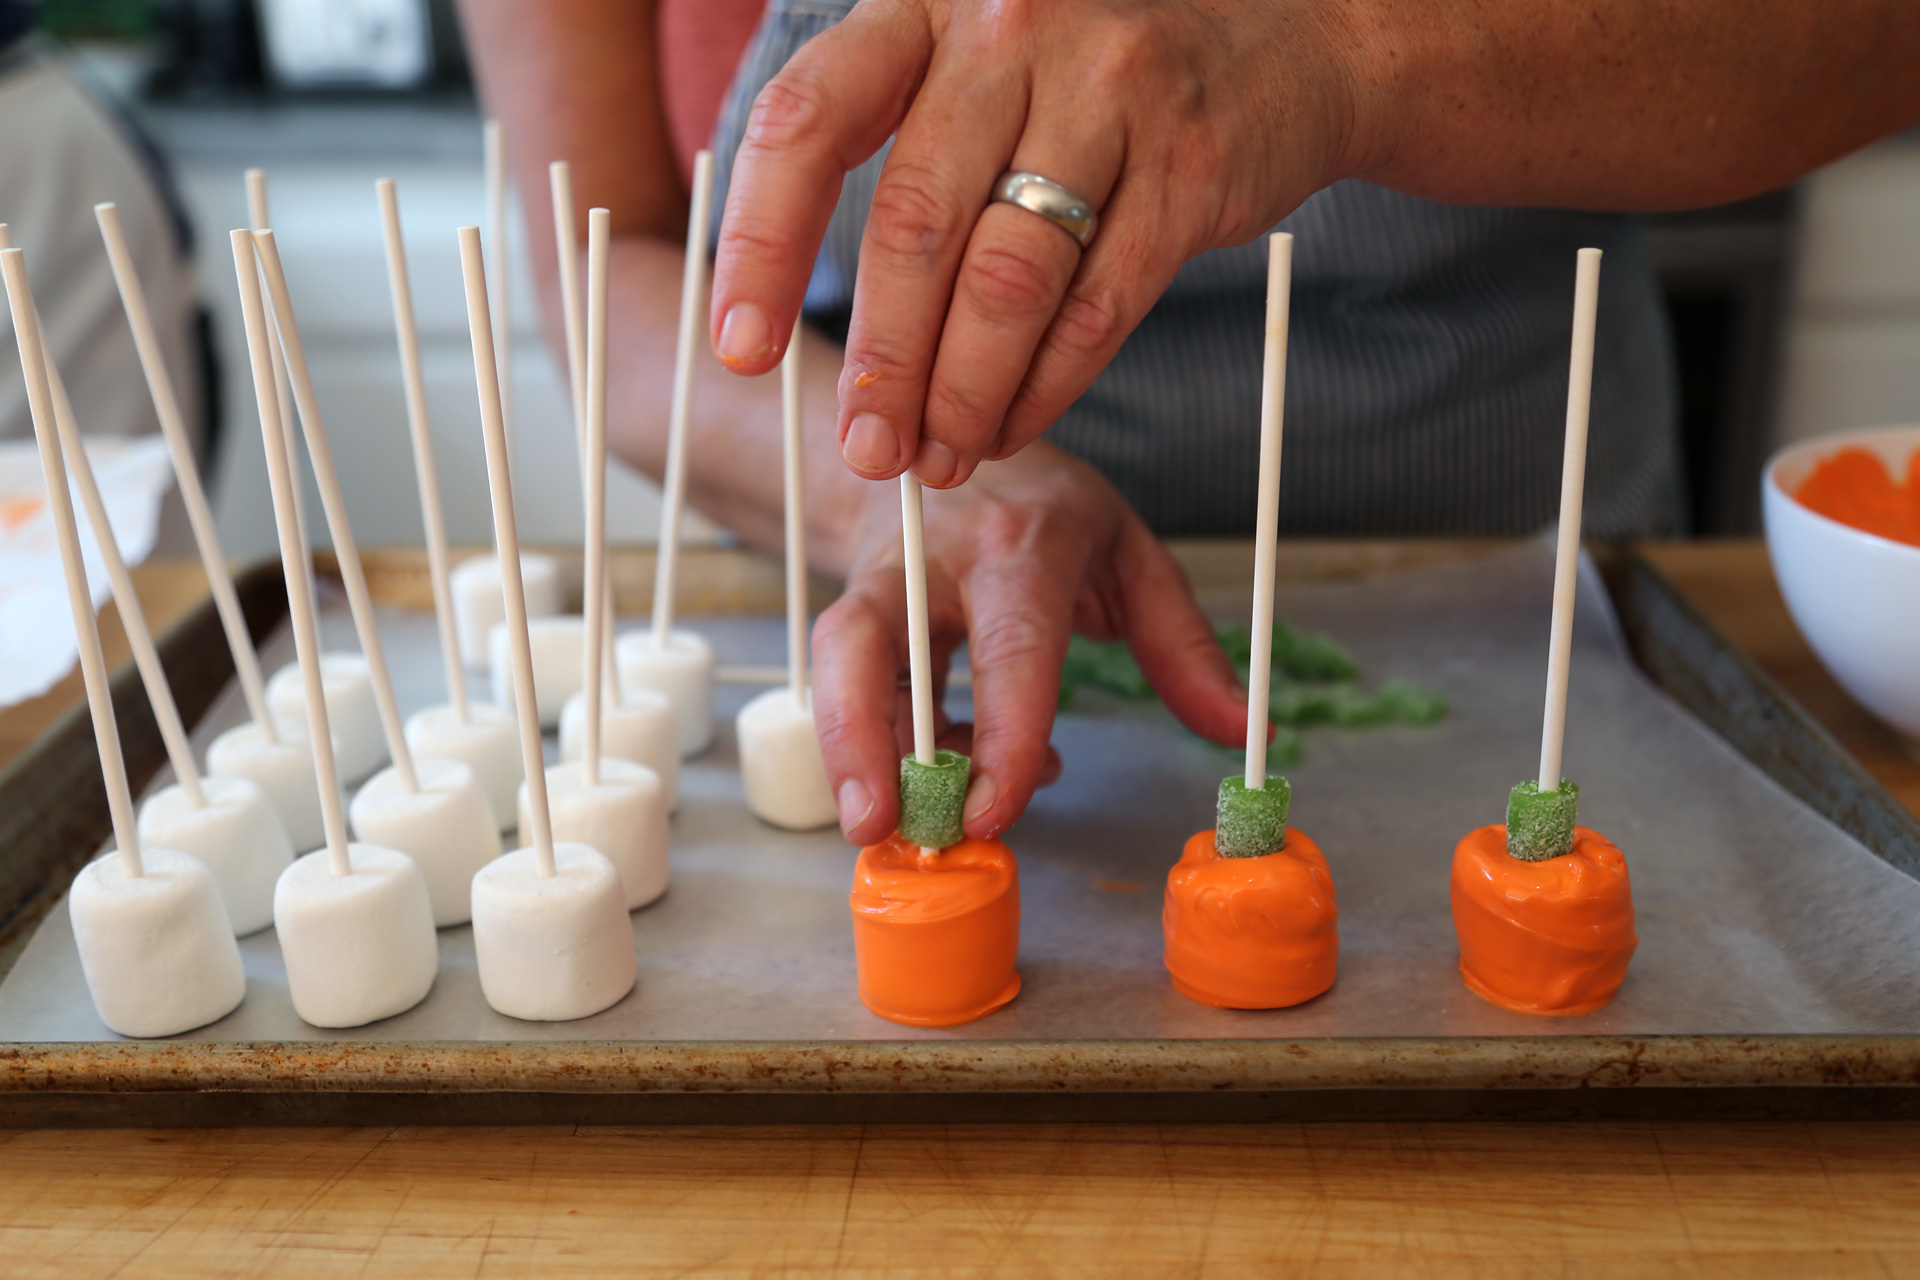
This kitchen project takes a little bit of prep. You’ll need to seek out some white lollipop sticks, green sour candy bites, and candy melts. I find candy melts kinda gross, but they do the trick really easily, and if you do it right, there is only a thin coating.

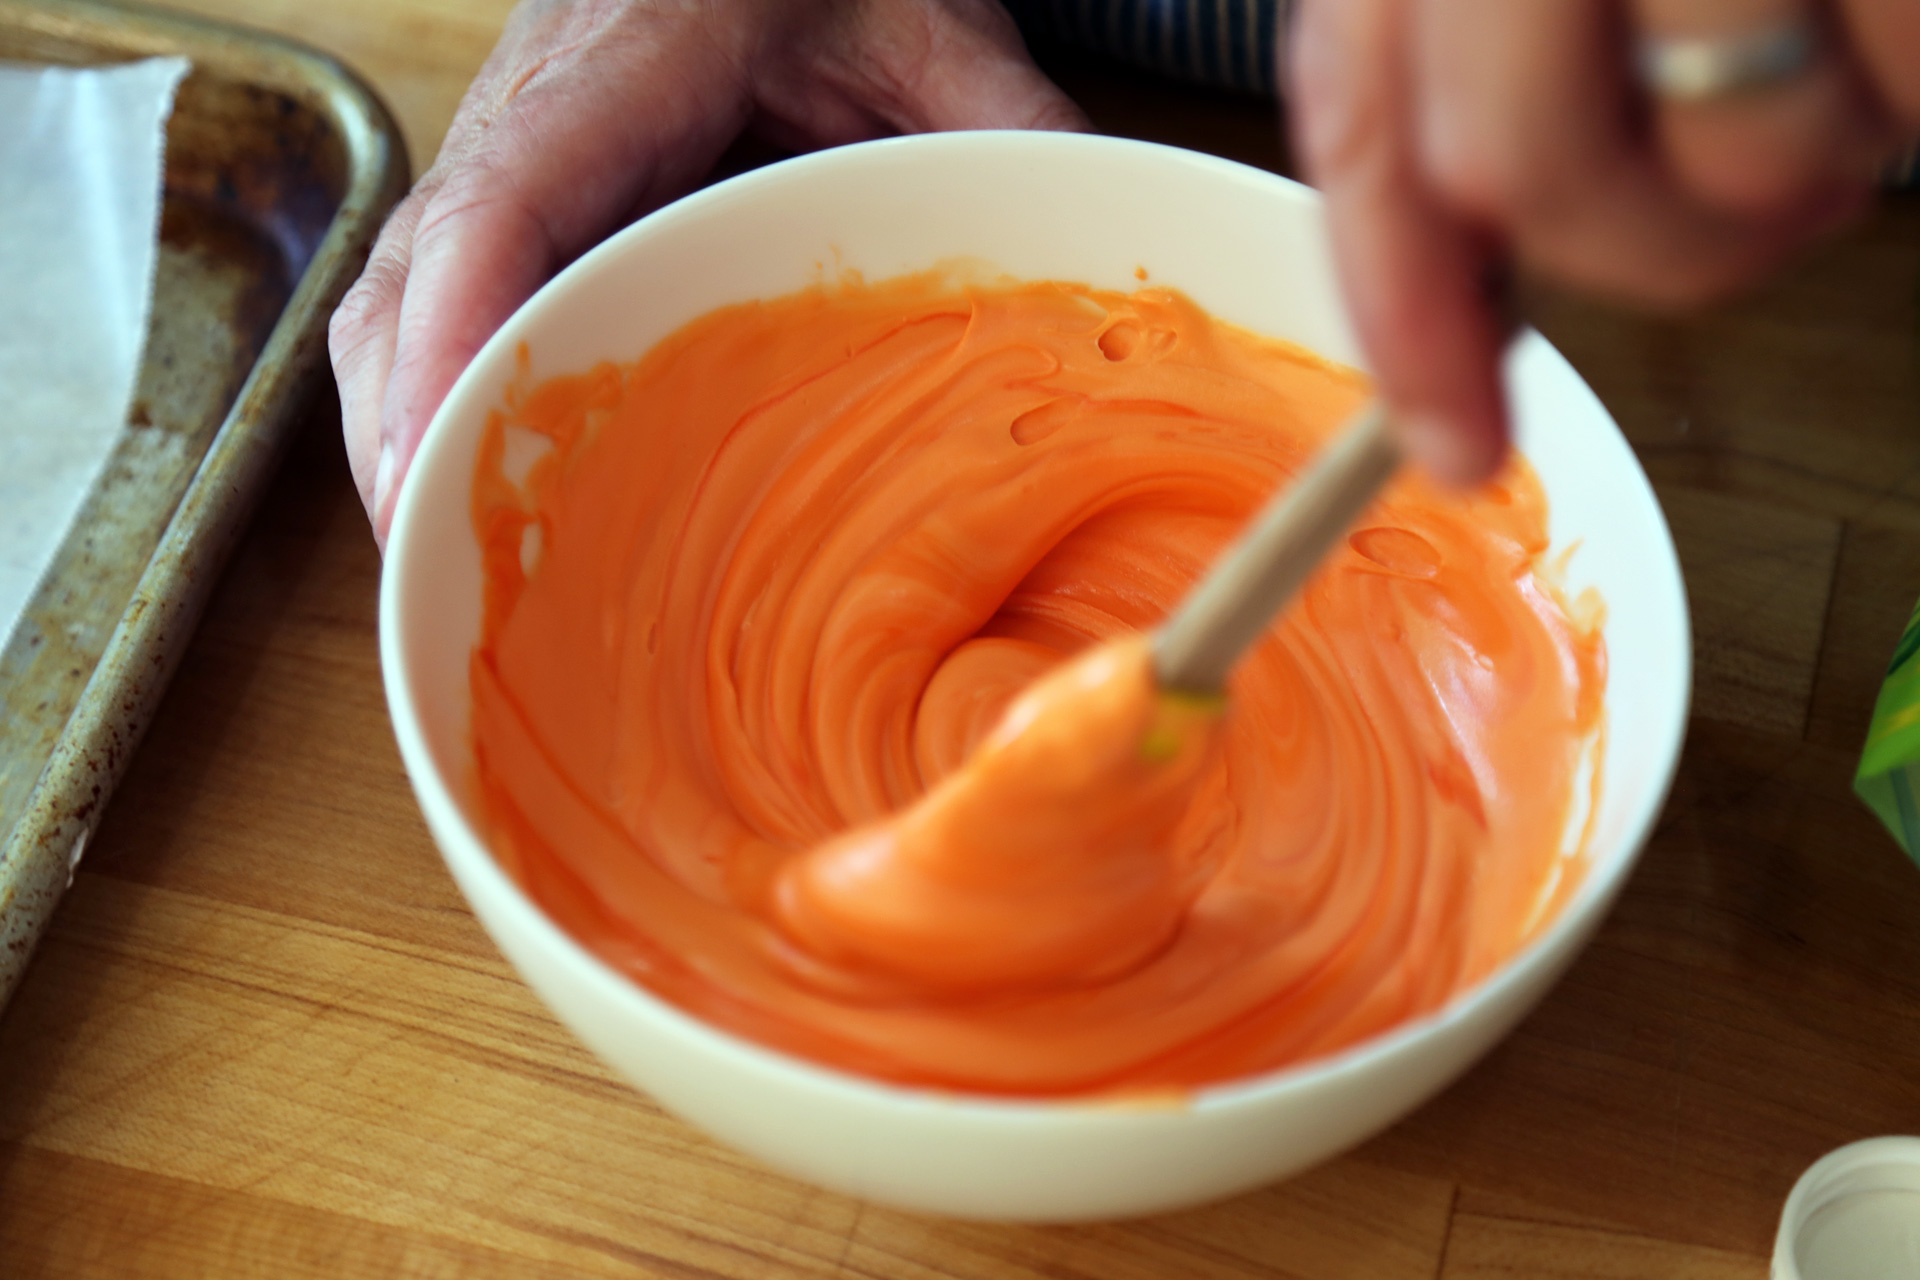
Instead of candy melts, you can use white chocolate, but just be super careful not to overheat it when you melt it or it will seize up. I find the best way to melt white chocolate is in a bowl set over gently simmering water rather than in the microwave.

Also, you’ll want to color the white chocolate orange, so you will have to locate some oil-based or powdered food coloring. You can find it online fairly easily, but it’s not the same as the stuff you buy in the store. Liquid or gel food coloring (which is the stuff you find in the store) is alcohol-based, and will seize up your chocolate if you try to use it.

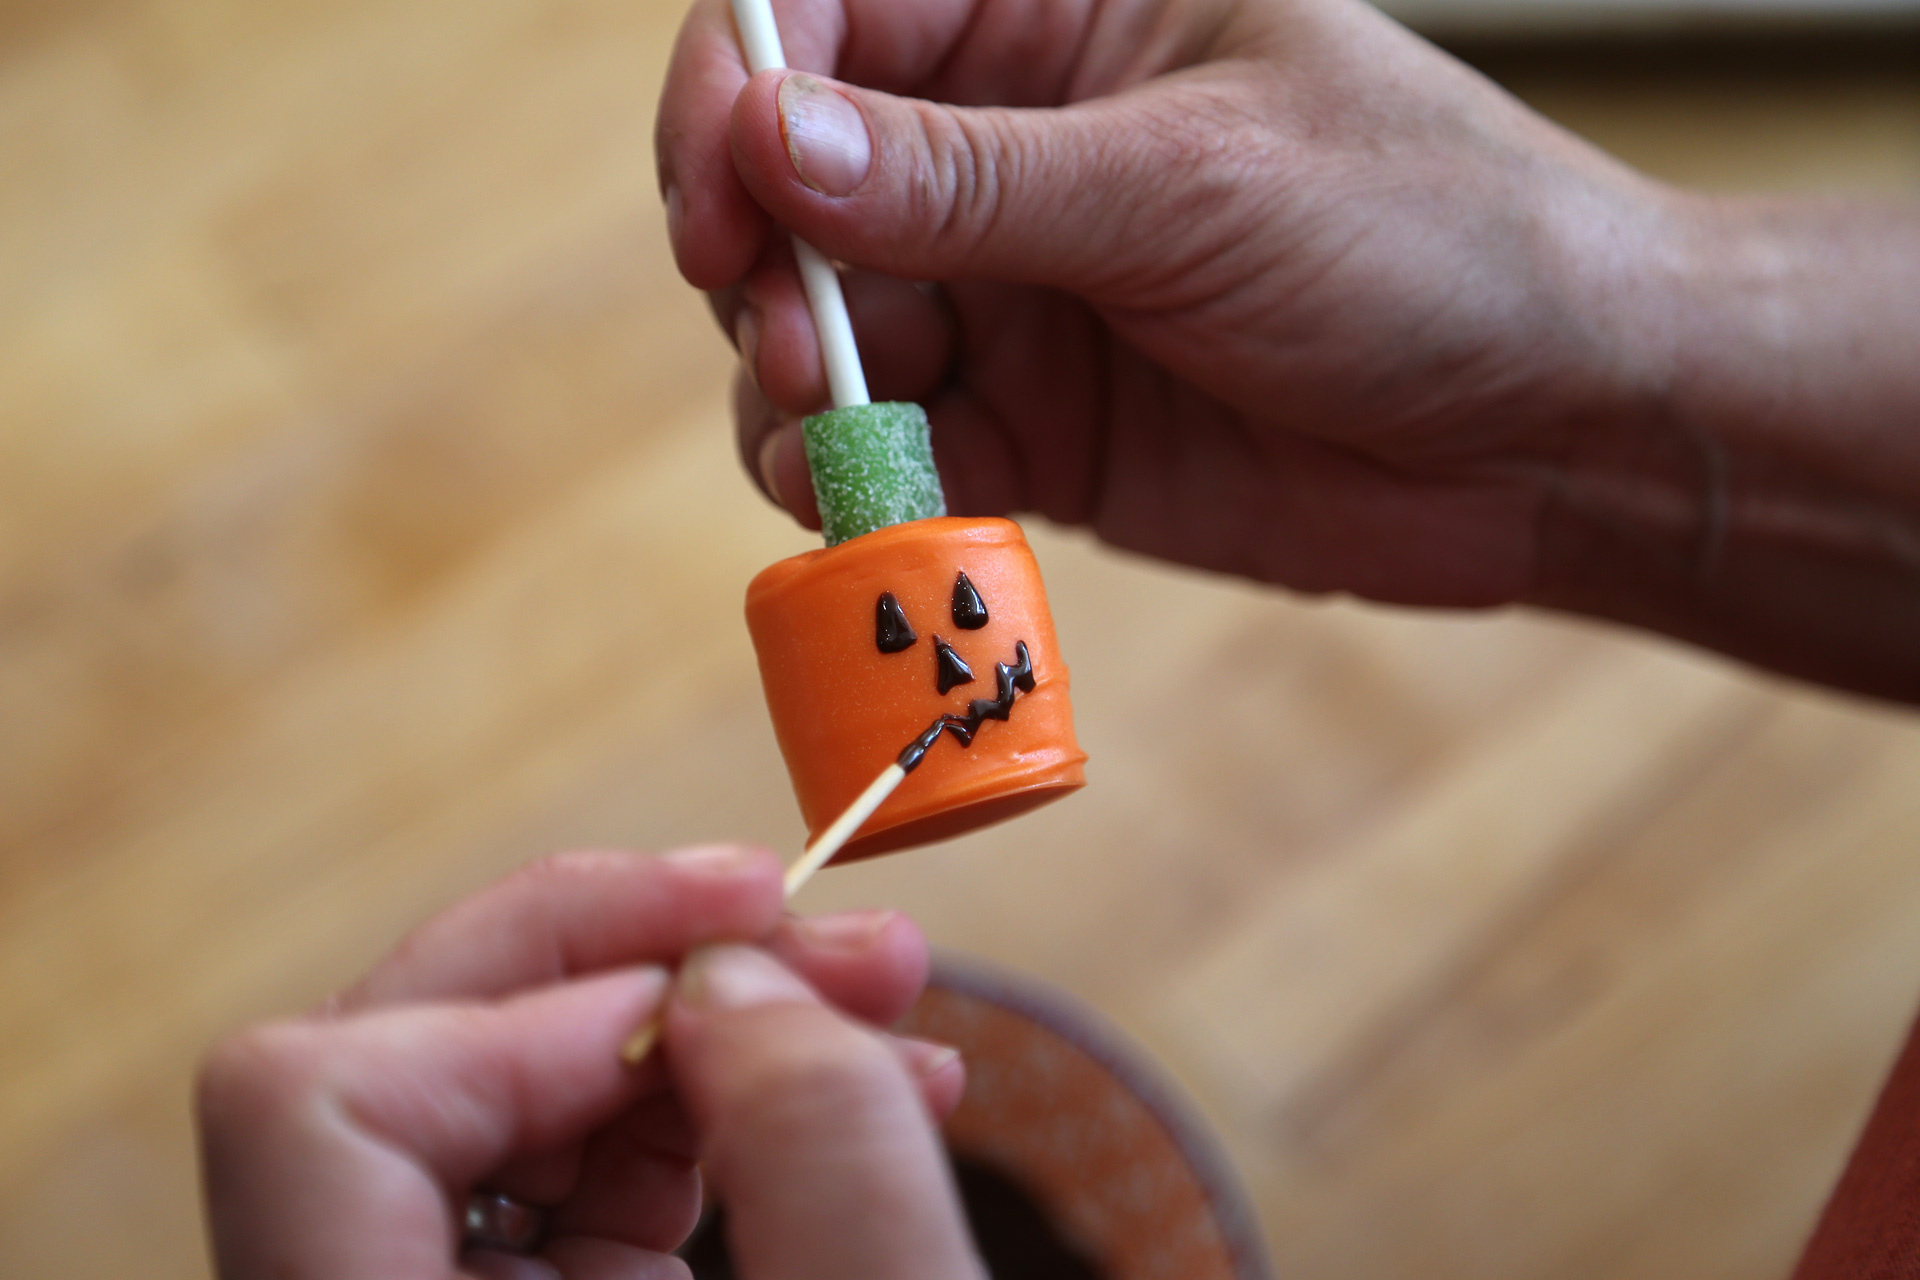
For this project, I used orange candy melts and amped up the color with oil-based orange food/candy coloring. You can decorate the pumpkins any way you like, but I found drawing faces in dark chocolate with a toothpick worked really well.

Candy-Dipped Marshmallow Pumpkins
Candy-Dipped Marshmallow Pumpkins (Wendy Goodfriend)

Recipe: Candy-Dipped Marshmallow Pumpkins

Makes 25 to 30 pumpkin pops

Sponsored

Ingredients:

  • Parchment or waxed paper
  • 25 to 30 lollipop sticks
  • 25 to 30 large, store-bought marshmallows
  • 12 to 15 green sour candy bites (I used Green Apple Sour Punch Bites), halved crosswise
  • 12 oz bag orange candy melts, or 12 oz white chocolate candy melts plus orange oil-based candy coloring
  • About 2 tbsp semisweet chocolate chips or chopped chocolate
  • Toothpicks

Instructions:

    1. Line a large baking sheet with parchment or wax paper. Put a lollipop stick into each marshmallow from the top down so it goes nearly to the end but doesn’t pierce all the way through.
Put a lollipop stick into each marshmallow from the top down so it goes nearly to the end but doesn’t pierce all the way through.
Put a lollipop stick into each marshmallow from the top down so it goes nearly to the end but doesn’t pierce all the way through. (Wendy Goodfriend)
    1. In a heatproof bowl, melt the candy melts in the microwave at 30 second intervals, stirring each time, until melted and smooth. Add more orange candy coloring for a more vibrant color. (See notes above if using white chocolate.)
In a heatproof bowl, melt the candy melts in the microwave at 30 second intervals, stirring each time, until melted and smooth.
In a heatproof bowl, melt the candy melts in the microwave at 30 second intervals, stirring each time, until melted and smooth. (Wendy Goodfriend)
Add more orange candy coloring for a more vibrant color.
Add more orange candy coloring for a more vibrant color. (Wendy Goodfriend)
    1. Dip the marshmallows into the melted mixture, coating them evenly all over (I used a small rubber spatula to help spread the coating over the marshmallow then rolled the marshmallow on the edge of the bowl to remove some of the excess melted goo and to coat the marshmallow thinly and evenly). Set aside on the prepared baking sheet. Place a “stem” on top of each pumpkin (if you use the ones I used, they are hollow in the middle). Let sit until firm, about 30 minutes.
Dip the marshmallows into the melted mixture, coating them evenly all over.
Dip the marshmallows into the melted mixture, coating them evenly all over. (Wendy Goodfriend)
Use a small rubber spatula to help spread the coating over the marshmallow then roll the marshmallow on the edge of the bowl to remove some of the excess melted goo and to coat the marshmallow thinly and evenly.
Use a small rubber spatula to help spread the coating over the marshmallow then roll the marshmallow on the edge of the bowl to remove some of the excess melted goo and to coat the marshmallow thinly and evenly. (Wendy Goodfriend)
 Place a “stem” on top of each pumpkin.
Place a “stem” on top of each pumpkin. (Wendy Goodfriend)
    1. Melt the chocolate chips in a bowl in the microwave at 30 second intervals, stirring each time, until melted and smooth. Using a toothpick, draw spooky eyes and a scary mouth onto the marshmallow pumpkins. Let set until firm. Alternatively, put a blob of chocolate on the pumpkins and add candy eyeballs.
Using a toothpick, draw spooky eyes and a scary mouth onto the marshmallow pumpkins.
Using a toothpick, draw spooky eyes and a scary mouth onto the marshmallow pumpkins. (Wendy Goodfriend)
Alternatively, put a blob of chocolate on the pumpkins and add candy eyeballs.
Alternatively, put a blob of chocolate on the pumpkins and add candy eyeballs. (Wendy Goodfriend)

lower waypoint
next waypoint
Samosas aren’t from India…Wait, what?With Seafood Restaurant alaMar, Oakland Chef Nelson German Breaks From Black Chef StereotypesYour Ultimate 2020 Summer Ice Cream GuideWords on the Waves: Litquake in SausalitoBay Area Bites Guide to 5 Favorite Burritos Spots South of San Francisco